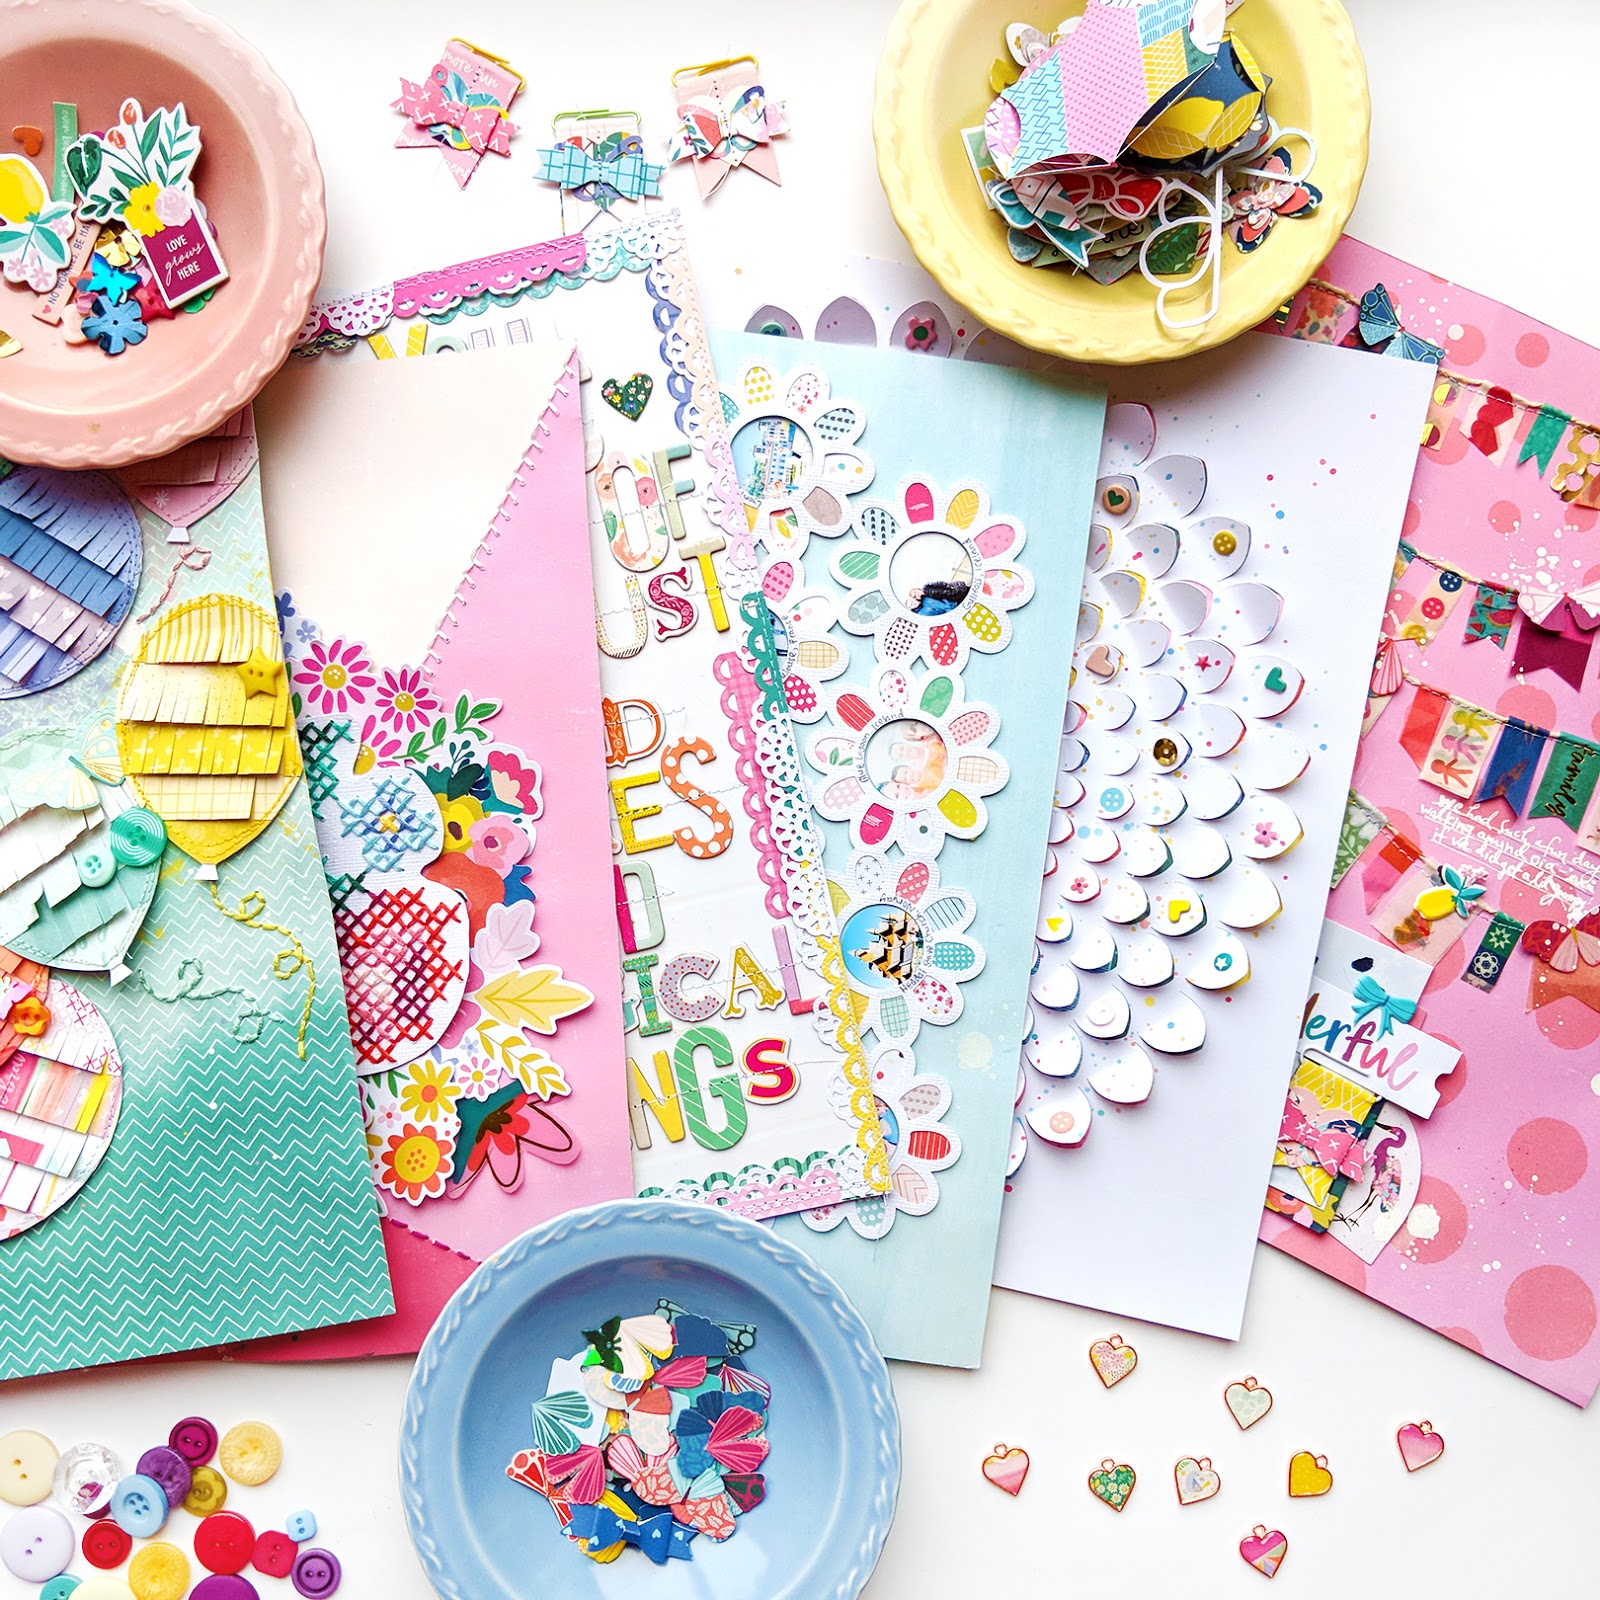
Inspirational Layout by Stefanie Ried


Friday, April 6, 2018

How 'bout another swoonworthy layout by design team member Stefanie Ried?!
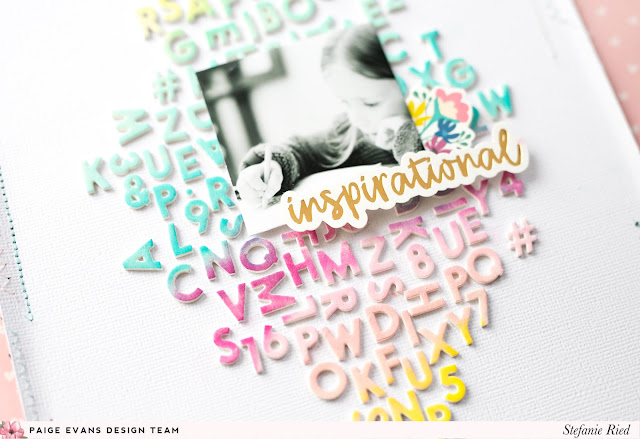
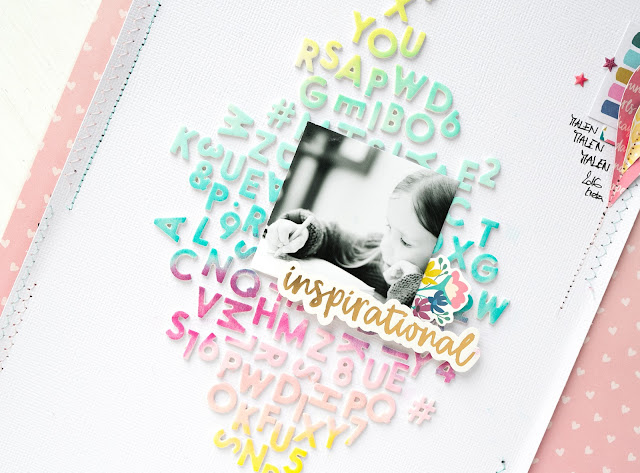
Have you already used the Mini Thickers from the Pick-Me-Up collection? I like the size and because of the neutral colors they are very versatile. For this layout I have turned them into a colorful background.
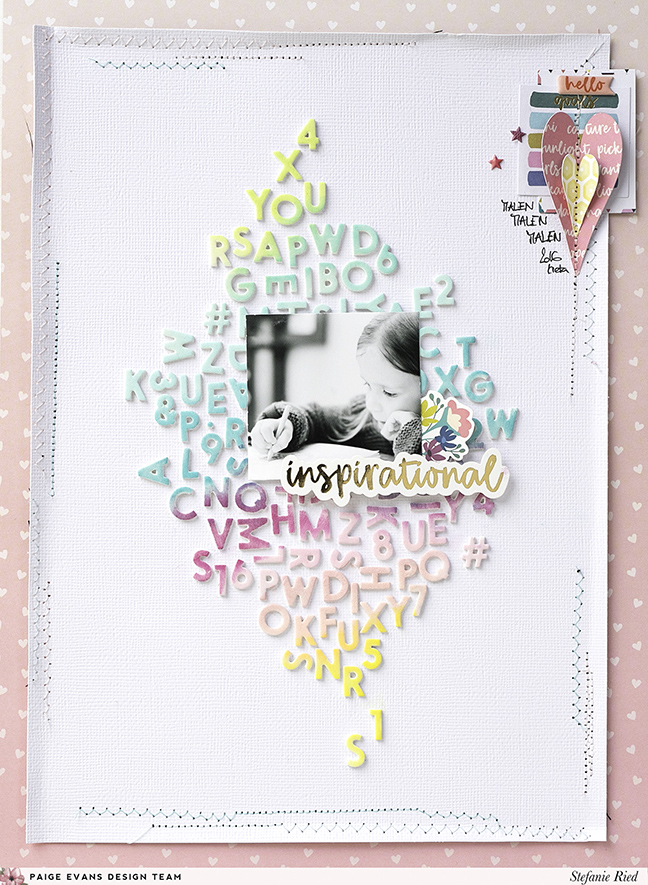
The Mini Thickers are made of foam and have a rough surface so the color keeps better.

First I glued the Mini Thickers on white cardstock. I left the middle of the cardstock empty so that the photo could be placed there.
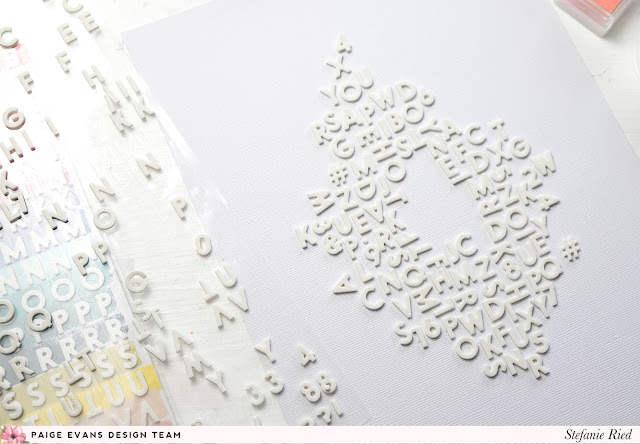
I decided to use stamping ink to color the stickers. The best are mini stamp pads because you can color small areas easily and quickly.
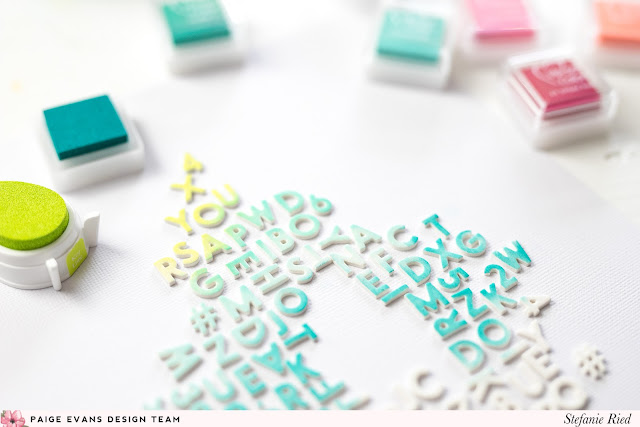
Carefully I colored the stickers with the stamp pads. This is easy and gives a great effect. Through the ongoing transitions, it makes a beautiful rainbow background.

Due to the colorful background, I have used very few embellishments so that the alpha stickers are not obscured.
Only on the edge did I add a few hearts and paper - done :)
I hope you liked my post and also try out the Mini Thickers with ink! Until next time!
Blog: steffiried.blogspot.com / Instagram: @steffiried / Pinterest: @steffiried / Facebook: stefanie.ried.96 YouTube: Steffi Ried

Wild Fun Layout by Zsoka Marko


Thursday, April 5, 2018

Check out this absolutely stunning and super cute layout by design team member Zsoka Marko!

Hey there lovelies, I'm sharing a new layout today that I've created for the Paige Evans + Silhouette Design Team. I wanted to do something a bit different from what I normally go for and boy did I struggle with this layout! I had to bring in an extra set of eyes just to be able to finish it haha! I do like how it turned out though, so thank you friend (you know who you are!) for all the help.
I chose the Grid of Flowers cut file and modified it a little. First I repeated the cut file four times, then mixed up the inner squares a little so they are more random, then I welded the four big squares (each one consists of nine small squares).

I cut it out from Paper 24 from the Pick-Me-Up collection then backed a few of the squares with various patterned papers from the same collection. I adhered it to my background paper (B-side of Paper 20) and started decorating.

I randomly placed my photos then went through all embellishments from Pick-Me-Up and pulled out the ones that fit the color scheme. My son is eating homemade berries and a yogurt popsicle in these photos and I thought the berry tones in this collection would be a perfect match.

I used StickersPuffy StickersChipboard StickersEphemera Die Cuts, sequins and buttons from the Haberdashery Multi-Pack, and placed them wherever I liked them, no rhyme or reason.

The title gave me headaches because I really wanted to use the gorgeous Chipboard Thickers from Pick-Me-Up, tone on tone. However they just got lost in the background. So I went through all of Paige's collections and chose the gold Foam Phrase Thickers from the Take Me Away collection - I love this font!

To finish off my layout, I added the date and wrote my journaling. I hope you like how this page turned out! Thank you for stopping by!


Blog: apocketfullofscrap.blogspot.com / Instagram: @zsokamarko / Facebook: Zsoka Marko / YouTube: Zsoka Marko
Such perfect photos for the berry tones in this collection!

Backyard Mini Album by Lorilei Murphy


Wednesday, April 4, 2018

Are you excited to see a new mini album by design team member Lorilei Murphy?! I sure am! Check it out:
Hello! I am happy to be sharing my mini album today! The album is 6x4” and bound using a Cinch tool. I made the cover with the gorgeous Floral Transparency Paper from Pick-Me-Up. For a special touch I made a flower from hand cut patterned paper circles layered together then embellished with some gold leaves from the Chipboard Stickers and added pretty sequins from the Haberdashery Multi-Pack. I placed a piece of vellum under the transparency and attached it with a heart paper clip to make it one page.
Mini albums are so much fun to make! Using Paige’s cut files adds such a unique flair and interest to the mini pages. Pick-Me-Up is perfect for mini albums, it has a wide range of possibilities to suit any photos, even simple backyard photos.
I love the simple beauty of the Geometric Feather cut file cut from white cardstock and decorated with some Heidi Swapp Gold Color Shine splatters and a fussy cut flower from Paper 02.
Little 2” pockets are fun to decorate with 2x2 Paper Pads.
The Butterfly Cluster cut file is a must have - even cut from simple white paper they have a huge impact. The sweet blue butterfly sequin is from the Haberdashery Multi-Pack.
I added more layered butterflies to the back of the tag.
The Adventure cut file is one of my favorites - it looks great cut big and small.
I folded a piece of vellum for this page and tucked in the Lined Hearts cut file - the heart from the Pick-Me-Up Ephemera Die Cuts fit perfectly!
I cut a square out of the paper I cut all the butterflies from and layered it up with some stickers on this envelope.
I made a page with the leftover transparency and then “sandwiched” the Heart Love cut file in between vellum and stitched it.
I added a tiny gold heart to the back of the cut file on this page. I think it looks pretty showing through the vellum even if the writing is backwards!
I added the Cross Stitch Heart cut file to the last page. Instead of having my stitching threads on the back I left them long on the front and tied them in a bow.
Blog: roseyposeystudio.com / Instagram: @roseyposey_studio / Pinterest: @roseyposeygirl /
Facebook: 
Rosey Posey Studio / YouTube: Lorilei Murphy
Such a sweet and fun mini album sure to bring a smile to whoever flips through it!

Scrap Gals Retreat in Seattle


Tuesday, April 3, 2018

Registration is now open for the Scrap Gals Retreat in Seattle from July 27th-29th! I will be teaching how to make two layouts and it's going to be so much fun with so many fellow scrappers!

Love Floral Layout by Flóra Farkas


Design team member Flóra Farkas is here today sharing a layout that made me gasp out loud in awe and wonder when I first laid eyes on it!
Hi girls! Spring is here and I just felt the urge to pull out the floral Oh My Heart collection and make something fresh with it. This time I have chosen a white cardstock for my background. I cut out little hearts by using the Hearts Background cut file by Paige. I backed it with a ombre pink Paper 14.

I placed my photo on the right and embellished the left side with flowers - I fussy cut many of them from the gorgeous Paper 06. I also added gold foiled flowers from the Ephemera Die Cuts and Sticker Book. I adhered the flowers with foam tape to add dimension, it looks so much better than if I had glued them directly to the background.

On the top of my photo I added the Chipboard Sticker "love" and completed it with tiny letters from the Sticker Book. In this corner I placed a gorgeous Heart Charm as well. I wrote my journaling on an Ephemera piece next to the photo.

To finish I hand stitched around some of the hearts on the background. This gave more texture to my page. That's it for today! I hope I could inspire you to pull out the Oh My Heart collection. Have a nice day!

Spring 2018 Layout


Monday, April 2, 2018

It's FLOWERS week on the Pink Paislee blog - one thing I love about managing the design team and blog is that I get to pick the themes - I should make it Flowers week every week hehe :) Anyway, here is the page I made featuring flowers:

First I have a process video so you can see how this layout was created from start-to-finish!

I started by fussing cutting over 3/4 of the flowers and leaves from Pick-Me-Up Paper 23. It took a few hours, I'll be honest. But I got all caught up on my Netflix and Hulu shows! I didn't even have a plan for all the pieces, I just knew I liked the colors and how tiny the images were. When I was about halfway through fussy cutting and needing to figure out the next steps, I went through all my Silhouette cut files to see if there was anything that struck my fancy, floral themed of course!

I came across my Flower Wreath cut file and thought it might be fun to put all of the tiny flower and leaf shapes I've cut out on top to create lots of texture. And so the idea was born! I grabbed the first color of cardstock I could think of that would match and didn't even audition any other colors - usually I feel like I spend most of my time on a layout just picking the background! But this yellow was so bright and cheery and brought out the yellow flowers so I went with it.

I started placing the fussy cut flowers on the die cut flowers, the fussy cut leaves on the die cut leaves, and liked how it looked. Before I glued anything down I did some mixed media on the background. I scraped white acrylic paint in the shape of the wreath and splashed matching watercolors on top followed by a layer of white acrylic paint splashes. Once the background dried I glued all of the flowers and leaves in place and let the edges bend up for lots of dimension.

I didn't have any photos to match, so what's a girl to do? I put my daughter Jane in a white lace shirt and took some photos! Now I had the perfect pics to scrap! Please tell me I'm not the only one who has done this?! Hahaha! To finish I created a title with Pick-Me-Up Chipboard ThickersEphemera Die Cuts, and Stickers. I wrote journaling on a Chipboard Sticker and tucked it into the wreath.

I hope you are inspired in some way by this layout, whether it's fussy cutting, layering die cuts, or creating a wreath shape! Thank you so much for stopping by today!

Paige's Process Masterclass at Big Picture Classes


Sunday, April 1, 2018

I am so excited to share that Paige's Process Masterclass is now available to register for at Big Picture Classes!
This class has been in the works since November - many hours went into the ideas, process, and execution of all 8 lessons and 6 start-to-finish process videos and I'm so happy with the results! Joe Gomez even flew out for two whole days of filming.
Here is some information about the class:
Looking to pack as much color, texture, and dimension into your layouts as possible? In Paige's Process, Paige Evans—scrapbooking extraordinaire—shares her tried-and-true techniques for creating dynamic, eye-catching layouts! Go back to the very beginning with Paige and learn where her 16-year passion and career of creating stunning works of art with paper and scissors started. Then take a look into her process, starting with choosing and printing photos. Continue with six inspiration-packed lessons featuring six easy-to-follow, gorgeous layout techniques to try out on your next project. From bend-up backgrounds to backing die-cuts to hand stitching, each lesson reveals tons of tips and tricks for creating layouts you'll love! Paige has been sharing installments her popular class, Paige’s Pages, here at BPC for years and now she's diving even further into her process, the ideas behind her layouts, and more in her first ever BPC Masterclass. Get ready to fall even more in love with paper and glue and let Paige's process guide the way!
***
8 lessons
Paige starts with a look into her scrapbooking story: the when, where, why, and how she found her passion in this crafty way of life. Then she explores how she chooses and prints her photos. The rest of the class takes an in-depth look into six of her eye-catching layout techniques with detailed written instruction and process videos for you to follow along with!
***
4 hours
It'll take around four hours to watch all the videos and read the text, but be prepared to put in some extra crafty time to complete your assignments and apply Paige's techniques on your projects.
***
Self-Paced
This masterclass is self-paced. Take it anytime, anywhere, and on any device. You’ll receive long-term access to the content in this class, so return to the material whenever you need a boost of creative inspiration.
***
The class goes live at midnight on April 16th and there will be an online chat (date and time to be determined soon!), a class forum, challenges, free cut files, and so much more! My heart and soul went into this class so I hope to see you in the classroom at
Paige's Process Masterclass at Big Picture Classes!

March 2018 Highlights


Fox has become a little bookworm and we couldn't be more proud and excited!
Jane getting some dental work done by Chris.
A gorgeous March day called for a walk to the park.
Sunshine at the playground.
Me in my happy place, doing what I love :)
Beautiful Jane! Sometimes I take pictures of her just for the sake of scrapping them :)
Gah! Spring is in the air! I love love love the pink trees blooming all around!
Easter eggs from Prague.
We drove to Wallace, ID at the end of the month for General Conference and stopped in Spokane for dinner. The sunset from the parking lot was unreal!
My parent's house in Wallace, ID. It's so darling!
Joey chillaxing hard core in Wallace.
Paige Taylor Evans © // Quinn Creatives DESIGN