You Are Awesome Layout by Missy Whidden


Tuesday, November 6, 2018

Hey, friends, Missy Whidden here with a new layout using the Whimsical collection. I have been eyeing all the beautiful scallops on Paper 23 and I decided to fussy cut them all out. My photo is of my daughter playing with her abacus and I was inspired by the shape and colors of all the little beads. I moved all the scallops around for a while trying to decide my design. I finally settled on putting the scallops in rows in rainbow order. I used white cardstock as my background and used clear gessoDistress Oxides, and Shimmerz on the background to create a messy watercolor look. I also used some watered down white acrylic paint to add splatters and finished it off with some gold Heidi Swapp Gold Color Shine.
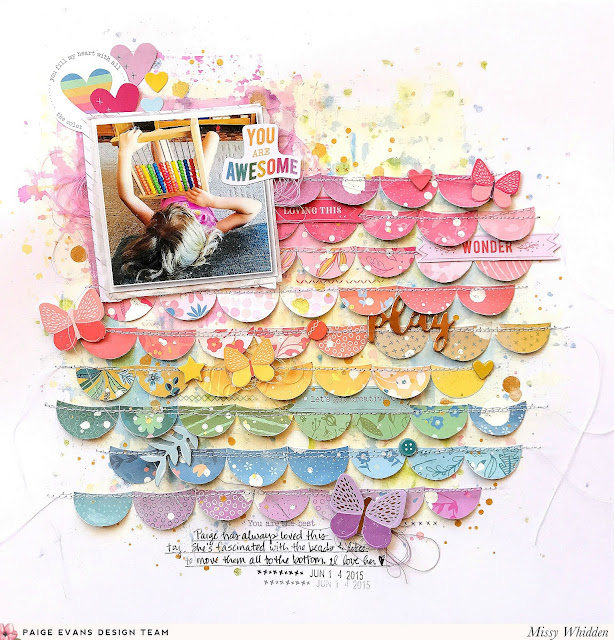
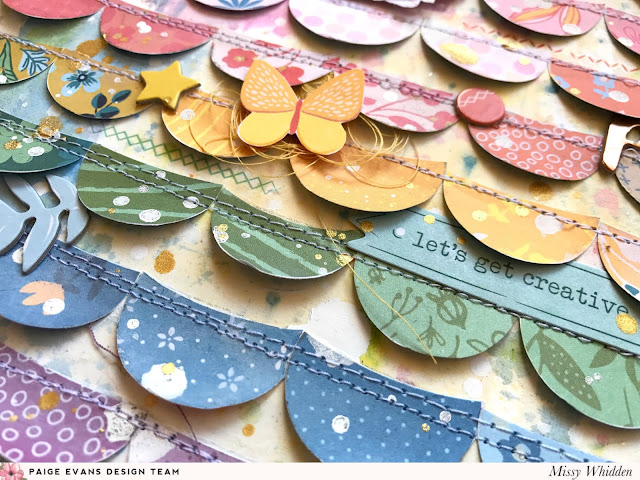
I arranged the scallops in rows and lightly glued them down. I added some texture and detail by machine stitching along each row. I was able to curl up the edges of the scallops to create fun dimension. I embellished with embellishments of matching colors. I fussy cut a few butterflies from Paper 06. I also used pieces from the Chipboard Stickers here as well as some of the Ephemera Die Cuts.
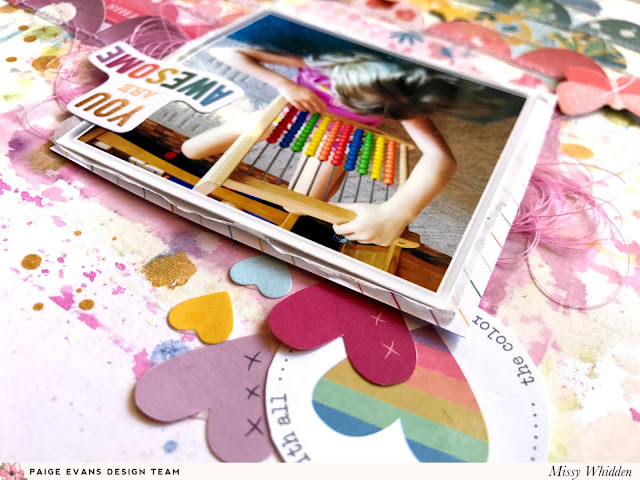
I used a paper from the 6x6 Paper Pad as a layer behind my photo as well as some tissue paper and adhesive foam. I added heart stickers from the Sticker Book. The cute rainbow heart is from one of the 2x2 Paper Pads. I went simple with the title and used a Sticker Book sticker. I added a bit more texture and color by tucking in pink tangled thread on the sides of the photos.
I used Rub-Ons in between some of the rows for small details. The Chipboard Stickers were perfect for adding tone-on-tone details. I highly recommend picking those up!
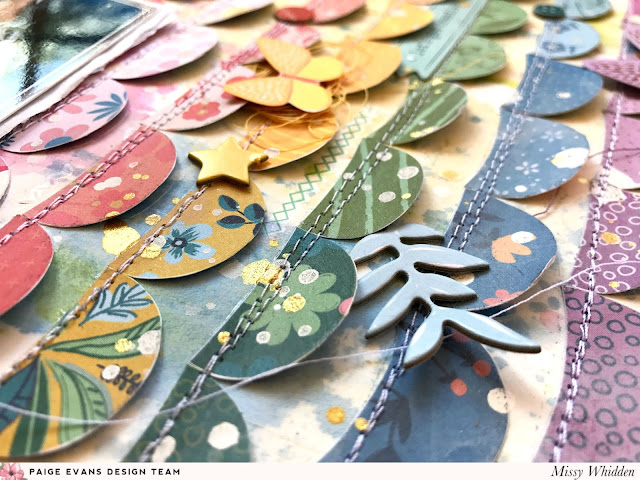
I hope this inspires you to do some fussy cutting with some of the Whimsical papers. Don’t be afraid to create your own designs with them! It’s so much fun to think outside the box! Thanks so much for stopping by!

Blog: littlenuggetcreations.blogspot.com  Instagram: @missywhidden  Pinterest: @missywhidden
Facebook: missy.whidden  YouTube: Missy Whidden

Citrus Twist Guest Designer - Whimsical Layout


Sunday, November 4, 2018

I'm guest designing for Citrus Twist Kits this month and the November kits include a lot of Whimsical! So excited to share my first page!
I started with the rainbow striped Paper 16 and used a border punch on every color to make scalloped strips. I lightly adhered the strips across the B-side of the aqua sailboats paper from Pick-Me-Up Paper 22 and then machine stitched across the top of each strip using white thread. To add lots of texture I bent up the edges of all the scalloped paper strips.
Next I grabbed two photos of my daughter and overlapped them in the middle. I layered frames from the Whimsical Ephemera Die Cuts underneath and added a Chipboard "Whimsical" Sticker at the bottom for the title. 
Then I had fun picking and choosing embellishments to go across the entire background, placing them color-on-color. So pink clouds over the pink paper strip, blue clouds over the blue paper strips, etc. I love the texture this technique creates! I hope that you are inspired to check out the November Sunshine in My Soul Citrus Twist kits! They are full of color and things to get your creative mojo going! See you again soon!
SUPPLIES: WHIMSICALPaper 16Chipboard StickersEphemera Die CutsStickersPuffy StickersPICK-ME-UPPaper 22; Scalloped border punch: Fiskars; Sewing machine: Brother; Thread: Coats & Clark

Let's Teach Layout by Kim Jeffress


Saturday, November 3, 2018

Hi everyone! It's Kim here, happy Saturday to you all! I am thrilled to be sharing another new layout today made with one of Paige's cut files. I love using large photos to make a dramatic impact on a page and when I saw the Leaf Wreath cut file I knew it would be the perfect complement to my large circular photo.
I began with that beautiful striped patterned paper from Heidi Swapp and trimmed a white piece of American Crafts cardstock as a layer over the top. I then took another piece of white cardstock and cut the Leaf Wreath cut file with my Silhouette Cameo. I adhered my photo to the white cardstock then carefully added my Leaf Wreath around the photo.

I then used my sewing machine and added some stitching around the cut file, stitching through the center of the leaves. I was able to lift the sides of the leaves up slightly for some dimension and shadow. I then took some of the butterflies from the Turn the Page Chipboard Stickers and Sticker Book and those pretty butterflies from Jen Hadfield for Pebbles to accentuate my wreath. I lifted up the wings of the butterflies for some extra dimension.

I added a couple of floral die cuts from the Turn the Page Journaling Spots as well as the 30-page Paige Evans #StickerBook to finish off the wreath. To complete my layout I added some glitter stickers from Heidi Swapp for my title. I love how soft and feminine my layout is. I will definitely be trying this technique again!

Blog: Glass Half Full / Instagram: @kimjeffress / Pinterest: @kimjeffress / Facebook: Kim Jeffress Designs / YouTube: Kim Jeffress

Whimsical Layout by Stefanie Ried


Friday, November 2, 2018

Hello and welcome! This is Steffi and today I'm showing you my first layout with the Whimsical collection. I have been waiting the last weeks impatiently and excitedly for the beautiful paper, stickers, die-cuts, and more and I am very happy now. The colors are dreamlike again and the motifs are totally sweet.
When I'm working on my first project with a new collection from Paige, I always want to show all the great colors. They fit perfectly together like a rainbow.

First I cut out the paper with the small rectangles of different patterns (Paper 19) and punched out different sized circles. I arranged them in the center of a white base. In the middle is the Chipboard Sticker title.

As you go downwards the circles become brighter and smaller so that the whole layout looks harmonious. I also punched out the photos with the circle punches. You almost don't see them at all. They hide very well between all the circles, haha.

I hope you like my first layout with the new Whimsical collection! Thanks a lot for stopping by and see you next time!

Blog: steffiried.blogspot.com / Instagram: @steffiried / Pinterest: @steffiried / Facebook: stefanie.ried.96 YouTube: Steffi Ried

October 2018 Highlights


Thursday, November 1, 2018

October might be my favorite month of them all! I love anything and everything spooky leading up to Halloween!
Well, this isn't so Halloweeny, but Margi helped me put up some wallpaper in the previous formal dining room. I love the pattern and pop of interest it adds to the one wall.
Let the Halloween festivities begin!
The kids and I met up with Haylie, Landon & Quinn at Boondocks to go bowling and play games. I didn't use Google maps to get there which was a big accomplishment for me. Learning my way around!
We went to the pumpkin patch at Chatfield Farms.
But we ended up getting our pumpkins from the grocery store.
SNOW IN OCTOBER?!?! You've cat to be kitten me right meow.
Fox turned 8! 8 is great!
We got our annual family photos taken up north.
Janey girl hanging out with me.
I got my teeth whitened at Chris' office.
We threw a birthday party for Fox and invited every single kid in his class. It was madness I tell ya!
We went with Jay's family to Pumpkin Nights out by the airport.
It was super cool!
I needed a new headshot so I set up my camera on a tripod and did some timer shots.
People really get into the holidays 'round here, it's so awesome! This guy had hundreds of carved pumpkins set up in his yard synchronized to music.
We attended our ward Halloween party & trunk or treat. Fox brought along his friend.
Merry Christmas! I mean, happy Halloween!
All ready to trick-or-treat.
The neighborhood gang.
Score!
I didn't eat a single piece of candy though, got some goals to crush!

Happy Layout


Here is my very first layout that I'm sharing using Whimsical featuring the 12x12 Specialty Die Cut Background Paper!
I have a process video so you can see how this layout came together from start-to-finish:

I started by taking the Specialty Die Cut Paper out of the packaging and bending up all of the flowers, leaves, and butterflies. This only took a few minutes and already made such an interesting layout base! Then I picked a paper to back it with and chose the colorful hexagons, Paper 05. I love how all the bright colors peek through the background!
I placed a flower sticker from the Sticker Book in the center of each flower and then I used a sewing machine and stitched through each flower, leaf, and butterfly to add texture and interest. I trimmed the thread ends to keep the layout clean - lots of times I like to keep the thread ends long but since this layout was already busy, I trimmed them.
Next I went to town with the Rub-Ons! I tried to fill in all of the gaps and empty spaces with the phrases, sentiments, and stitching borders included in the package. I added journaling (first with a pencil then went over it with a blue pen) in another of the empty spaces.
I layered the photo with papers from the 6x6 Paper Pad and edged it with a scalloped border sticker and rainbow scalloped rub-on. To finish I added a few more Stickers and Puffy Stickers in the gaps!
Thank you so much for stopping by today and checking out my first layout made with Whimsical! I'll be back soon with another one!
SUPPLIES: WHIMSICALSpecialty Die Cut PaperPaper 056x6 Paper PadChipboard StickersPuffy StickersStickersRub-OnsSticker Book; Sewing machine: Brother; Thread: Coats & Clark; Pen: Zig
Paige Taylor Evans © // Quinn Creatives DESIGN
