You Are Loved Mini Album by Bea Valint


Wednesday, February 21, 2018

Absolutely swooning over this sweet mini album by Design Team member Bea Valint it's GORGEOUS from cover to cover!
Hello there! I’m so excited to share my first project I created with the brand new Pick-Me-Up collection! Everything about this collection is stunning! The colors are amazing, the mixture of both pastel and bolds, and I love all the gold, beautiful flowers, and cheerful embellishments!
I have had some cute photos of my daughter lingering on my desk waiting to be used so I decided to create a mini album using these photos and document some cute things we love about our daughter - we can't say those things often enough!

My idea was to use the pages as a pocket with round windows and place the photos on tags behind. To do this I opened a new Silhouette Studio document and drew a rectangle in the size of my page (I doubled the longer size because I folded in half the page after cutting). I placed a wreath cut file into the page and removed the outline of the wreath. I used the Flowers in Wreath, Jewel Heart, Scalloped Circles Background, and the Simple Wreath cut files and cut them from my Silhouette Cameo 3. I created four pages with this technique, folded them in half, and adhered them to a paper spine I created before. (I used the hidden hinges technique). I love how the wreaths surround the photos like a pretty paper doily.

Here is a look at some of the spreads and interactive elements:


I embellished my pages mostly using Stickers and Ephemera Die Cuts. To add a little texture to the album I inserted vellum and tulle pages with lots of sequins from the Haberdashery Multi-Pack. I wrote my journaling on Journaling Spots or on the back of tags.


Here is the back cover with string to wrap around a Button on the front to keep it closed.

Thank you for stopping by, I hope you like my first mini album made with the Pick-Me-Up collection!

SUPPLIES: PICK-ME-UPPaper 01Paper 03Paper 11Paper 20Paper 2212x12 Paper Pad6x6 Paper PadMini ThickersChipboard ThickersChipboard StickersEphemera Die CutsStickersJournaling SpotsSilhouette Cameo 3; Cut files: Flowers in WreathJewel HeartScalloped Circles BackgroundSimple Wreath

Blog: myshinystudio.blogspot.com / Instagram: @beavalint / Pinterest: @valint7 /
Facebook: myshinystudio / YouTube: Bea Valint

I mean, right?! How gorgeous is this? Love it oh so much and want to make one for my little Janey girl now :)

Bookbinding at Ben Franklin Recap


Tuesday, February 20, 2018

Back in December... :) I taught a bookbinding class at Ben Franklin in Redmond! I grew up in Redmond and went to the BF often, so it was crazy that it all came full circle and I ended up teaching a class there!
Enza Gudor from the Pink Paislee Design Team came, always love seeing her :) 
 And my mom came! Hehe! So fun!
 There were eight students in total and they must have all been super crafty people because we finished about two hours early!
 About halfway done! I didn't take a whole lot of pictures, but enough that I can always remember this fun day of teaching!
 My absolute favorite part of teaching bookbinding workshops is seeing all the books lined up in a row at the end. Even though we all use the same supplies, each gal makes her book different whether through the paint color or embellishments she adds to the binding, the color of thread, etc.
 Be still my heart!
 I'm teaching another bookbinding class this Saturday in Los Gatos, CA and I'm already looking forward to seeing the books all lined up once more!

Also, I do have an online bookbinding class and kits if you're interested in learning how to make these one-of-a-kind books!
Thanks for stopping by!!

Good Life by Flóra Farkas


I often hand stitch on my layouts so I know the time and effort involved which is why I am so enamored with this new layout by Design Team member Flóra Farkas!
Hi ladies! It’s Flóra back today and I am sharing my latest scrapbook layout created with the Pick-Me-Up collection and Heart Lines Background cut file designed by Paige. A few days ago we were in Venice for the famous Carnival. It was fantastic experience. At home I was searching for materials to document our photos and I was so happy that Pick-Me-Up perfectly matched my theme.
I used Paper 24 as my background. I collected seven embroidery threads with matching colors and the fun started: I hand stitched the Heart Lines Background cut file. I spent many hours stitching this stunning pattern and it was definitely worth it.

I wanted to keep my layout simple, so I placed a 4x6” photo in the middle and created two clusters on each side. I placed only pinkish, purple, and orange elements. I love all the gold foil on the embellishments and the different elegant frames everywhere. They really echo the pomp of Venice .

On the right I layered Ephemera Die Cuts on my photo to cover and hide tourists in the background. Why would you need photoshop if you have embellishments, right, haha? Also added Chipboard ThickersChipboard StickersPuffy Stickers, and cardstock Stickers. I really love the small phrase labels from the Stickers, they are recurring elements on my layouts.

On the left I made a smaller cluster with similar concepts as before. To finish I adhered gold sequins from the Haberdashery Multi-Pack. The decorations turned out heavy but this resonates perfectly with the big ornate costumes. Thanks for stopping by!

Blog: pinkandpapergift.blogspot.com Instagram: @floramfarkas Pinterest: @floramfarkas
Facebook: pinkandpapergift YouTube: Flora Monika Farkas

I love the stitching, the colors, the embellishments, the fun photo, EVERYTHING!!

Pick-Me-Up Floral Page


Monday, February 19, 2018

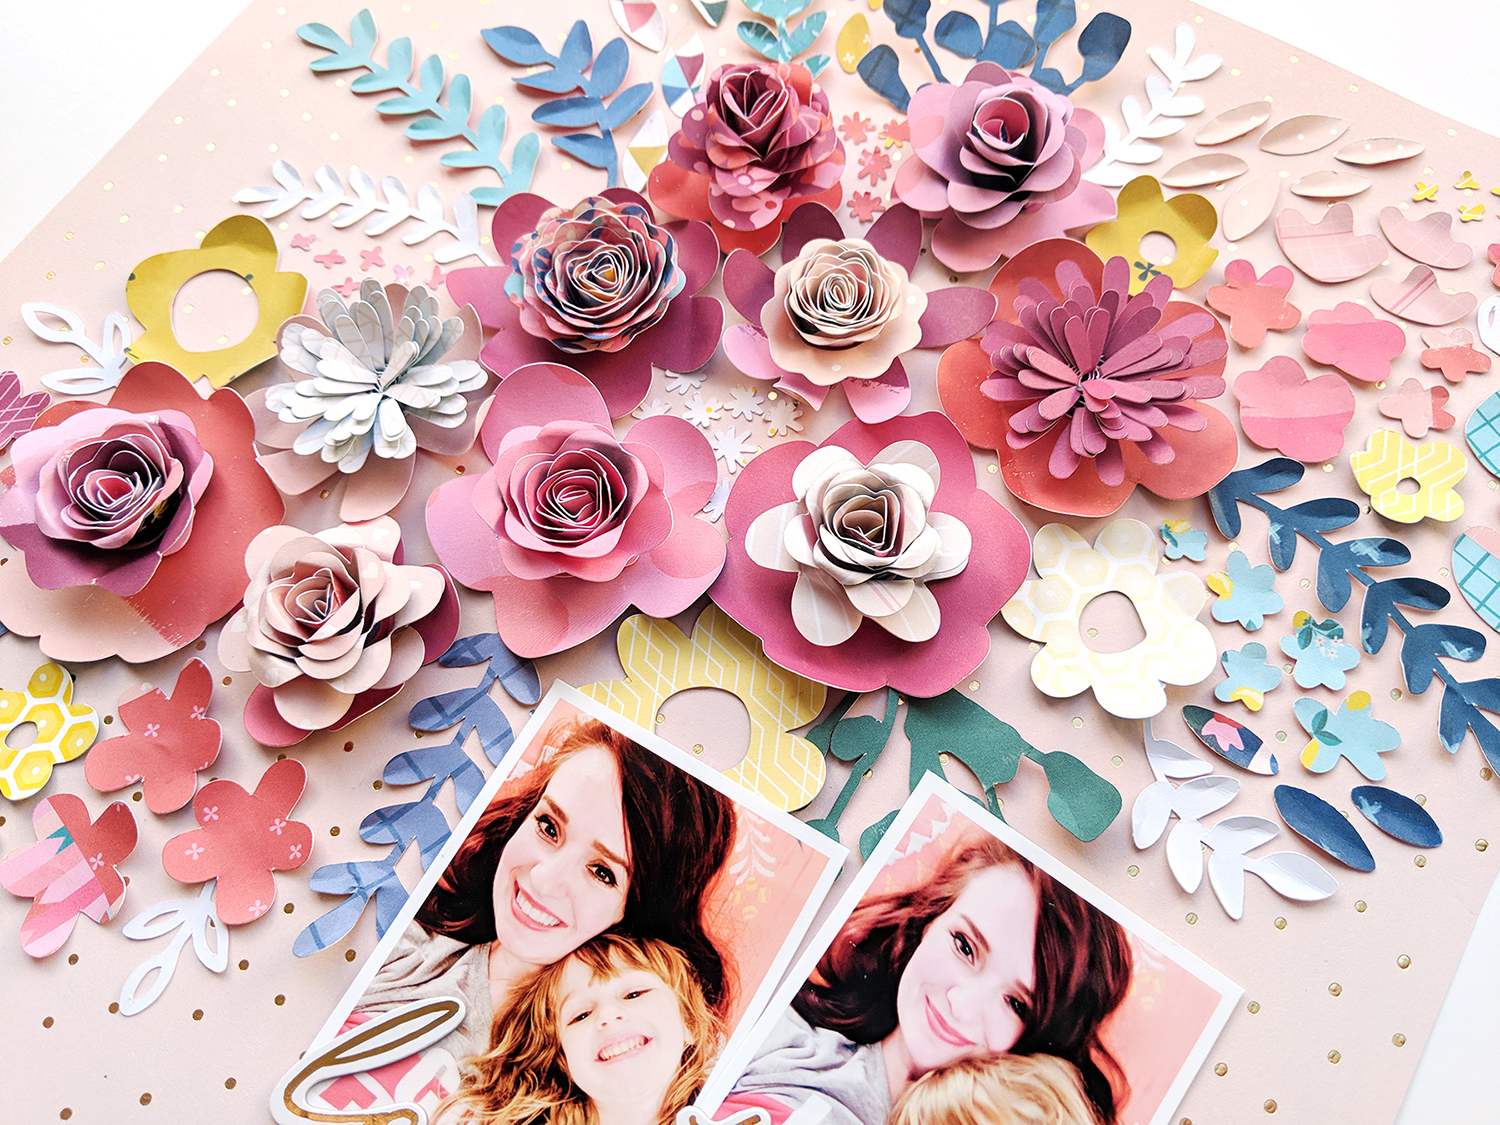
Hi everybody! Hope you had a wonderful weekend and are excited about everything in store for the upcoming days! This week the Pink Paislee Design Team is sharing pages using my new Pick-Me-Up scrapbooking collection and today I have a layout and process video!
First, sit back and relax and watch the process video to see how this layout was made from start-to-finish:
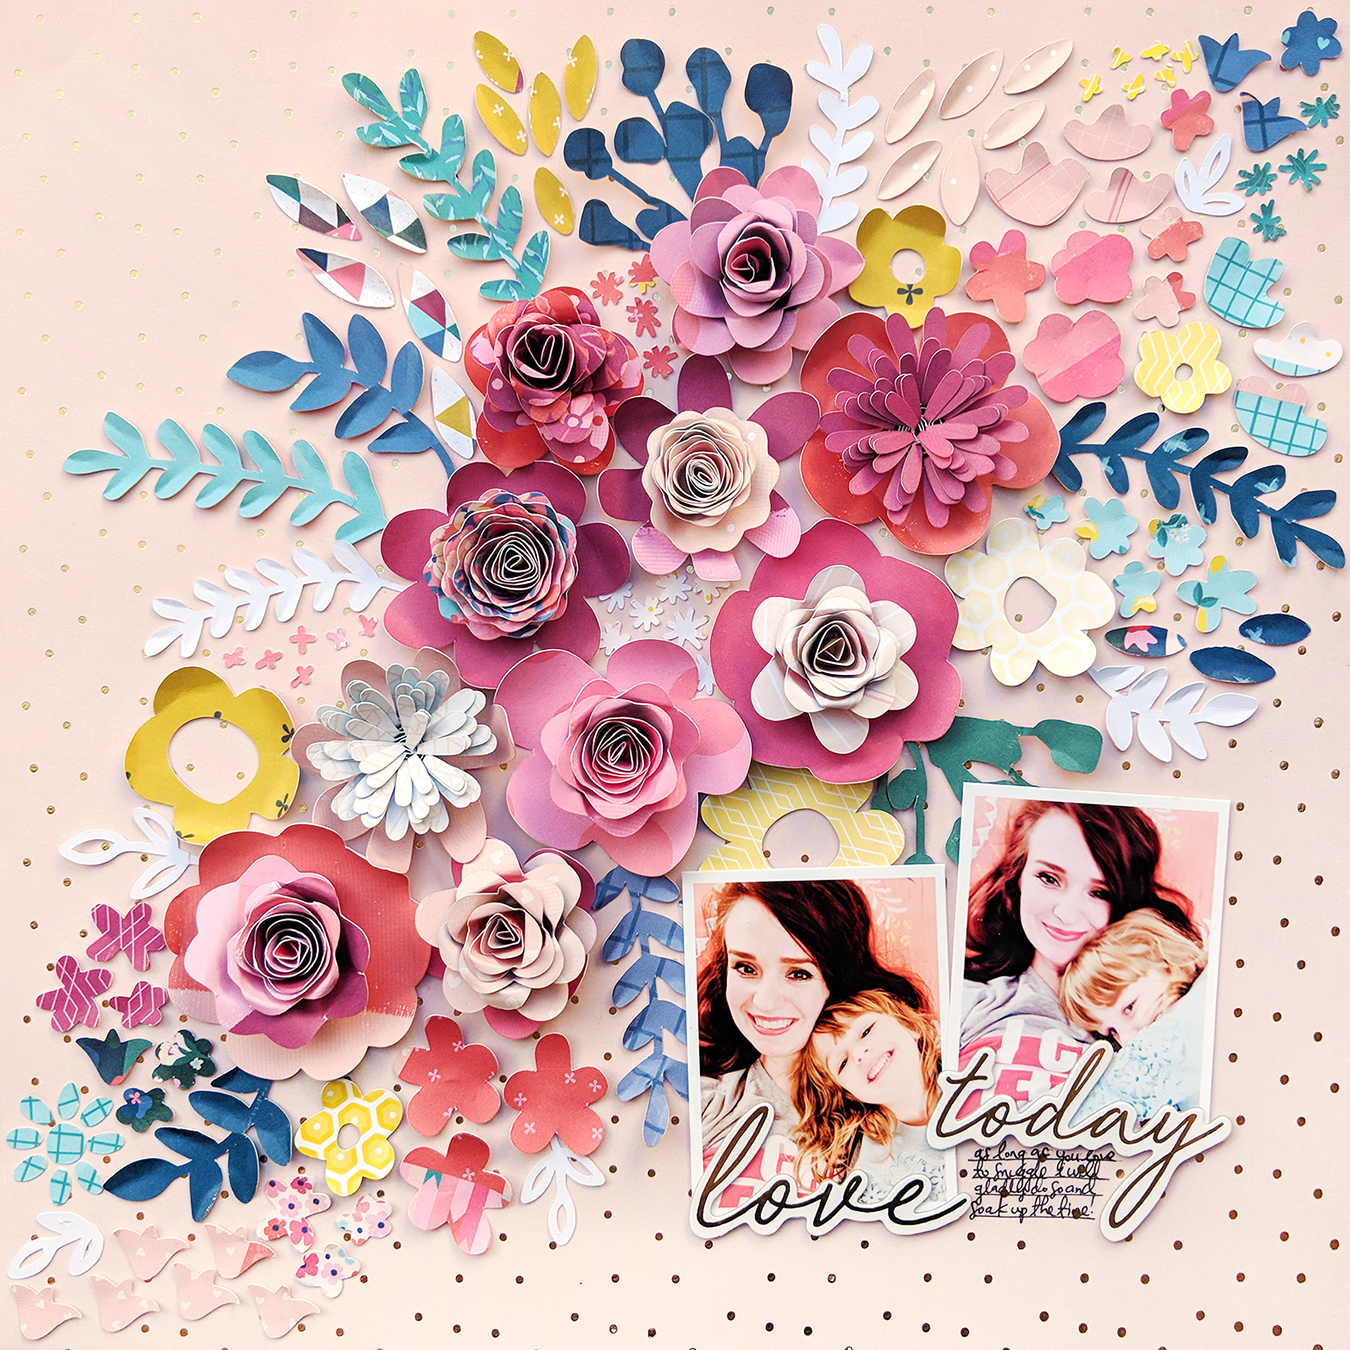
Now for written instructions for those who learn better that way - we all learn differently! I started by placing all of my Silhouette cut files that had potential to be used on a page featuring flowers and leaves. I used Rolled Flower 1, Rolled Flower 2, Rolled Flower 3, Rolled Flower 4, Rolled Flower 5, Flower Garden Background, Branch, a deconstructed version of the Flower Vase, and the Flower Cluster cut files.
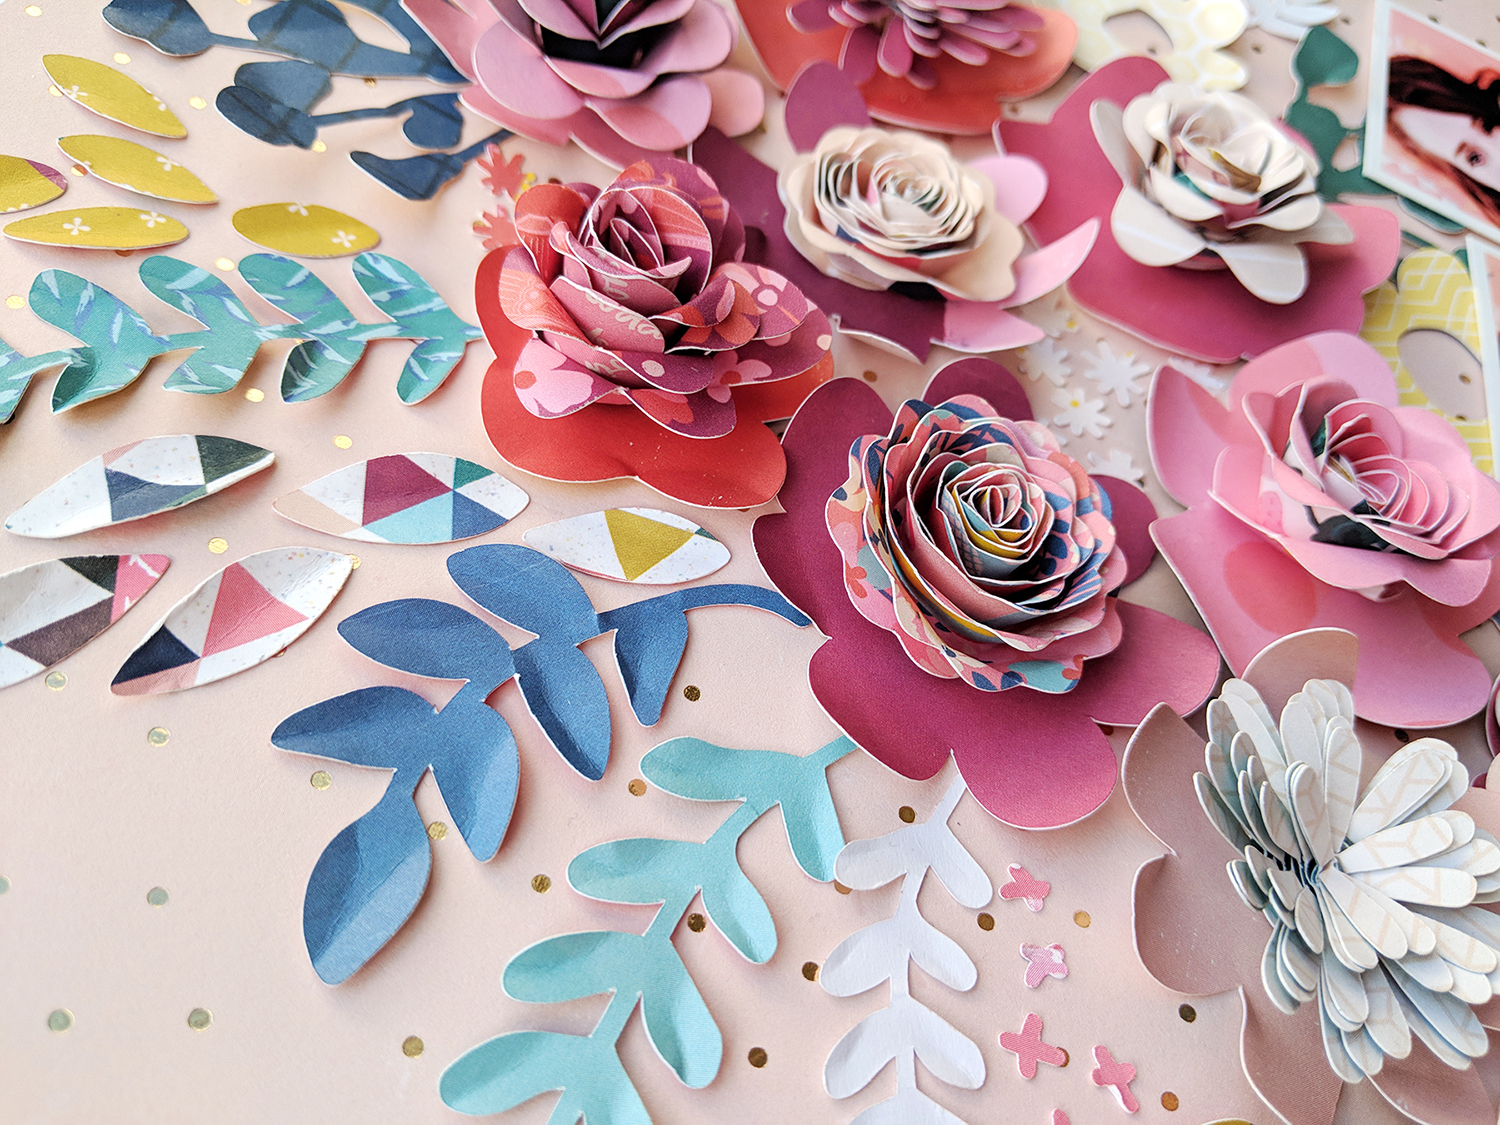
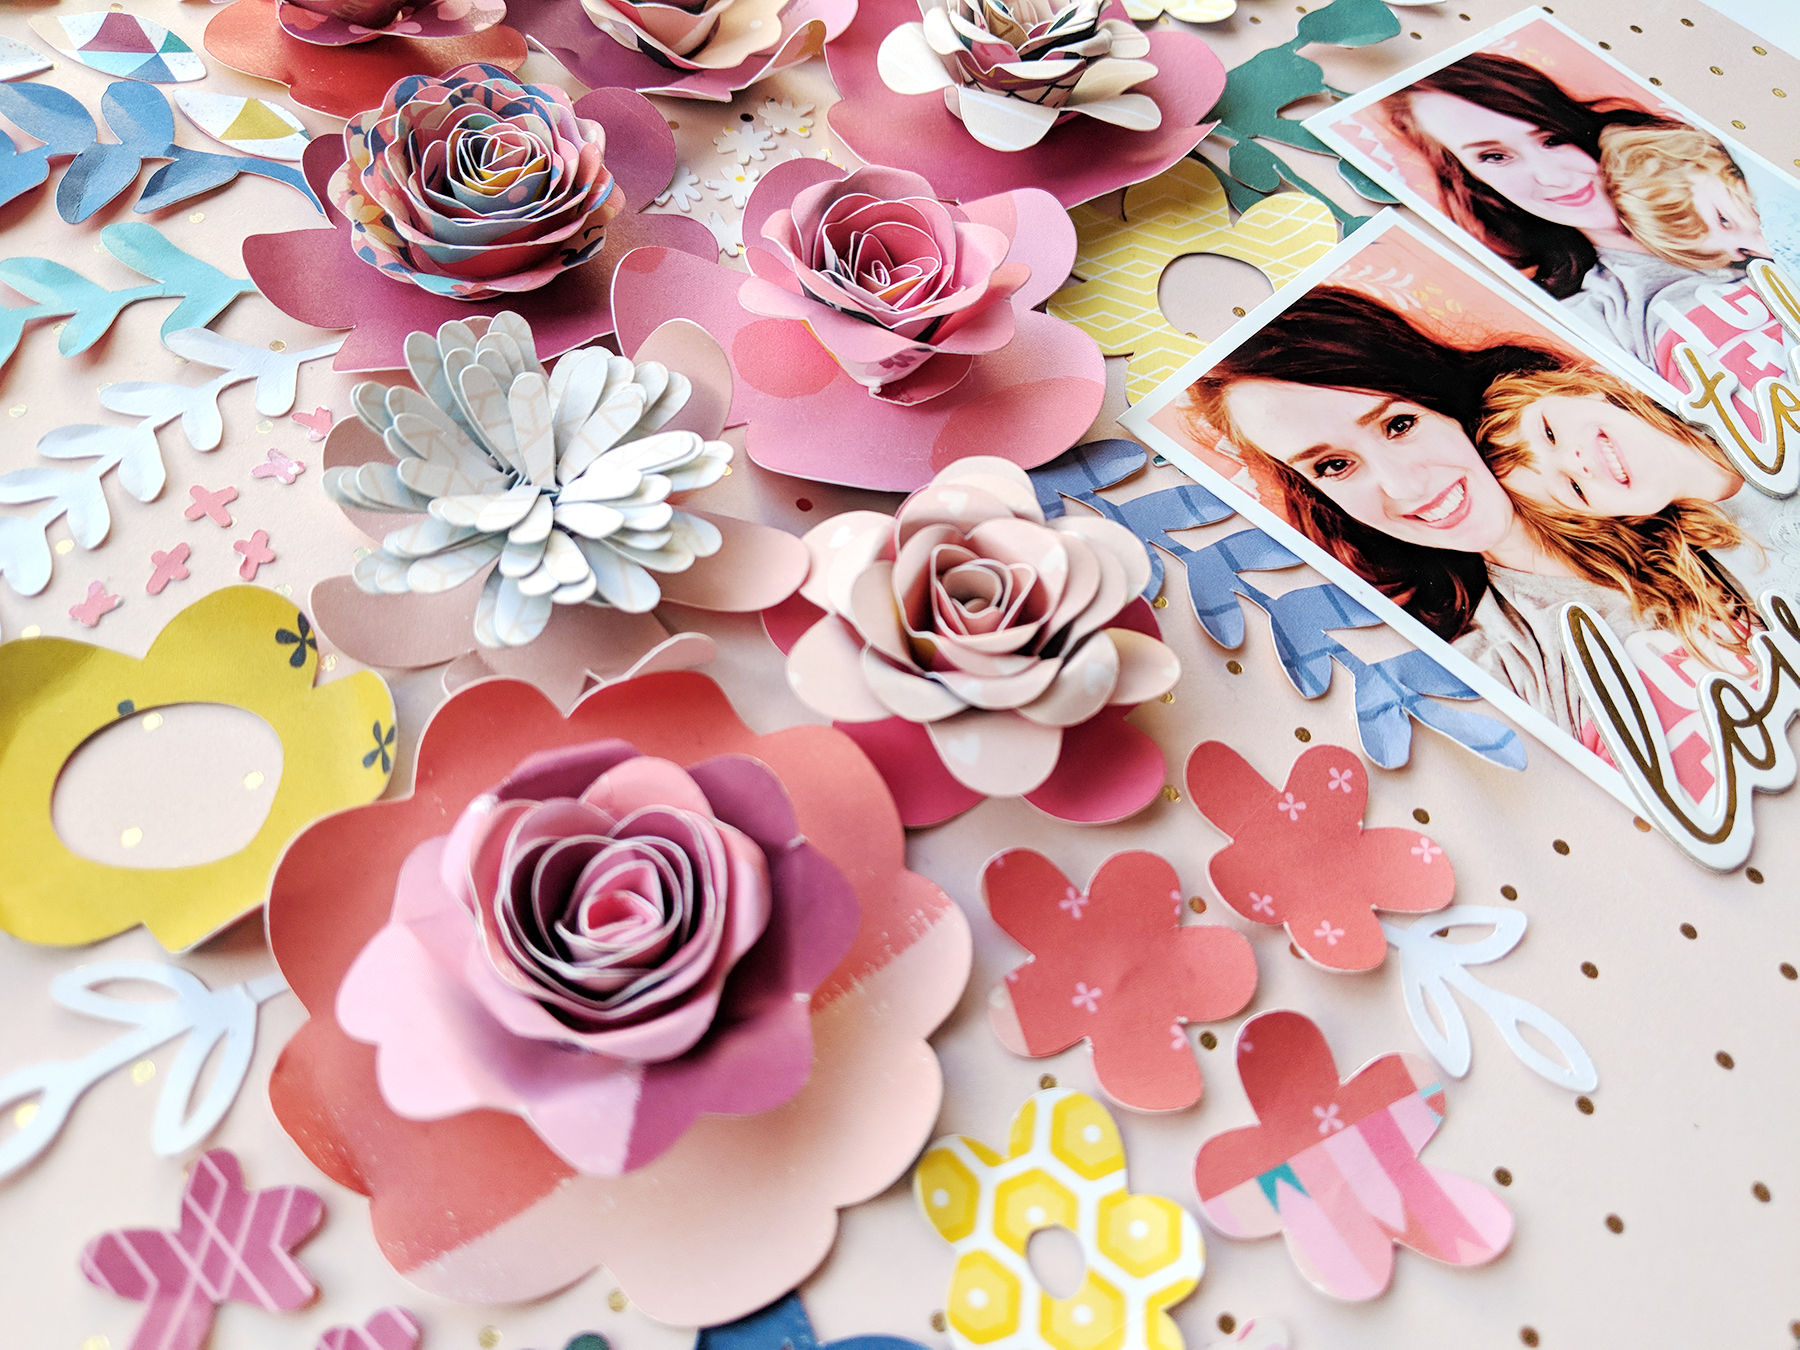
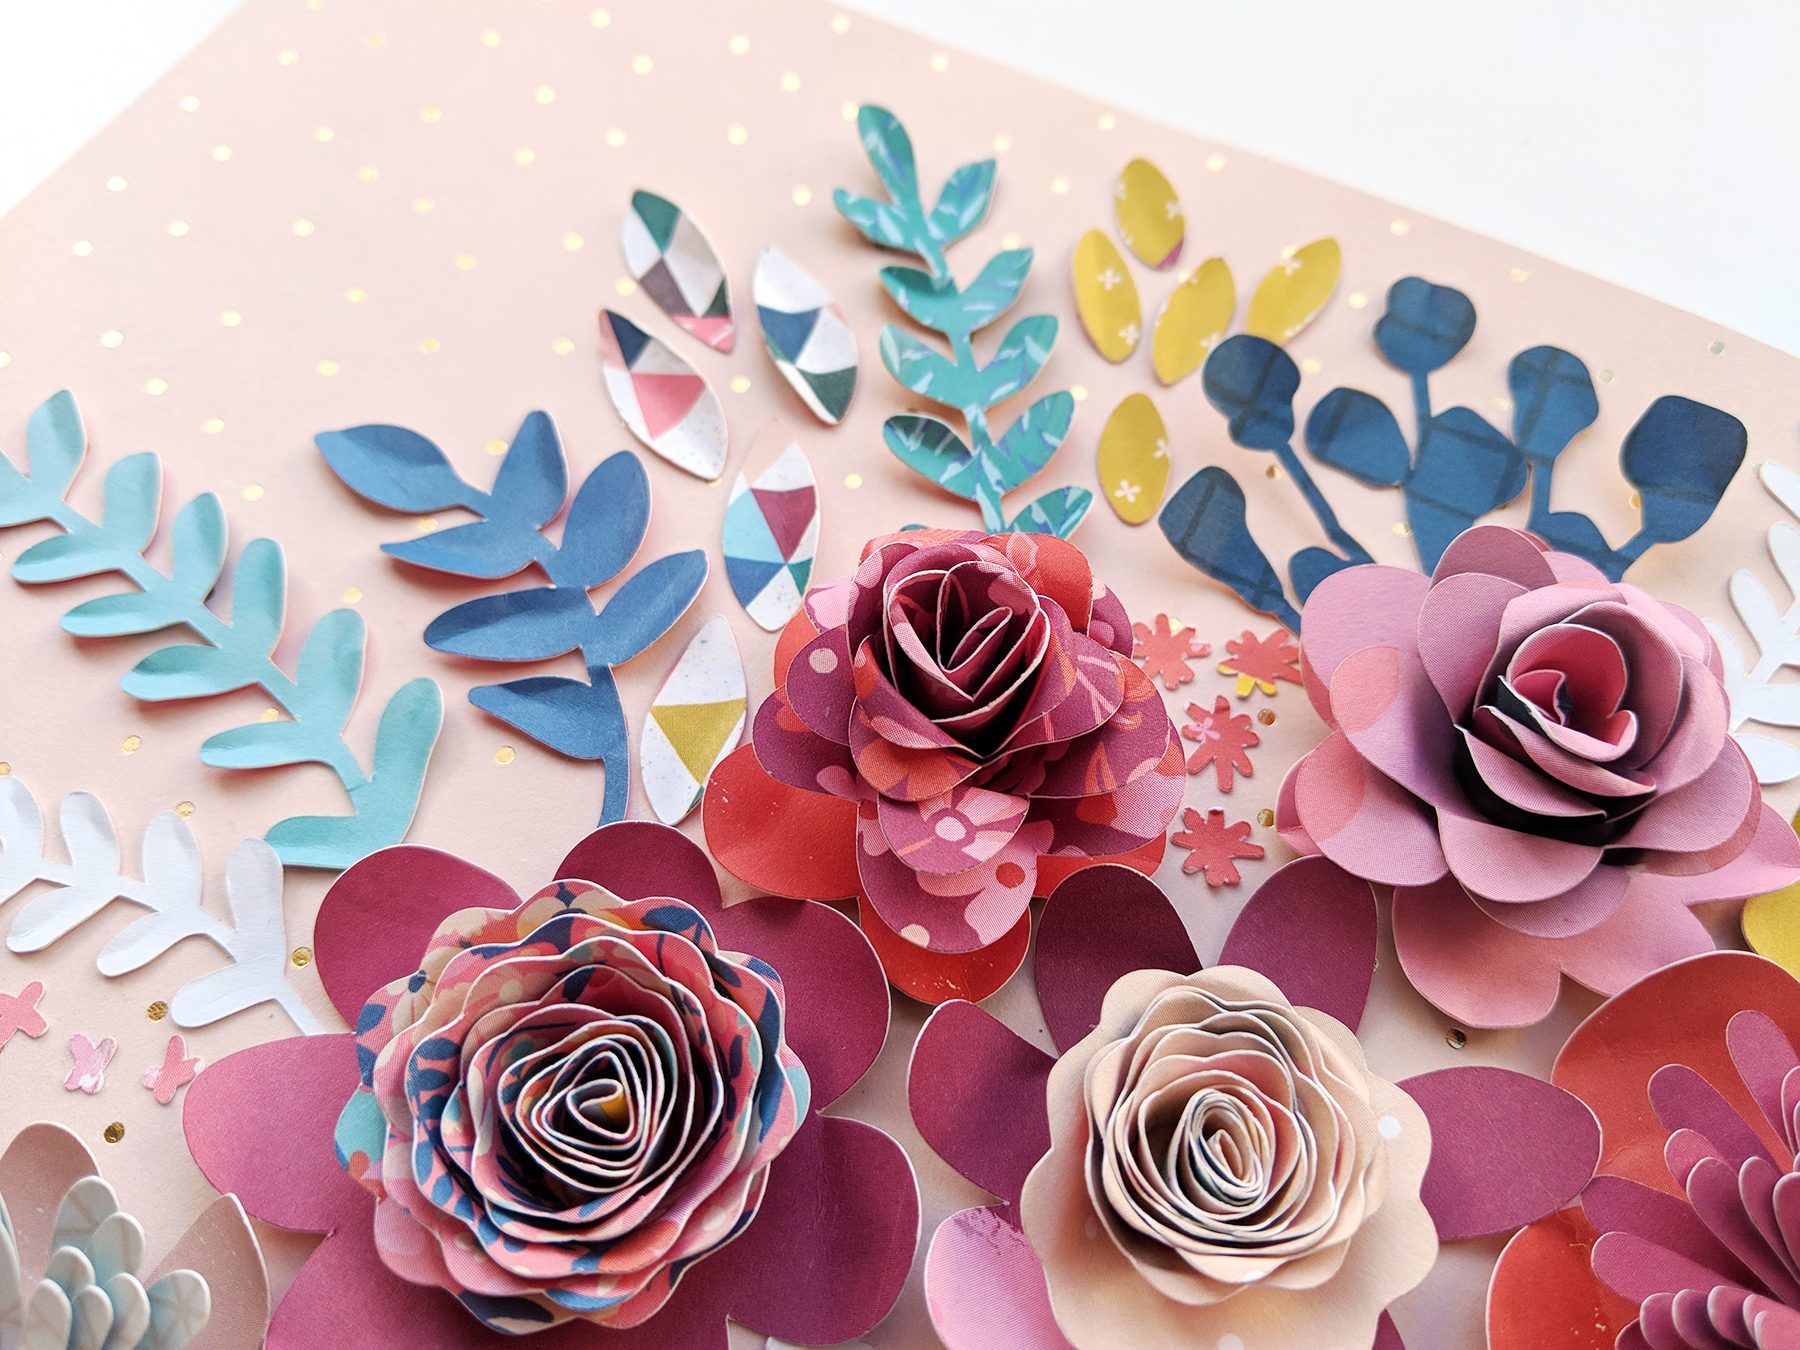
I went through all of the Pick-Me-Up patterned papers and pulled out the solid pinks, reds, purples, yellows, and blues. Then I trimmed the pink patterned papers to 4" square, die cut 10 rolled flowers from them using my Silhouette Cameo 3, and assembled them with hot glue. Next I die cut larger solid flowers for bases for the rolled flowers again from pink, red, and purple papers. I curled up the flower petal edges for added dimension. I cut a few more flowers with open centers from the yellow patterned papers. I die cut all kinds of branches and leaves from blue patterned papers as well as smaller leaves and branches from white cardstock. Lastly, I die cut the entire Flower Garden Background from Paper 10 - the one with all the squares of different patterns.
Once everything was cut and the rolled flowers were assembled it was time to pick a background paper! I chose the light pink paper with gold foil polka dots from the 12x12 Paper Pad. I had also thought about creating the layout on a royal blue paper, but I like how the flowers stood out more against the pink paper.
I began clustering the largest flowers in the middle and then tucked the leaves around the edges. Then came more flowers spreading out to the corners and then I picked little clusters from the Flower Garden Background to fill in all of the gaps.
Recently my daughter and I took a bunch of snuggling selfies on the couch and I couldn't wait to document this precious moment in time. I love that Jane still loves to snuggle and I will savor these moments! I printed two photos, leaving a white edge, and added them below the flower background.
Since the background was so busy I wanted it to be the main design element and kept everything else super simple - all I did to finish was add "love" and "today" Chipboard Stickers at the bottom of the pictures and then journaled below with my favorite .03 black precision pen.
I hope you are inspired by this layout to create a pretty floral background using Pick-Me-Up!

Birds Background Layout by Audrey Yeager


Sunday, February 18, 2018

Repeating elements on a page and backing cut files are my jam, so this layout by Design Team member Audrey Yeager knocks it out of the park!
As soon as I saw the Birds Background cut file I knew exactly what photo I was going to use! I have been saving it for the perfect supplies, and this cut file paired with the Pick-Me-Up collection is perfect!
I began by painting the background with some light blue acrylic paint and splattering with pink, yellow, and white mists.

Then I cut the Birds Background cut file using my Silhouette Cameo from white cardstock and cut out each bird separately. Amazingly, I only used ONE piece of patterned paper to back all the birds, Paper 21. Once they were all backed, I use aqua embroidery floss and made French knots for the eyes and stitched the beaks and feet with yellow floss.

I used very few embellishments, letting the birds stand out for themselves. Just a few frames cut from a paper in the 12x12 Paper Pad, and some Ephemera Die CutsPuffy Stickers, and sequins from the Haberdashery Multi-Pack.
Blog: audreysreflection.blogspot.com / Instagram: @audreykit1 / Pinterest: @audreykit /
Facebook: Audrey L. Yeager  / YouTube: Audrey Yeager

I'm such a big animal lover, and the birdie in the pic is too cute, I bet Jane would agree with me that we need one :)

Dreamcatcher Layout by Lorilei Murphy


Saturday, February 17, 2018

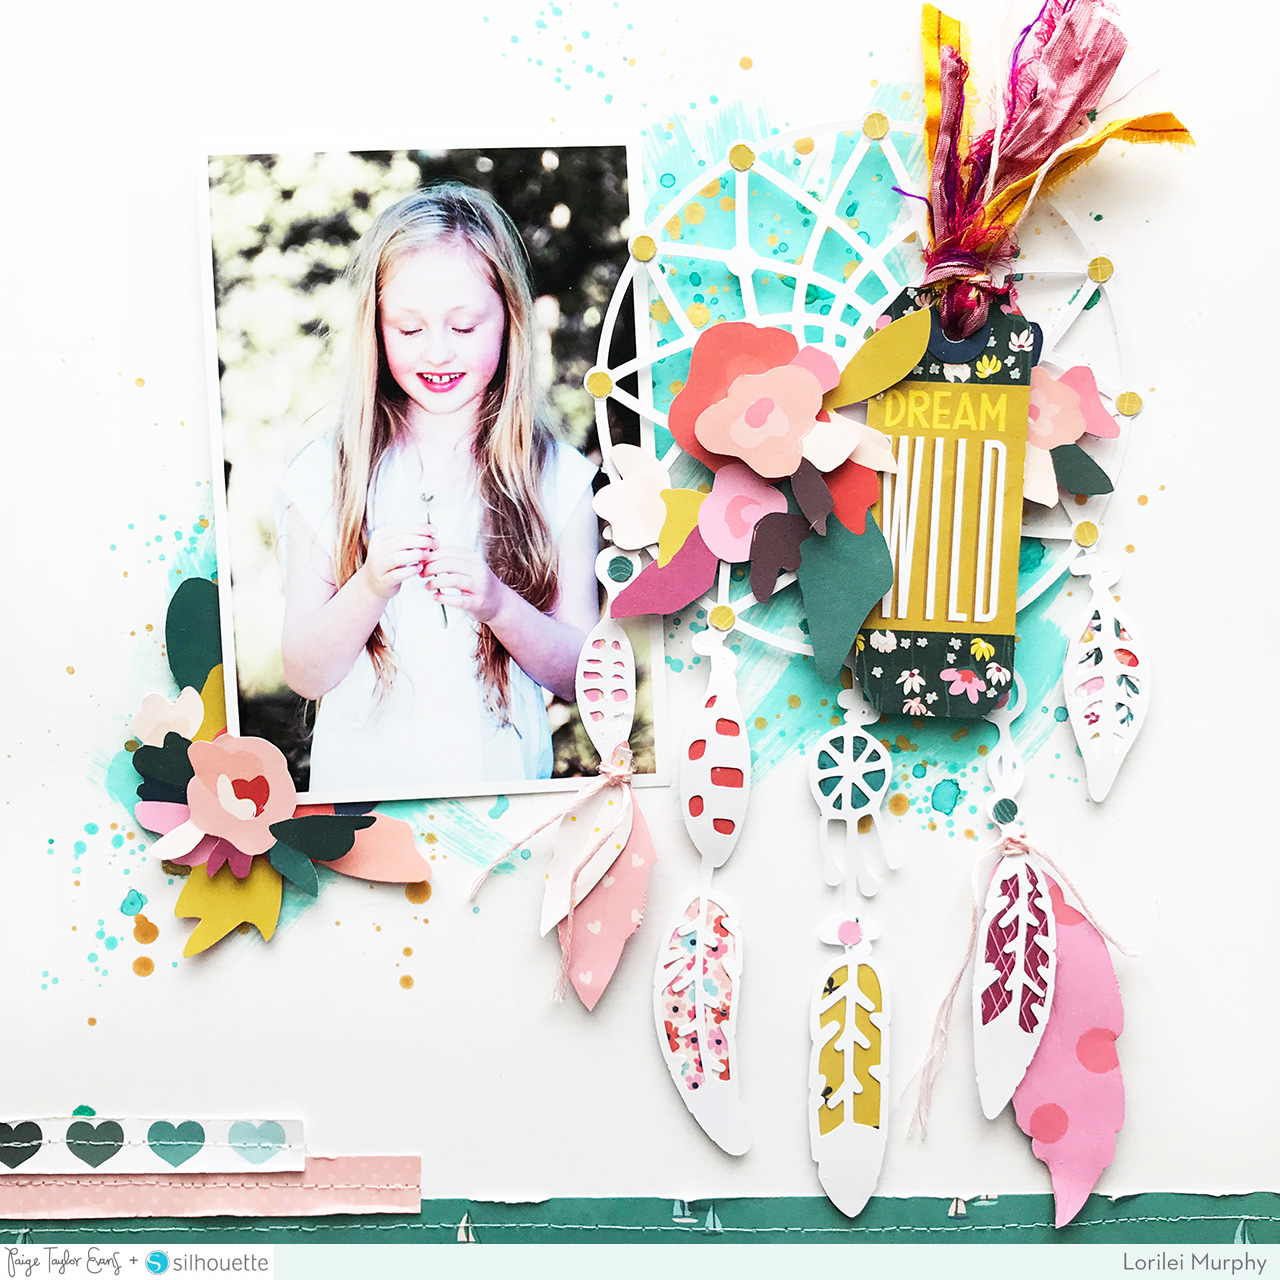
I was able to see this layout by Lorilei Murphy in person at Creativation - the layers are so incredibly beautiful! Take a look:

If you are going to dream you might as well dream big and dream wild! The rich gorgeous colors on the Dream Wild tag from Paper 13 in Pick-Me-Up completely inspired my layout! I have wanted to use the Dreamcatcher cut file for awhile and when I saw the Dream Wild tag I knew it was perfect!
I cut the Dreamcatcher cut file from white cardstock using my Silhouette Cameo 3. I added some turquoise paint to a white background and splattered a bit of Heidi Swapp Gold Color Shine around. While that was drying I started to back the cut file with gorgeous papers from Pick-Me-Up. I also fussy cut pretty flowers from Paper 02 to use as embellishments.
I decided to leave the main part of the dreamcatcher open so that the paint would show through and I wanted to let the florals and tag stand out! To make little “beads” for the the dreamcatcher I simply punched into the same papers I used with my regular single hole punch and then glued them on. They add just the right amount of color around the dreamcatcher circle. I used Paper 10 to back the feathers - the small patterns show perfectly through the openings! I also traced around some of the feathers onto Paper 02 and Paper 16 to make extra patterned paper feathers.
I love how this layout turned out and the challenge to only use cardstock and patterned papers from Pick-Me-Up!
Blog: roseyposeystudio.com / Instagram: @roseyposey_studio / Pinterest: @roseyposeygirl /
Facebook: 
Rosey Posey Studio / YouTube: Lorilei Murphy
I haven't used any of my three dreamcatcher cut files yet, but now I'm itching to do so! This layout is STUNNING!

Good Times Layout by Missy Whidden


Friday, February 16, 2018

There are a few royal blue B-side papers in Pick-Me-Up and I love how the colors pop against it like on this new layout by Design Team member Missy Whidden!!
Hey, friends! Missy here, and I have a new layout to share today featuring Paige’s new Pick-Me-Up collection. I often use white or light backgrounds for my projects so I challenged myself to use a dark blue patterned paper as my background for this page. I used Pick-Me-Up Paper 15 and also Paige’s Faux Flower Background cut file. I cut the design first and then left the paper on my Silhouette cutting mat to add some mixed media to it. I first smudged some white gesso over the cut file area with my fingers. I knew I was going to add a lot of color to the page, so I used several coordinating colors of ink sprays over the gesso to create a watercolor effect. Once it all dried, I carefully peeled it off the mat and punched out the shapes. Next, I used nine different patterned papers from the collection to back all of the open spaces.  I love how all the colors pop against the dark blue and all of the ink sprays just add to the color explosion.
For added texture and dimension, I machine stitched through every line of flowers with different colored threads. This collection is excellent for backing cut files because there are so many colors and patterns to choose from. In fact, it was hard to narrow down which papers to use! I used several pieces from the Pick-Me-Up Ephemera Die Cuts to embellish.

To add layers under my photo, I used some pieces from the Journaling Spots and Ephemera Die Cuts. Those floral clusters are my favorite! To the left of the photo I created a small title using the Mini Thickers which are perfect for these dark backgrounds - the white just pops off the page. Then I created a little cluster of goodies underneath it: I fussy cut some small word and phrase bits from the 6x6 Paper Pad. I also added a sticker from the Stickers and a few Puffy Stickers.

I created another fun cluster on the left side of the page. I used more of the Ephemera Die CutsStickers, pieces cut from the 6x6 Paper Pad, as well as a circle element cut from one of the 2x2 Paper Pads.

I hope this inspires you to step outside of your comfort zone and use a dark background! It was a challenge at first, but once I got going with the embellishing, it quickly came together. And it really makes those bright colors stand out! Thanks for stopping by!

SUPPLIES: PICK-ME-UPPaper 02Paper 04Paper 07Paper 08Paper 10Paper 11Paper 13Paper 14Paper 15Paper 23Ephemera Die CutsJournaling Spots6x6 Paper Pad2x2 Paper PadsStickersPuffy StickersRub-OnsMini ThickersFaux Flower Background cut fileSilhouette Cameo
Blog: littlenuggetcreations.blogspot.com  Instagram: @missywhidden  Pinterest: @missywhidden
Facebook: missy.whidden  YouTube: Missy Whidden
All of the details and colors combine to create another stunning page from the marvelous Missy!
Paige Taylor Evans © // Quinn Creatives DESIGN