
I created a new Mini Album Card cut file and have an example to share with you using my Turn the Page collection!


 Here is a tutorial on how to assemble and embellish the mini album:
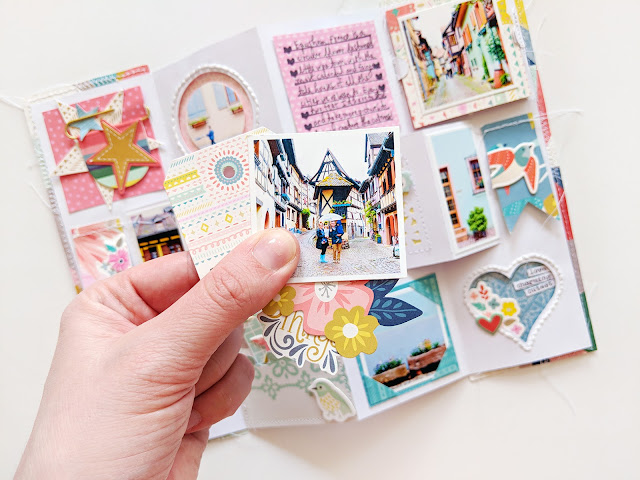
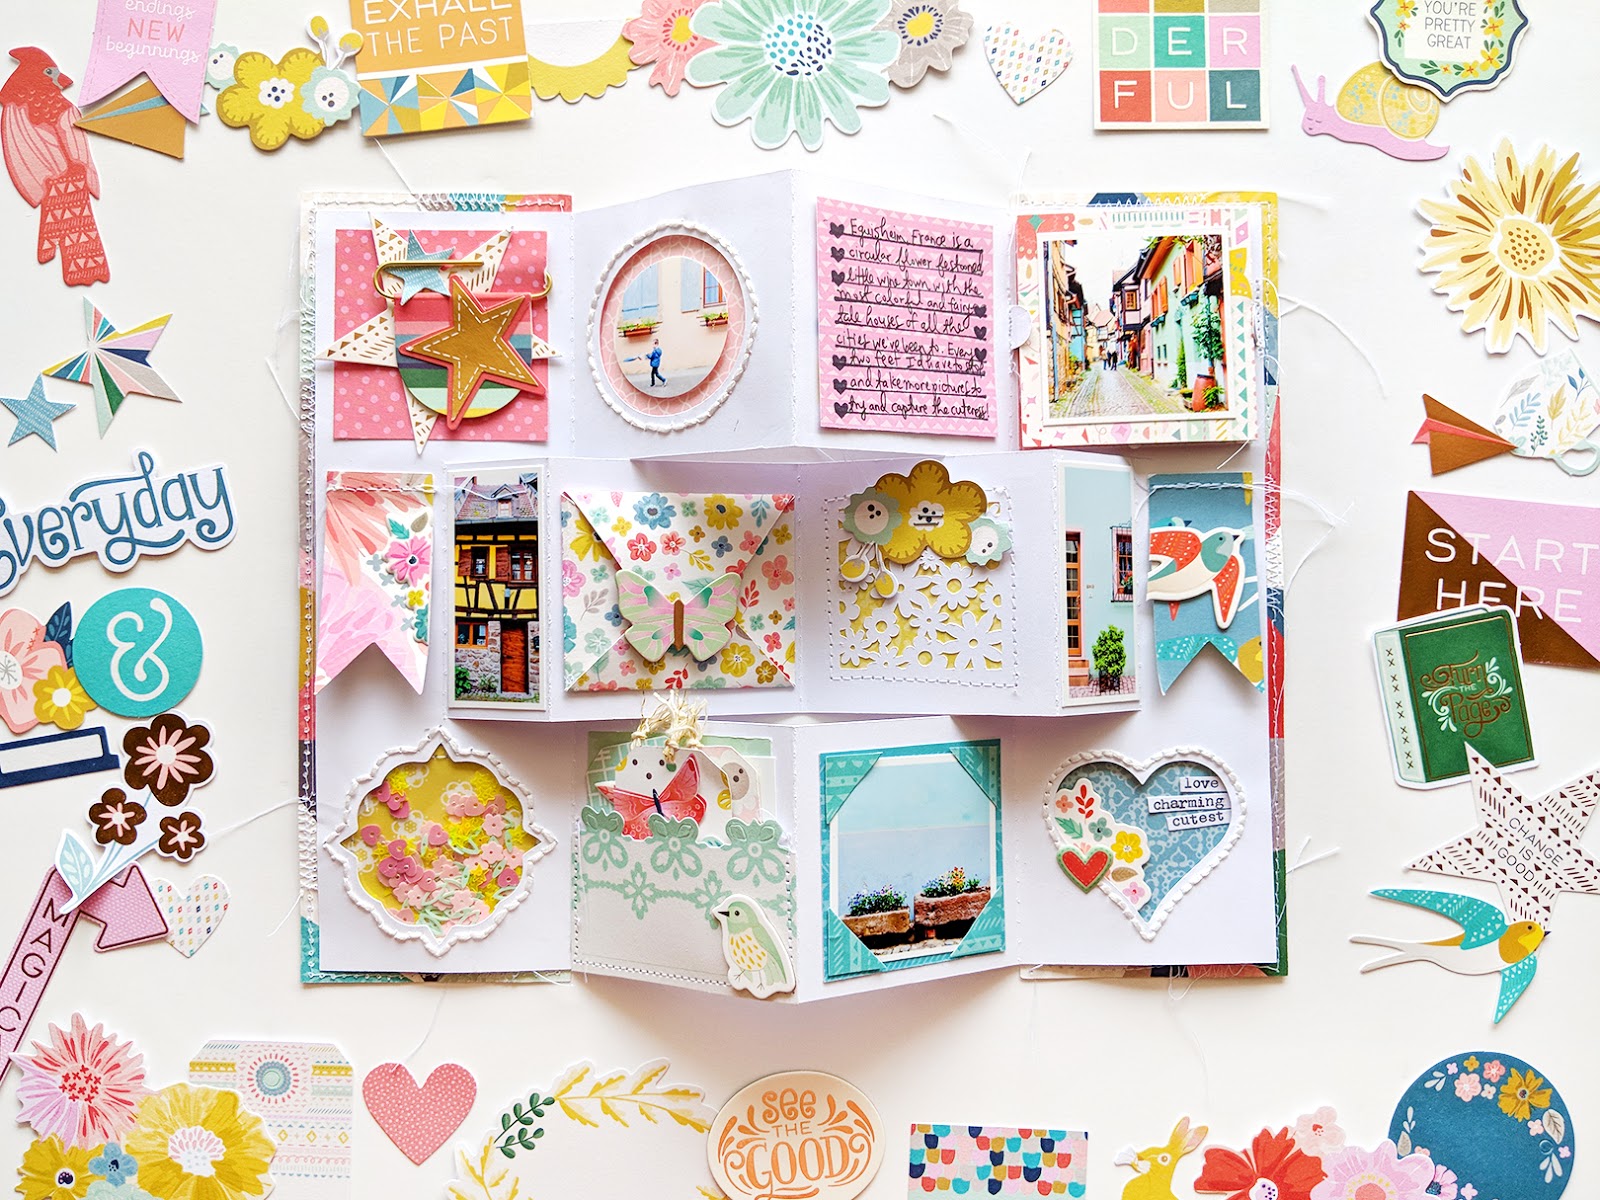
I always have a hard time narrowing down photos so any time I can add more in secret spots is a win in my (mini) book! :) Accordion book, pockets, and envelopes for the win!
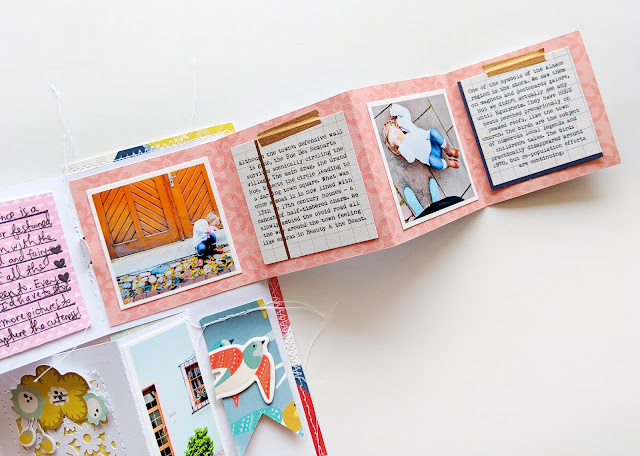 Above is the front of the accordion mini and below is the back. I used the font Remington Noiseless to print journaling onto trimmed down Journaling Spots. The copper washi tape is from the new Auburn Lane collection by Pink Paislee. I trimmed a flower Puffy Sticker in half to edge the bottom of the journaling.
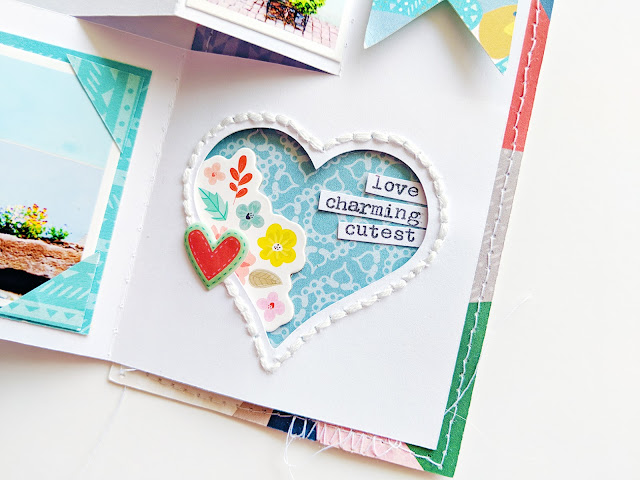
 Adding hand stitching around three of the open shapes required taking apart a few things so if you're going to add any hand stitching I would recommend doing so before assembling anything. I typed the little sentiments in the heart using my We R Memory Keepers Typecast Typewriter.
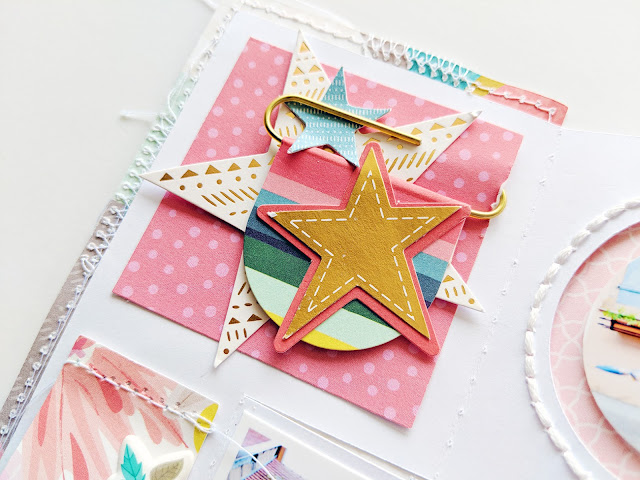
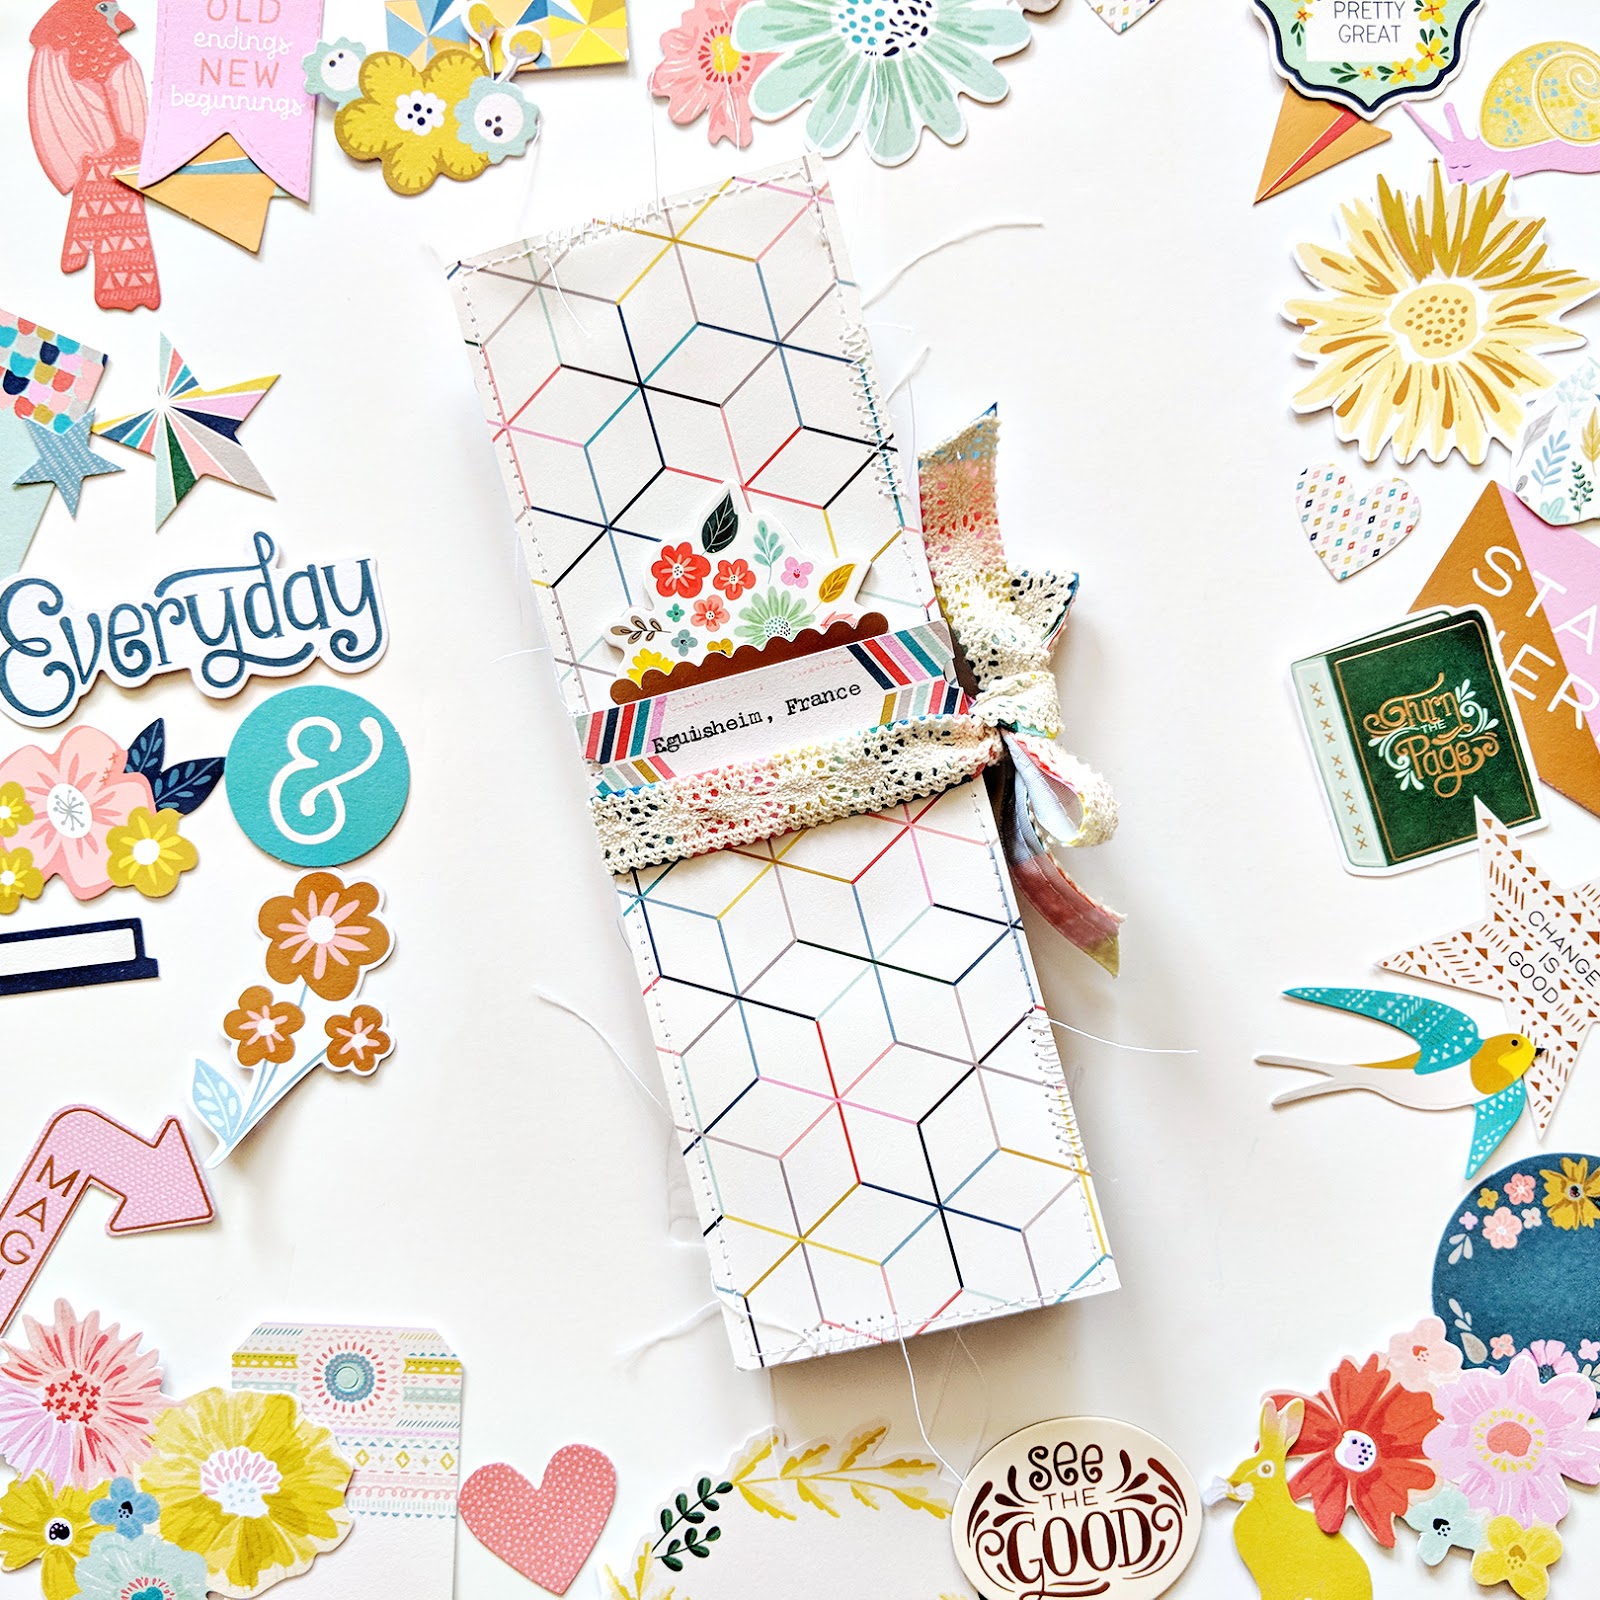
 Here is the "star section" including a star Pennant Paper Clip and two star Ephemera Die Cuts.
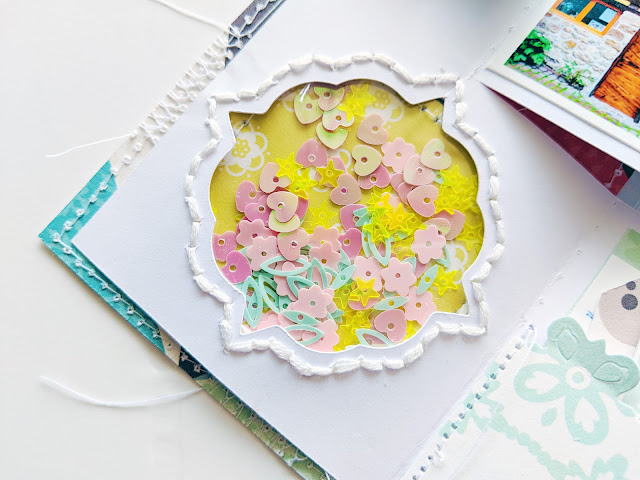
 On this section I made a shaker pocket using the Turn the Page Sequins. Full instructions are in the video at the top :)
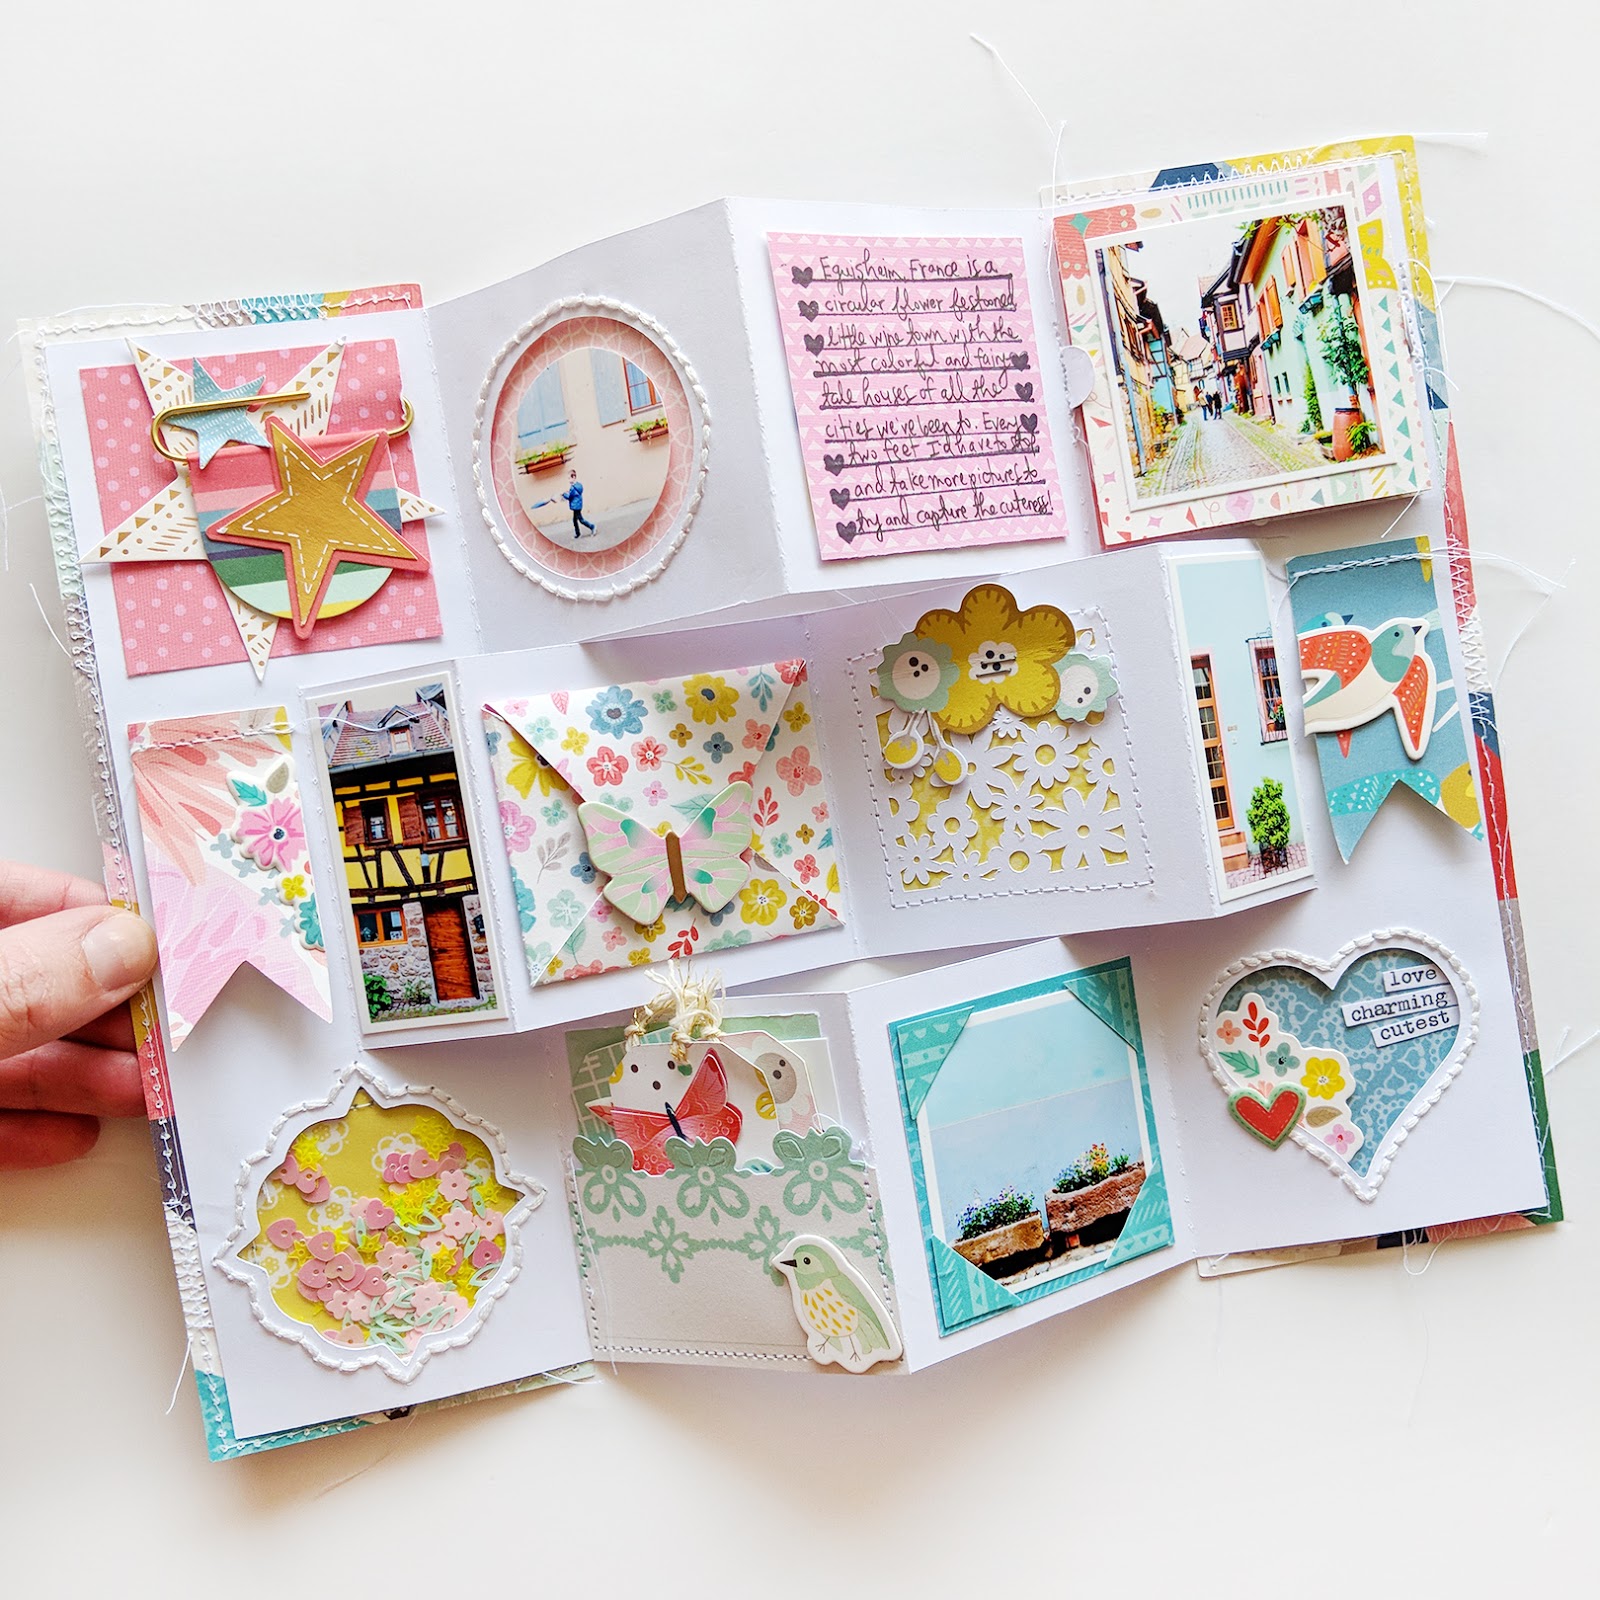
 Another view of the finished album.

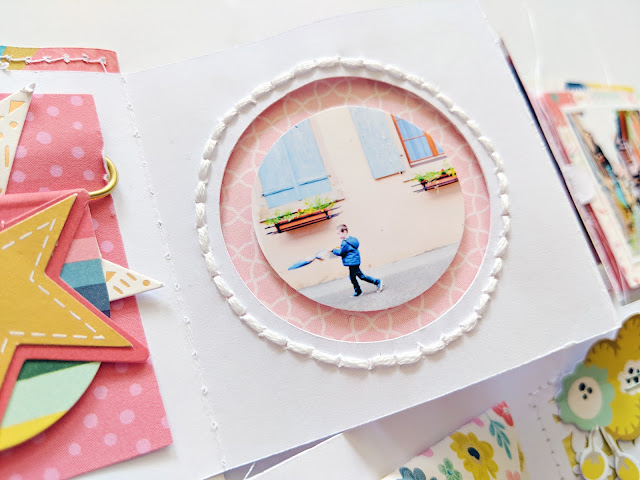
I call this the "round section". I punched the photo into a circle and placed it in the open circle with dimensional adhesive and hand stitched around the circle.
 To help keep this envelope closed when not in use I added a tiny foam square on the flap.
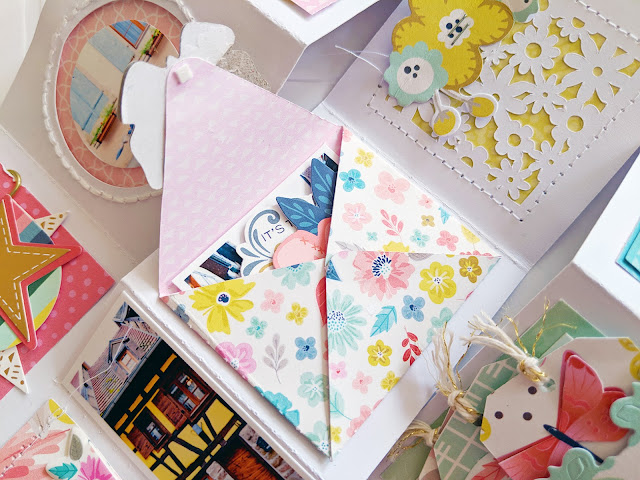 Inside the envelope I have a family photo, some die cuts, and a tag with journaling.
 In the pocket at the bottom I have another photo and three embellished tags.


Everything you see in the photo below is included in the cut file - from the squares and flower screen to the envelope, tags, open shapes, and more!

And this is what a finished mini album card looks like:
I always have a hard time narrowing down photos so any time I can add more in secret spots is a win in my (mini) book! :) Accordion book, pockets, and envelopes for the win!


I call this the "round section". I punched the photo into a circle and placed it in the open circle with dimensional adhesive and hand stitched around the circle.


I hope you are inspired to use the Mini Album Card cut file! This little book was so easy and fun to put together and most importantly family memories have been documented :)
SUPPLIES: Cut file: Mini Album Card by Paige Evans; Die cut machine: Silhouette Cameo 3; white cardstock; TURN THE PAGE: Paper 01, Paper 02, Paper 04, Paper 08, Paper 10, Paper 12, Paper 13, Paper 15, Paper 16, Paper 18, Paper 20, Paper 23, Paper 24, 2x2 Paper Pads, Sequins, Ribbon, Ephemera Die Cuts, Journaling Spots, Pennant Paper Clips, Chipboard Stickers, Puffy Stickers; OH MY HEART: Acrylic Stamps; TAKE ME AWAY: Roller Stamp; AUBURN LANE: Washi Tape; Tiny Attacher; StazOn; precision pen


Hi Paige, I love this file! I just bought it, but the SVG is missing the score lines. I have it on the dxf file, but that one doesn't work as well on my silhouette. Is there an updated file, by any chance?
ReplyDeleteHi Natalia! Sorry there are issues! Can you please tell me your email address or email me paigetaylorevans at gmail . com and I can send you the .studio3 file?
DeleteThis is AMAZING!!! What a GREAT mini!! LOVING the photos, the colors and of course, your stitching!!!!!!!!
ReplyDeleteI’m guessing this is a 12 x 12 file. I love it, but I have a Portrait which is only 8 1/2 by 11. It is a very cool project, though.
ReplyDeleteHi Renee! The mini album is rectangular in shape so it's actually perfect for a Portrait!
DeleteLove this project. Do you have any tips for hand stitching? I am finding the cardstock is creasing when I’m stitching.
ReplyDeleteJust have to practice to get the hang of how your hands move while you're stitching and preventing the paper from bending!
DeleteI was hoping on turning this into a card. What can I use as a backing? Do you have a file for that? Thanks, Debbie
ReplyDeleteIf the sections are glued to a card base they won't bend up, so I recommend just the two largest pieces included :)
DeleteJust purchased this so will be cutting and playing..great..
ReplyDeleteHi Paige. I just love this cut file, but I just can't get it to work. I've purchased the svg cut file from your etsy shop and Lori Whitlock's shop and no matter what I try, I can't get it to work on my cricut. I've spent countless hours trying to figure it out.There are no score lines and I can't attach the flower, heart or circle portions. Any help or instructions would be great. Thank you.
ReplyDeleteHi Jen! I'm so sorry the cut file isn't working, I need to have them removed from Lori's shop for Cricut users. My suggestion would be to watch this YouTube video and see if those steps will make it work: https://www.youtube.com/watch?v=q45No_wHk_s&feature=youtu.be&fbclid=IwAR34DHhFSbg5_EnlzoBnKYPNl__VgFbXuOxSBmTA617g_2EZnHGmtXHOKQQ
DeleteJust came across this tutorial and love the album. Purchased the cut file and can't wait to play. Beautifully done. Thank you.
ReplyDeleteLove this! Is there somewhere i can still find the cut file? TIA
ReplyDeleteYes it can be found in the Silhouette Store at https://www.silhouettedesignstore.com/mini-album-card-with-pocket-envelope-and-tags.html
Delete