
I am so excited to be the April guest designer for Hip Kit Club! I couldn't wait to get started creating with many of my Horizon embellishments!


First, check out the process video so you can see how exactly to make this mini album from scratch:
I started with a full 12x12 piece of white cardstock and scored a line every 2" horizontally and vertically. Then I creased the folds with the tool used for scoring. I trimmed at 6" down to the last score line, folded it over in half to create one long page, and then folded it up together accordion style to create the base. I used strong adhesive to turn the middle section into a pocket. This all makes much more sense in the video so be sure to watch it :)
Once I had the base completed I came in with the 2x2 Paper Pads from Horizon - one is filled with phrases and the other patterns. I placed all of the papers first and then filled the rest of the spots with slightly smaller than 2" square photos which I printed at home using Adobe Photoshop and a Canon Pro-100 printer.

As far as the photos, I searched through and found all of the selfies of me and Jane from the past year. I didn't realize we had so many! Which makes me so happy that she still loves to get her picture taken - I'll take it while I still can! She's also still so cuddly and snuggly. I just love her and this album was made for her to document our special moments together.

Once I had the papers and photos in place, I trimmed down the 2x2" papers ever so slightly so they would fit in the album better and then adhered them in place. A lot of times when I'm scrapping I like to use dimensional adhesive for depth and texture but in this instance I used regular double sided tape to make the album not too chunky - even though I do love a thick album!

Time for embellishing! The April Hip Kits are filled with so much yumminess. I added paper stickers, chipboard stickers, and puffy stickers throughout the album wherever I could find the space and thought it would look good. To help the tiny stickers stay in place permanently I machine stitched through them and varied between a running stitch and zig zag stitch. I trimmed off the excess threads - sometimes I leave them longer for texture but here I trimmed them up since there is a lot going on already in this album.

Inside the pocket I journaled on two tags from the Ephemera Die Cuts using a blue pen. To help anyone who looks through this know which tag to read first I numbered them with the dark blue puffy alpha/number stickers and then tucked them inside the pocket.

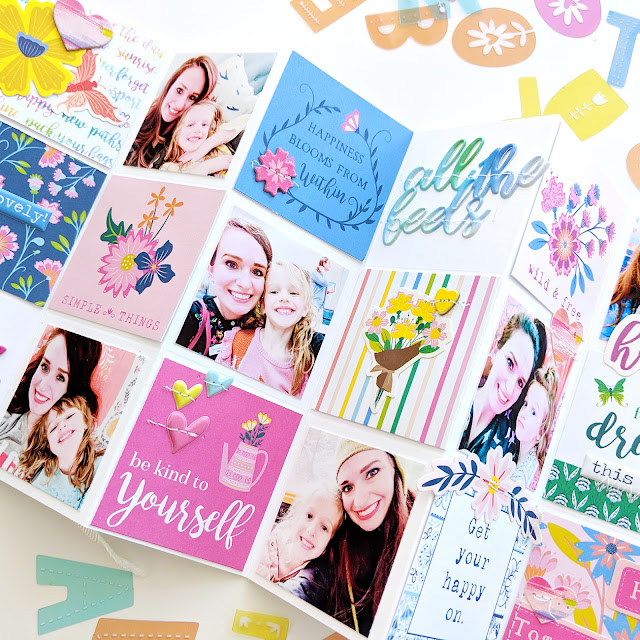


I wasn't sure how I was going to decorate the sides of the pocket at first, but then I just decided to go with the same design and filled the front and back with more 2x2 papers and stickers. Easy peasy!

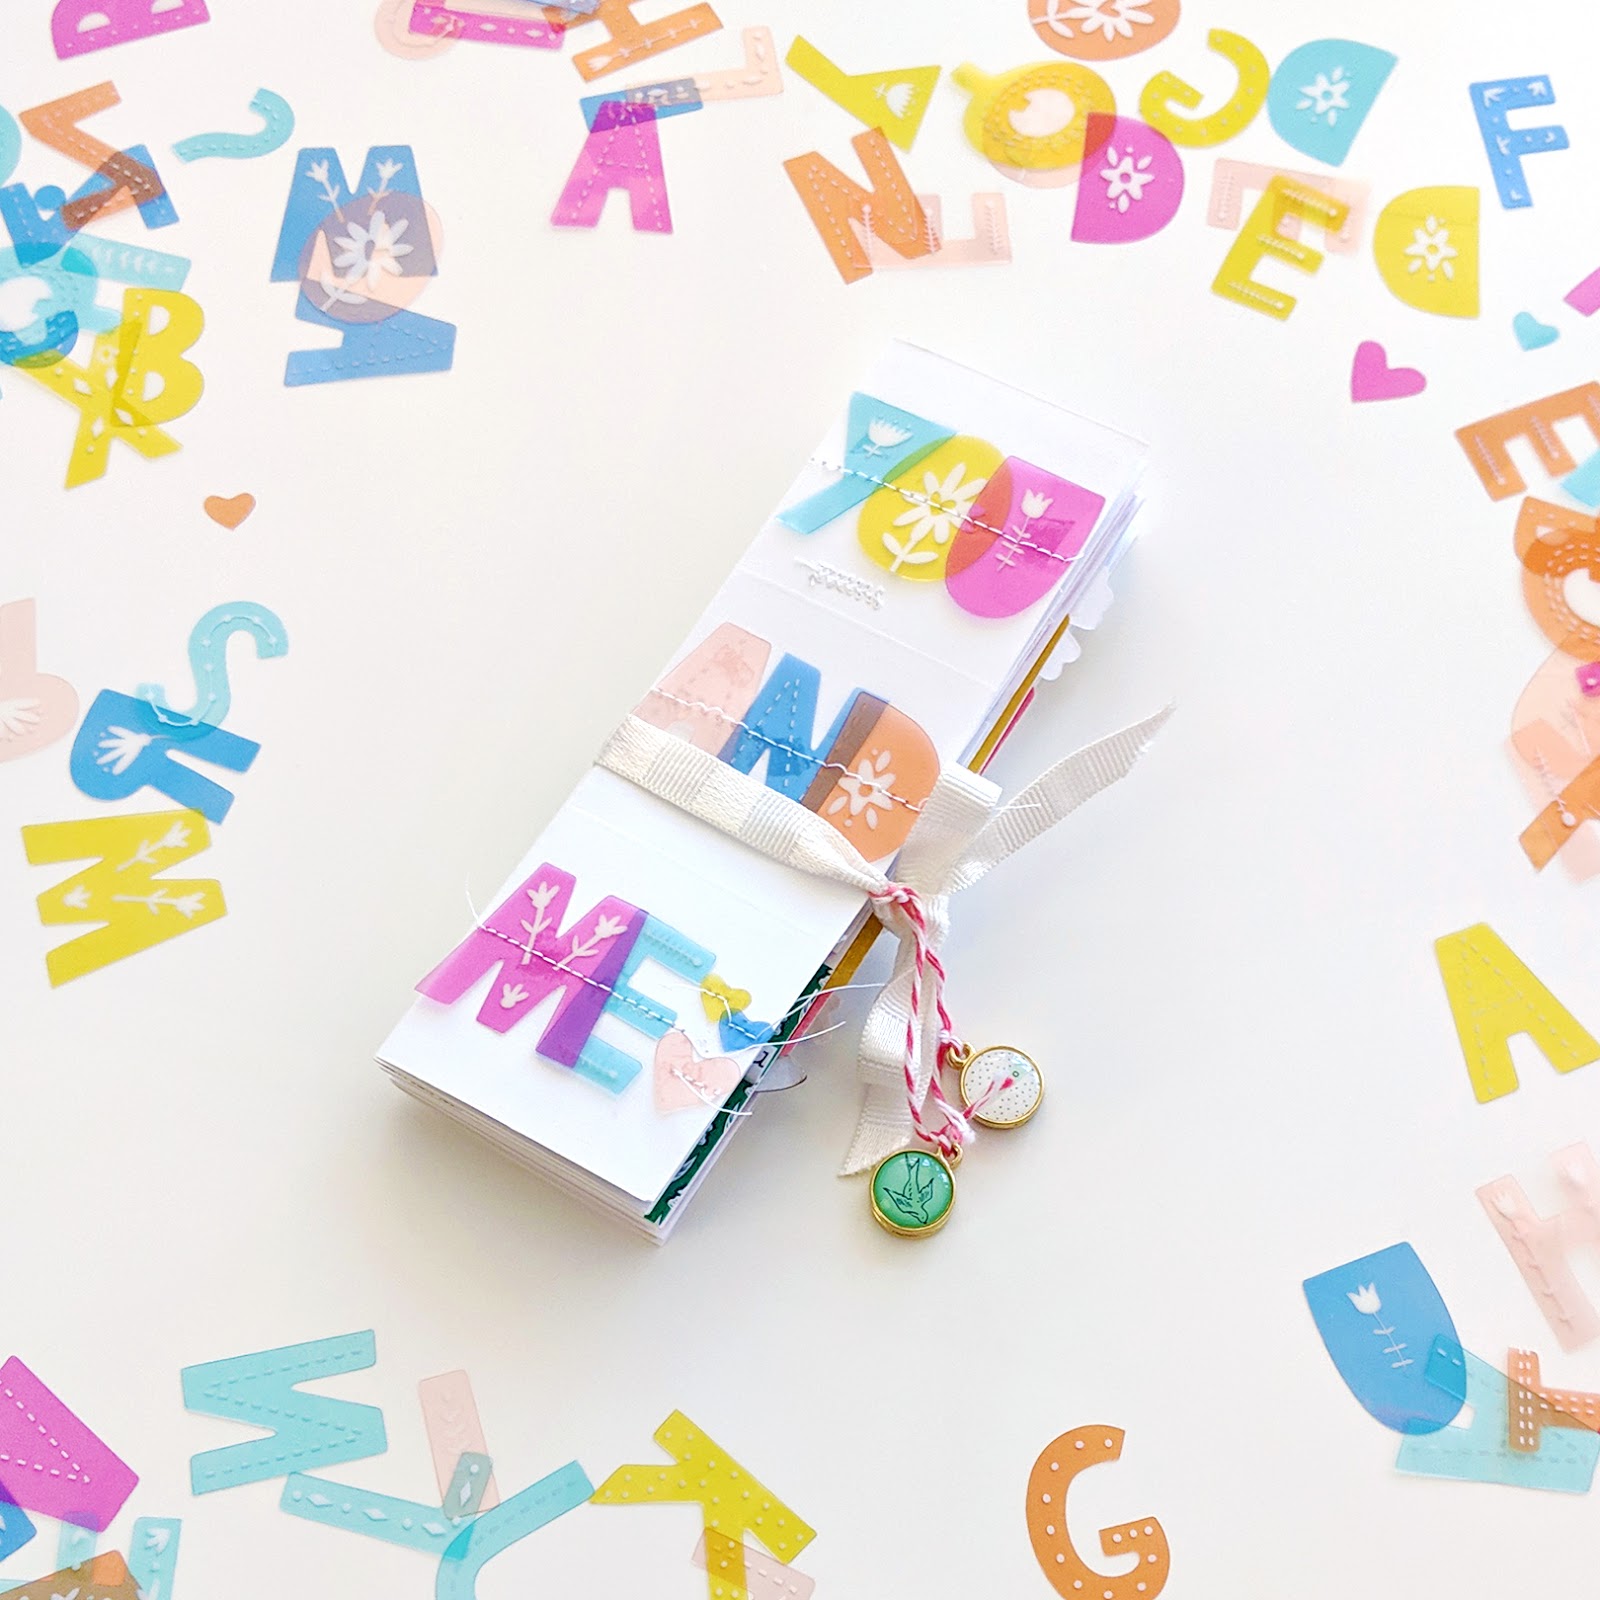
For the title on the cover I used the super cute & colorful transparency letters to say "YOU AND ME" along with a trio of hearts and machine stitched them in place. To do this I removed the photo and papers on the other side first before machine stitching, and then adhered them back in place once finished.
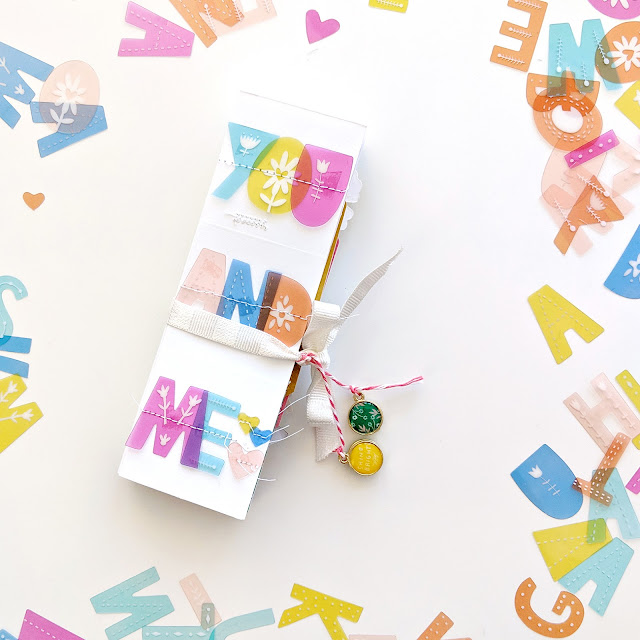
To keep the album closed I tied a piece of white ribbon from my stash in a bow around the middle and then added some charms adhered back-to-back dangling from pink baker's twine also from my stash. By having the charms stuck together no matter which side is showing it will be cute! All done!

To keep the album closed I tied a piece of white ribbon from my stash in a bow around the middle and then added some charms adhered back-to-back dangling from pink baker's twine also from my stash. By having the charms stuck together no matter which side is showing it will be cute! All done!

I hope you are inspired to create a mini album from scratch with the Hip Kit Club supplies! This project came together quickly and easily and so many precious memories are stored within it. I can't wait to give it to my daughter when she gets home from school. And since it was so easy to create, I'm definitely going to create one for Fox too :)

Thanks so much for stopping by, see you again soon!


Post a Comment