
Assembling the album base:
1. Trim a 10 x 7” piece from the floral Paper 03, fold it in half, then open it and place it flower side down.
2. Trim a 10 x 5” piece from the blue floral Paper 09, fold it in half, then open it and place it flower side down.
3. Trim an 8 x 4” piece of the green floral Paper 24, fold it in half, then open it and place it flower side down.
4. Trim a 10 x 7” piece from the colorful frames Paper 07, fold it in half, then open it and place it frames side down.
5. Using a 7" circle template, trace it onto the blue floral Paper 04, cut it out, fold it in half, then open it and place it flower side up.
6. Trim off the binder ring holes edge of a 6x8 pocket page transparency and place it on the pile long-ways so that when folded in half each side is a 2x3 pocket grid.
7. Trim an 11 ½ x 7” piece of the rainbow striped Paper 16 with the stripes oriented vertically then score at 4” and 8” from the left edge. With the striped side down, fold the left edge over. Fold over the right edge, open it back up, then place it on the pile still striped side down.
8. Using a heart template, trace it onto the orange chevron striped Paper 22, cut it out, fold it in half, then open it and place it orange side down.
9. Gather the pages together and arrange them so they’re centered and together in the crease.
10. Using the We R bookbinding tool, slide the pages up under the blue ruler, centering the crease down the middle row of holes and pushed up to the top edge of the tool.
11. Pierce a hole through the first black circle and then every other black circle, making a total of 7 holes.
12. Carefully slide the pages out, making sure to keep everything aligned so the pierced holes stay aligned (use binder clips).
13. Thread a needle with the white string and then starting at the 2nd hole on the outside of the book, stitch the album together weaving in and out of the holes. Keep the string as tight as you can without tearing the papers.

14. When you’re coming out of the hole at the top of the outside of the book, before tying a knot, thread on a Butterfly Charm. Tie the thread ends into a double knot and trim the excess. The base of the album is finished!


Embellishing the album:
1. On the cover, trim out a piece of an aqua frame from Paper 07 and add a pink floral sticker strip and scalloped border sticker strip (both from the Sticker Book) above the bottom edge of the frame.
2. Place colorful Foam Mini Thickers and mini paper alphabet stickers from the Sticker Book for the title.
3. Add a pink flower Chipboard Sticker on the right and a little segment of a gold foil floral border sticker on the left.
4. Stamp the date using black ink below (optional).

5. Adhere a 4 x 6” photo on the left side and place a chipboard floral sticker at the top edge.
6. Fussy cut a blue frame from Paper 07, use a ruler and black pen to draw journaling lines, write journaling, then adhere it to the right page.
7. Add an orange chipboard flower sticker at the bottom of the frame and tuck two leaf stickers underneath.

8. Adhere a 4 x 4” photo to the left side then add a banner of chipboard pennant stickers across the top.
9. Apply an “enjoy the moment” Rub-On below the banner then journal above the banner.
10. Fussy cut a journaling spot from Paper 01, journal on it, then adhere it to the right page.

11. Adhere a 4 x 4” photo to the left page then overlap the left edge with a heart border sticker.
12. Add a “dream” chipboard sticker to the left edge.
13. On the right page, fill in the colorful frames with stickers, chipboard stickers, rub-ons, and a flower circle punched from Paper 01 using a 1” circle punch.
14. Journal inside one of the frames.

12. Add a “dream” chipboard sticker to the left edge.
13. On the right page, fill in the colorful frames with stickers, chipboard stickers, rub-ons, and a flower circle punched from Paper 01 using a 1” circle punch.
14. Journal inside one of the frames.

15. Adhere a full 5 x 7” photo to the left page.
16. Apply “grateful” and “family” rub-ons to the top and add mini foam Thickers to say “for” between. Finish with a chipboard heart sticker above.
17. On the right semi-circular page, place colorful mini foam Thickers along the curve to say “we came we saw we conquered”.
18. Trim off the edge of a floral sticker then place the flat edge facing the spine and centered on the page.

19. Trim a “do what makes your soul happy” sentiment card from Paper 01, adhere it to the left edge of the left semi-circular page, then trim off the excess.
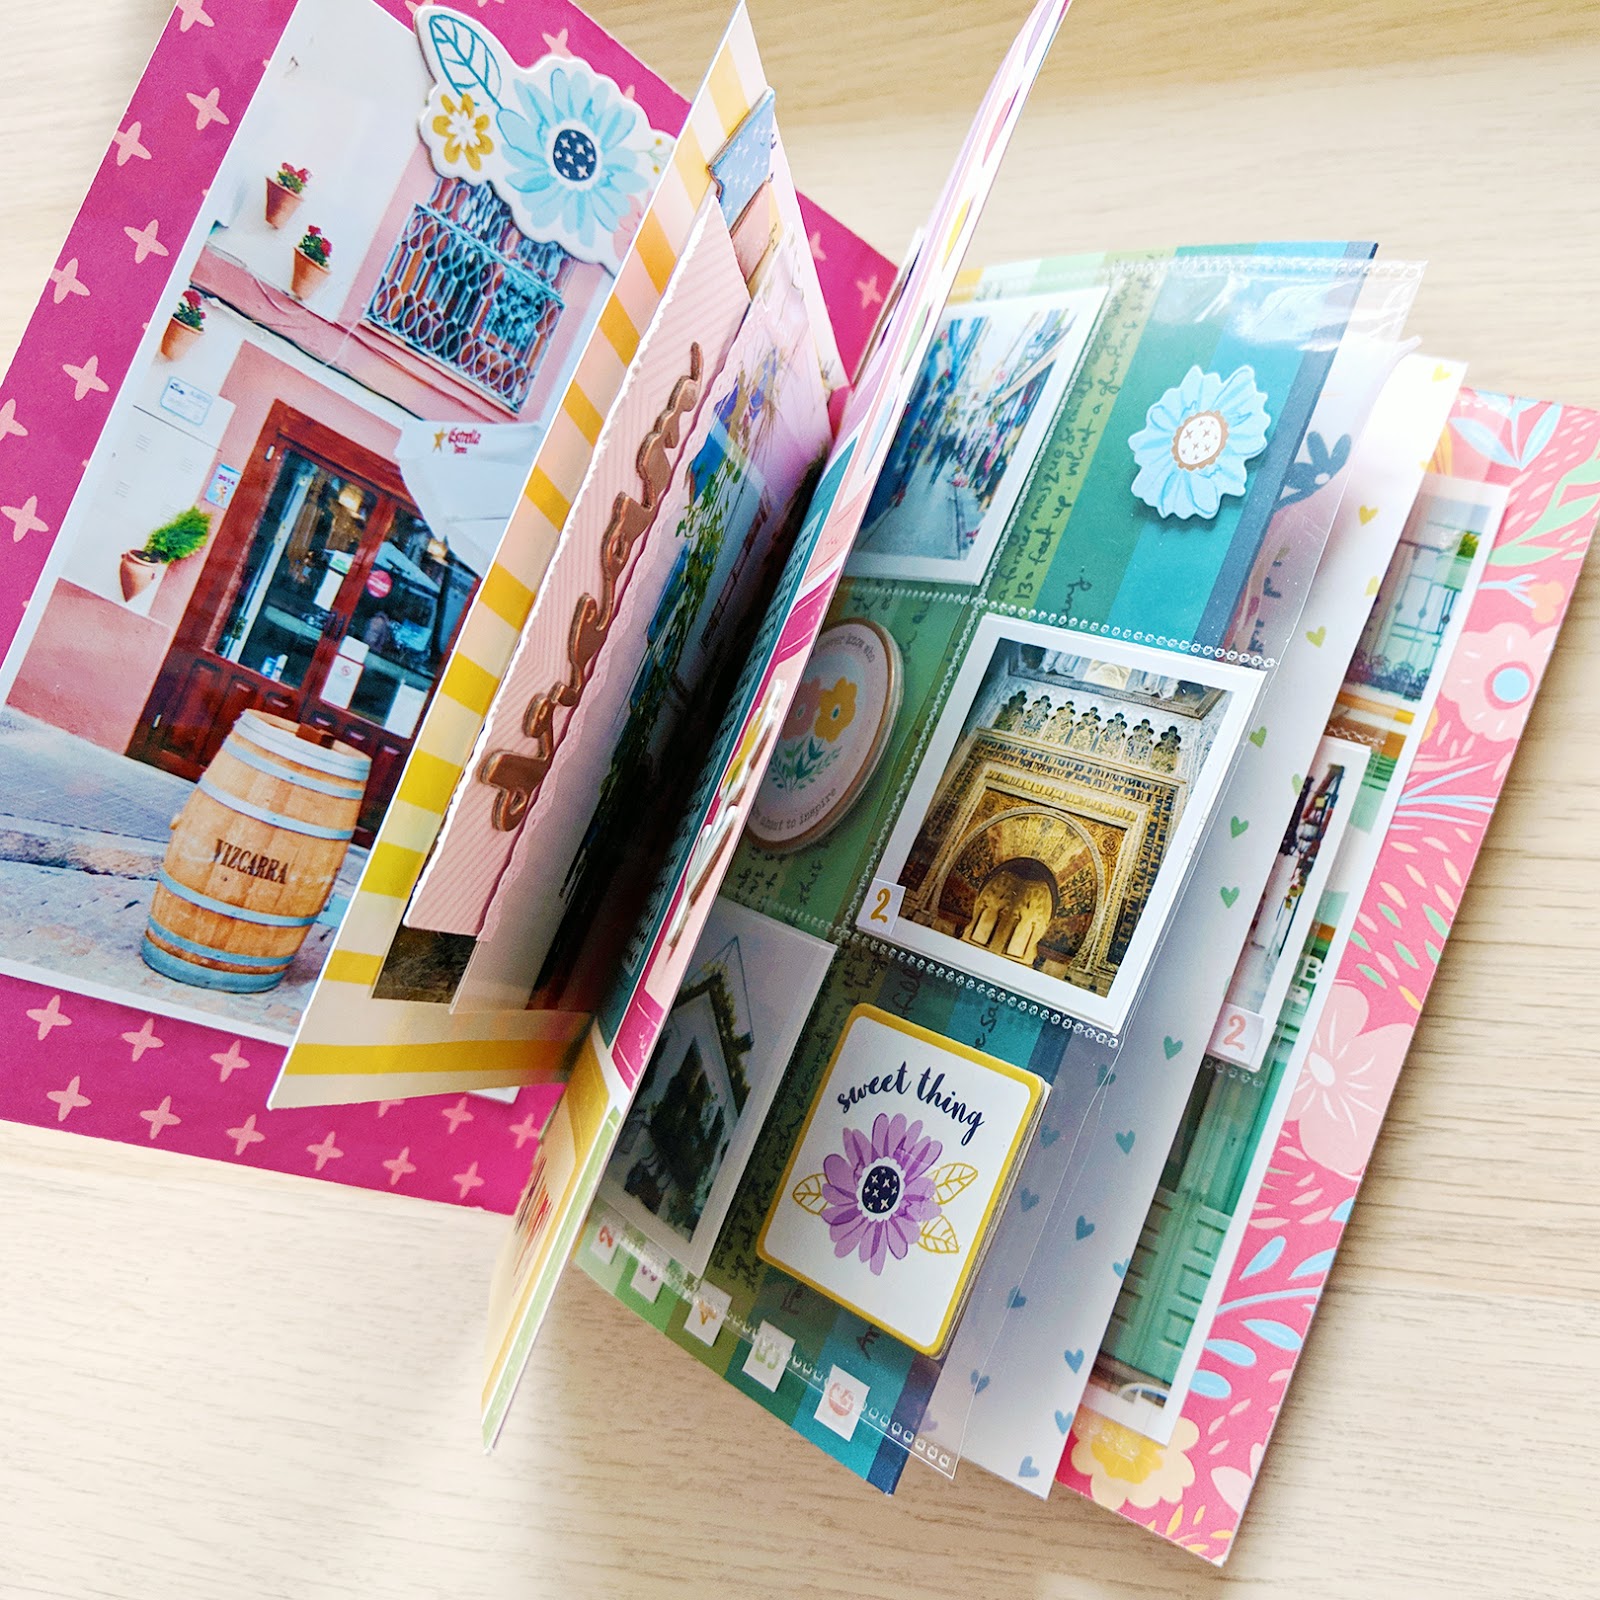
20. Place six 2” square photos (three sets back-to-back) in the top left, middle right, and bottom left sections of the pocket page protector.
21. Place two flower stickers back-to-back and add it to the top right section.
22. Place two round sentiment chipboard stickers back-to-back and place them in the middle left section.
23. Place two square chipboard stickers back-to-back and add them to the bottom right section. To keep these pieces in the pockets from moving around, add a tiny bit of adhesive to one side.
24. Place numbered stickers on the corners of the photos.

25. Add a pink flower sticker on the bottom left section of the left pocket page.
26. On the right page, place number stickers along the bottom edge and write journaling along the stripes of the paper to coordinate with the numbered photos in the pocket page.

26. On the right page, place number stickers along the bottom edge and write journaling along the stripes of the paper to coordinate with the numbered photos in the pocket page.

27. Choose a Tassel Paper Clip, adhere a flower chipboard sticker on it with super glue, then tuck it onto the right edge of the flap page.
28. On the right page, frame a 2” square photo with a chipboard sticker frame then adhere it over fussy cut flowers from Paper 03.
29. Write a bit of journaling and add a heart sticker below.

28. On the right page, frame a 2” square photo with a chipboard sticker frame then adhere it over fussy cut flowers from Paper 03.
29. Write a bit of journaling and add a heart sticker below.

30. Inside the flap, on the right page, adhere three 2” square photos down the center then apply colorful border rub-ons to the left and right edges.
31. Write a caption below the trio of photos.
32. From Paper 01, fussy cut the row of tags, keeping them connected and then fold them accordion style.
33. Adhere the back side of the last tag to the left page and keep the mini-mini-album closed with the tassel paper clip.
34. Add a bunch of flower stickers coming out from the top of the tags.

35. Open the tag mini-mini-album and add a 2” square photo to the 2nd and 4th tags, placing some floral sticker tape at the top of both.


36. On the back side of the mini-mini-album, place a 2” square photo on each tag and add a bit of sticker tape to the top edge of each photo.
37. Embellish three of the tags with rub-ons.
38. Write captions on each tag.

37. Embellish three of the tags with rub-ons.
38. Write captions on each tag.

39. Inside the center heart-shaped page, add a 2 x 3” photo to the right side and tuck the rest of the gold flower border sticker under the left edge.
40. On the left side, cascade sentiment stickers down the left side and trim any excess. Use chipboard stickers, fussy cut sentiments, paper stickers, and the pink foam mini Thickers to echo the feelings captured in the photo.

40. On the left side, cascade sentiment stickers down the left side and trim any excess. Use chipboard stickers, fussy cut sentiments, paper stickers, and the pink foam mini Thickers to echo the feelings captured in the photo.

41. On the back side of the heart-shaped page, add a 3 x 4” photo and place flower and leaf stickers at the top edge.
42. Use a ruler and black pen to draw journaling lines at the top of the right page then write journaling.
43. Apply a “fun” rub-on above the journaling then place a trio of flower stickers, a chipboard “isn’t it love” sentiment banner sticker, and a row of cross-stitch rub-ons below.

42. Use a ruler and black pen to draw journaling lines at the top of the right page then write journaling.
43. Apply a “fun” rub-on above the journaling then place a trio of flower stickers, a chipboard “isn’t it love” sentiment banner sticker, and a row of cross-stitch rub-ons below.

44. Fussy cut part of an orange frame from Paper 07 and adhere it to the top of the left page.
45. Add a gold hearts sticker strip across the top and apply a “little moments” rub-on below.
46. Journal on the rest of the frame, numbered to match the numbered photos in the right pocket page.
47. Place six 2” square photos (three sets back-to-back) in the top left, middle right, and bottom left sections of the pocket page protector then number them with stickers.
48. Punch 1” circles from the round icon shapes on Paper 01, adhere two back-to-back, and place them in the top right section.
49. Place two square chipboard stickers back-to-back and add them to the middle left section. Place a flower sticker on top on the outside of the page protector.
50. Place two flower stickers back-to-back and add them to the bottom right section. To keep these pieces in the pockets from moving around, add a tiny bit of adhesive to one side.

51. Add a gold flower sticker to the middle right pocket section.
52. Around the curve of the right page, place leaf stickers flanking a “the happy life” chipboard sticker and apply a blue flower rub-on beside it.

53. Place mini pink foam Thickers on the left page to say “we love to travel & see new places”.
54. Place a yellow heart chipboard sticker instead of the first “o”, a red flower sticker instead of the second “o”, and a light blue chipboard ampersand sticker.
55. Add a 4 x 6 “ photo to the right page and place an “imaging” chipboard banner sticker on top of it in some white space.

56. Adhere a full 5 x 7” photo to the left page.
57. Fussy cut a floral section from Paper 03 and adhere it to the top edge of the photo.
58. Fussy cut part of a frame from Paper 07 then add super strong adhesive to the left, bottom, and right sides only.
59. Add the frame to the right page to create a pocket and tuck in extra 2” square photos.
60. Apply a trio of heart rub-ons above along with a chipboard heart sticker and place a blue chipboard leaf sticker across the bottom.
61. Finish the pocket with an “amazing” sticker on top.

62. Back a pink chipboard frame sticker with a light pink piece of paper from inside one of the frames of Paper 07 then adhere it to the left page.
63. Punch a 1” circle from the floral circle on Paper 01 then add it inside the frame.
64. Adhere a 4” square photo to the right page and add a gold chipboard “whimsical” sticker to the top edge.
65. Embellish the top right corner with a pink chipboard flower sticker and two green leaf stickers.

66. Adhere a 3 x 4” photo to both pages, centered.
67. On the left page, embellish the top left corner of the photo with a yellow and a blue chipboard cloud sticker and a 1” circle punched butterfly from Paper 01.
68. Use a black pen to draw a frame around the right photo then place three trios of round stickers/chipboard stickers.
69. Write journaling around the rest of the drawn frame to finish your album!
70. Keep the book closed with a binder clip.
SUPPLIES: WHIMSICAL: Paper 01, Paper 03, Paper 04, Paper 07, Paper 09, Paper 16, Paper 22, Paper 24, Foam Mini Thickers, Sticker Book, Rub-Ons, Chipboard Stickers, Tassel Paper Clips, Butterfly Charms; Other: 6x8 Pocket Page Protector, White Thread, Scoring board & tool, 1” circle punch, hole punch, bookbinding tool, heart template, circle template, adhesive, paper cutter, scissors, fine tipped scissors, journaling pen, ruler, black StazOn ink, needle, binder clips, roller date stamp
Photo Sizes: (2) 4 x 6”, (3) 4 x 4”, (2) 5 x 7”, (26) 2 x 2”, (1) 2 x 3”, (3) 3 x 4”
Photo Sizes: (2) 4 x 6”, (3) 4 x 4”, (2) 5 x 7”, (26) 2 x 2”, (1) 2 x 3”, (3) 3 x 4”


Wow wow wow!!!! You always amaze me!! This is GORGEOUS! LOVING the colors, the circular pages, the photos!!! Just simply STUNNING!!!!!!
ReplyDeleteLove this album, Paige. It is just beautiful. Thank you �� for sharing. ������������✨
ReplyDeleteOmgosh! You're a star Paige. You've provide such great instructions and photo's. I see this post must have been a ton of work to put together. Thank you so much!
ReplyDelete