
Hey crafty, scrappy friends! Amber Mitchell here on Paige's blog today to share with you this fun, spring-themed mini album I created using the Envelope cut file and the new Bloom Street collection!
 With Spring finally in the air and Easter just around the corner, I thought a floral mini album would be the perfect way to document all of those upcoming memories. And since I like to plan ahead, I've made my mini early so that all I need to do now is add photos once the holiday has come and gone.

The base of the mini album was created using the B-E-A-UTIFUL Speciality Transparency Paper. The floral print screams spring while the iridescent polka dots draw the eye in. I also love the idea of using a clear base for this project as it provides a little sneak peek at the inside of the album. To assemble the base, I started by cutting a 2.75 by 11.5" strip from the transparency. I then scored along the 11.5" side at 1.5, 3, 6.5, and 8". When working with a material like acetate, it's important to get a crisp score and crease as it will make bending and folding the paper easier. For decoration, I stitched a purple strip of Paper 15 along the length of the base. To keep the album closed I used a velcro dot, but a magnet or string closure would work just as well.

For the pages of album I used envelopes. Paige has several fun envelope cut files to choose from and I loved the simplicity of this Envelope. It was simple, yet still had character in its shape. I resized the envelopes to 2 3/8 by 3.25" so they'd fit perfectly in the base I created. I then cut 8 separate envelopes from the following papers: Paper 03, Paper 04, Paper 06, Paper 08, Paper 09, Paper 12, Paper 15, and Paper 19.

Once cut, I paired the envelopes together by taking two, lining them up side by side, and stitching them together using a zig-zag stitch and my sewing machine. A zig-zag stitch down the edges of them binds the two envelopes together but also allows them to be folded like pages. I did this four times in total to pair all 8 of my envelopes together.


With my pages now made, I worked on the binding of the album. I chose to use four strands of elastic in alternating colors of pink and purple. I tied these to the spine, making sure the knots were tight, and cut off any excess elastic. Then I slipped the pages in, one pair to one elastic band, and the entire base of the project was done!

Moving onto embellishments, I first started with the spine. I used my Crop-A-Dile to set a purple eyelet near the top of the spine and from that I attached two of the Flower Charms using jump rings.

For the cover I decorated the small flap on the outside of the album. I first layered up Floral Die Cuts and then added a dimensional flower I created using the Layered Flower and Leaves cut file. I finished off the cover with a cute Layered Butterfly Sticker and then moved on to the inside envelopes.

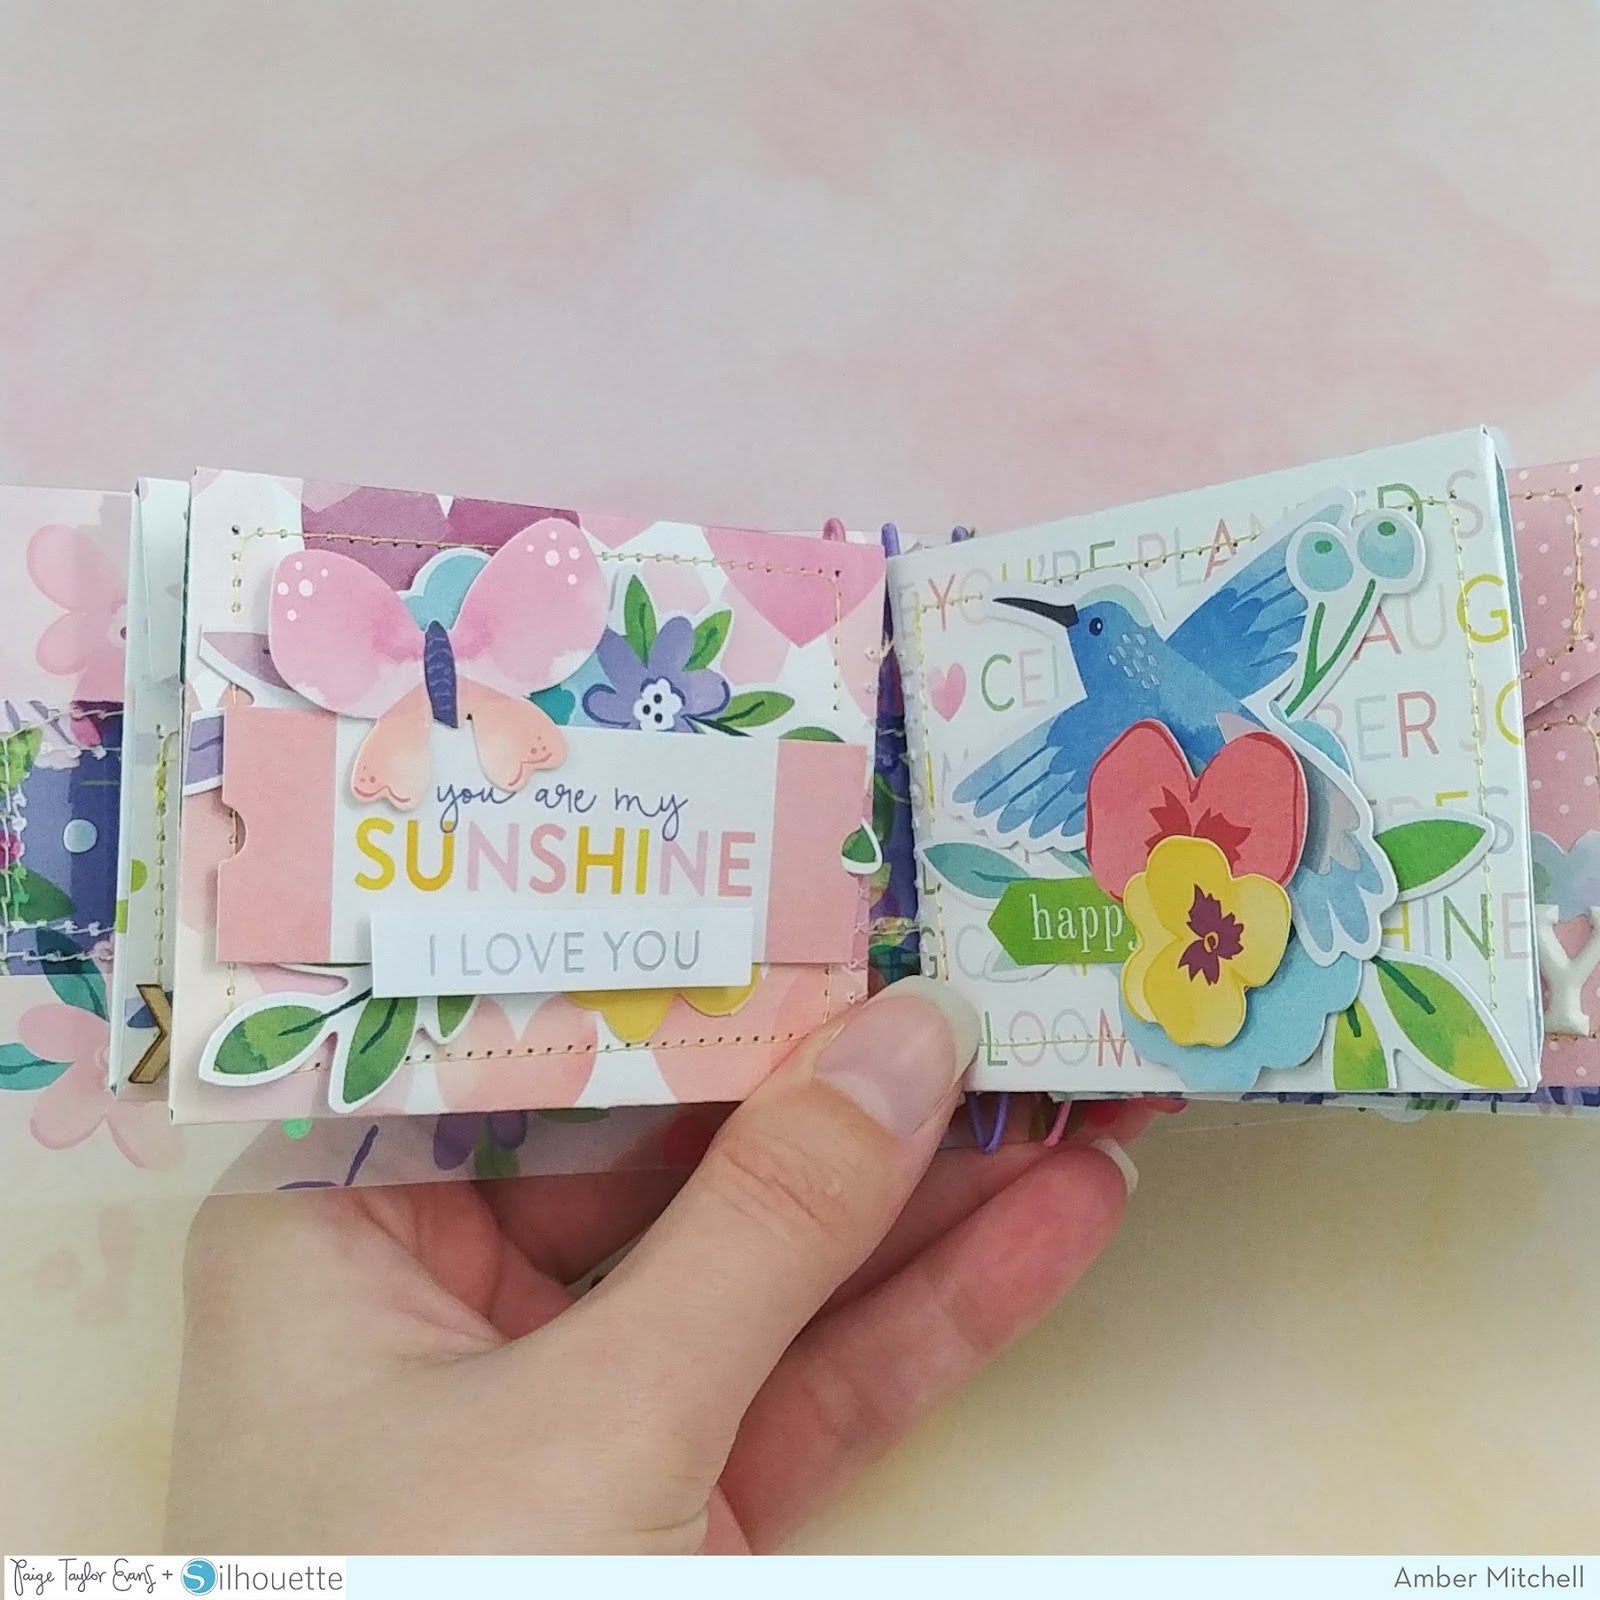
To embellish the inside of this album, I used all of the beautiful bits from Bloom Street. I started with the Floral Die Cuts and added a sprinkle of flowers throughout the entire album. I just love the look of florals! I then used the Ephemera Die Cuts and Cardstock Stickers to add sentiments and character. One of my favorite pieces from this collection are the Layered Butterfly Stickers so I made sure to add those throughout the album as well and they really just tied the whole spring-theme together!
Although I mostly decorated the backs of the envelopes (more room to embellish!) I couldn't leave the fronts of them blank. I used the Puffy Word Stickers, Cardstock Stickers, Ephemera Die Cuts, and the 4-Page Sticker Book to embellish those up as well. I also pulled some wood veneers from my stash and added those to give the album a bit of a rustic look.

And now it's all ready for photos! If you'd like a closer look at this album, be sure to check out this video:
Thanks so much for stopping by Paige's blog today! See you next time with another fun craft!


The base of the mini album was created using the B-E-A-UTIFUL Speciality Transparency Paper. The floral print screams spring while the iridescent polka dots draw the eye in. I also love the idea of using a clear base for this project as it provides a little sneak peek at the inside of the album. To assemble the base, I started by cutting a 2.75 by 11.5" strip from the transparency. I then scored along the 11.5" side at 1.5, 3, 6.5, and 8". When working with a material like acetate, it's important to get a crisp score and crease as it will make bending and folding the paper easier. For decoration, I stitched a purple strip of Paper 15 along the length of the base. To keep the album closed I used a velcro dot, but a magnet or string closure would work just as well.
For the pages of album I used envelopes. Paige has several fun envelope cut files to choose from and I loved the simplicity of this Envelope. It was simple, yet still had character in its shape. I resized the envelopes to 2 3/8 by 3.25" so they'd fit perfectly in the base I created. I then cut 8 separate envelopes from the following papers: Paper 03, Paper 04, Paper 06, Paper 08, Paper 09, Paper 12, Paper 15, and Paper 19.

Once cut, I paired the envelopes together by taking two, lining them up side by side, and stitching them together using a zig-zag stitch and my sewing machine. A zig-zag stitch down the edges of them binds the two envelopes together but also allows them to be folded like pages. I did this four times in total to pair all 8 of my envelopes together.


With my pages now made, I worked on the binding of the album. I chose to use four strands of elastic in alternating colors of pink and purple. I tied these to the spine, making sure the knots were tight, and cut off any excess elastic. Then I slipped the pages in, one pair to one elastic band, and the entire base of the project was done!

Moving onto embellishments, I first started with the spine. I used my Crop-A-Dile to set a purple eyelet near the top of the spine and from that I attached two of the Flower Charms using jump rings.

For the cover I decorated the small flap on the outside of the album. I first layered up Floral Die Cuts and then added a dimensional flower I created using the Layered Flower and Leaves cut file. I finished off the cover with a cute Layered Butterfly Sticker and then moved on to the inside envelopes.

To embellish the inside of this album, I used all of the beautiful bits from Bloom Street. I started with the Floral Die Cuts and added a sprinkle of flowers throughout the entire album. I just love the look of florals! I then used the Ephemera Die Cuts and Cardstock Stickers to add sentiments and character. One of my favorite pieces from this collection are the Layered Butterfly Stickers so I made sure to add those throughout the album as well and they really just tied the whole spring-theme together!
Although I mostly decorated the backs of the envelopes (more room to embellish!) I couldn't leave the fronts of them blank. I used the Puffy Word Stickers, Cardstock Stickers, Ephemera Die Cuts, and the 4-Page Sticker Book to embellish those up as well. I also pulled some wood veneers from my stash and added those to give the album a bit of a rustic look.

And now it's all ready for photos! If you'd like a closer look at this album, be sure to check out this video:
Thanks so much for stopping by Paige's blog today! See you next time with another fun craft!
SUPPLIES: Patterned papers, stickers, embellishments, die cuts: BLOOM STREET; Die cut machine: Cricut; Cut files: Envelope and Layered Flower and Leaves by Paige Evans

Location: California, USA / Blog: Happy Crafty Studio / Instagram: @bambismail / YouTube: bambidearr / Pinterest: bambidearr


Love love love this!!! So gorgeous!!!
ReplyDeleteSo, my mind is blown, LOL! That is so tiny and pretty Amber! All the sewing on the envelopes looks amazing and I really love the acetate cover. Two envelopes zig-zagged together is another lovely idea! Absolutely a gem! xK
ReplyDeleteWow!! Amazing 💕💕💕💕
ReplyDeleteOh My Goodness! I made one today in preparation for my 9-year-old granddaughter's visit tomorrow. I have all the parts ready for her to make one herself. It's time for her to learn how to use a sewing machine! She will love this project. It's absolutely adorable! Your tutorials are also very easy to follow. Thank you for sharing all of your BEAUTIFUL projects.
ReplyDelete