
Hello crafty friends! Amber Mitchell here on Paige’s blog today to share with you this pocket mini album that I created using Bungalow Lane!
I have been having such a fun time working with this collection. Fall is my favorite time of year and this collection is full of all the things that make this season great!
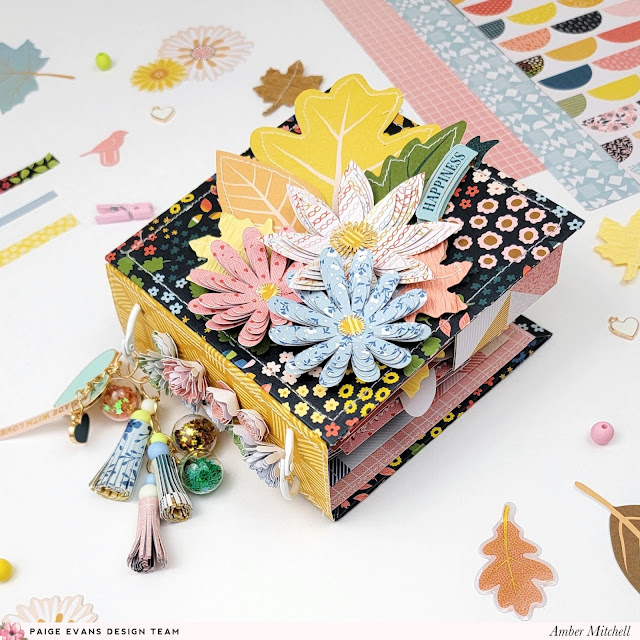
To create the covers of this mini, I used two pieces of chipboard that measured 4.5 x 4.5 inches. I wrapped these using Paper 11. To hold the covers together, I created a spine from another piece of this paper that measured 3.25 x 4.5 inches. I scored on the 3.25-inch side at ¾ of an inch on both ends, then used those tabs to add the spine to the inside of the covers. To line my album, I used Paper 16.
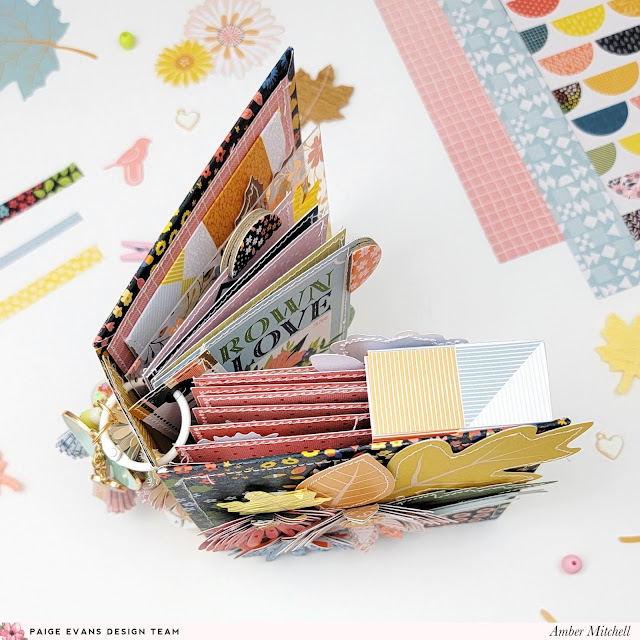
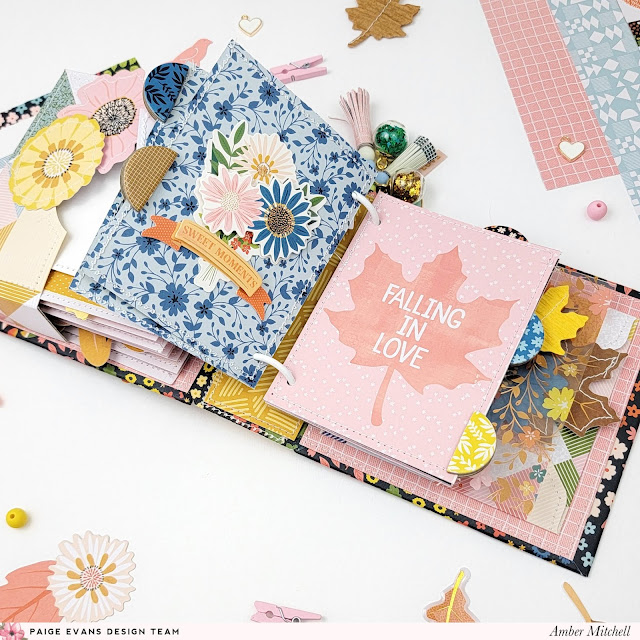
I added 1-inch binder rings to this spine which, alone, would hold a ton of pages. However, I wanted to add a pocket to hold even more. My pocket is 1-inch in depth. I created this using a sheet from Paper 8 that measured 5 x 6.25 inches. I scored on the 5-inch side at 2 inches on either end and I scored on the 6.25-inch side at 1 inch on either end. I then cut the squares in the center into tabs and used those to adhere the pocket together. In hindsight, I would have made the pocket a bit smaller in depth, but I do love just how many pages it can hold inside of it!
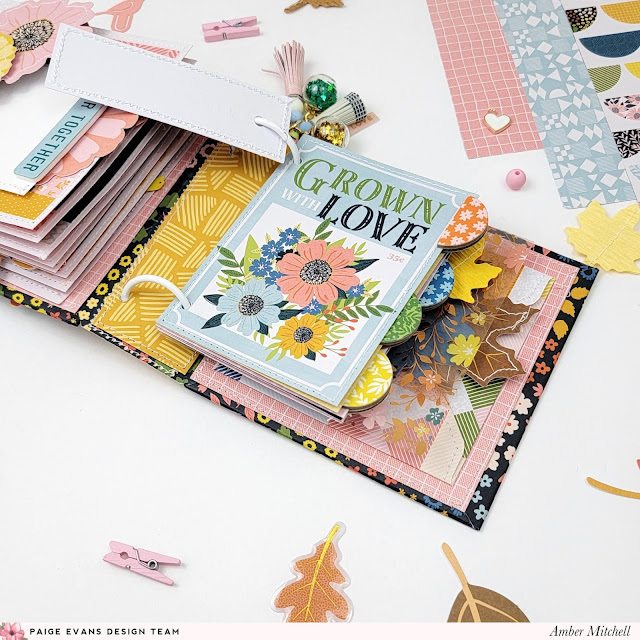
To create the pages for the pocket, I used Paper 1 and cut it into 4x4 inch squares. I then layered 3x3 inch photo mats on top which I popped up on some foam tape. The foam tape actually helped to fill out the pocket a bit more which prevents the pages from moving around too much or from falling out of the pocket. Dimensional embellishments from Bungalow Lane also helped with that.
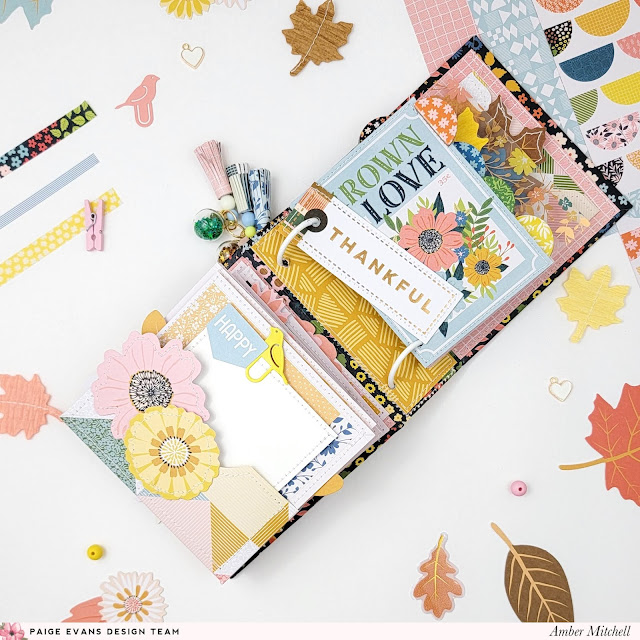
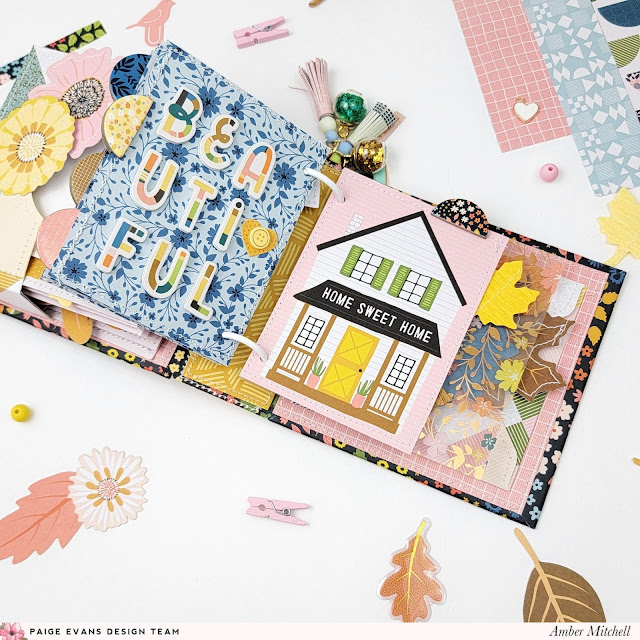
When it came to making the pages for the binder rings, I decided to use some of the fun cut-aparts from Paper 23. I love the size of these! As a fun transition page, I used a 4x4 inch square that I cut from the Floral Transparency.
On the inside of my back cover, I created a 3x3 inch envelope that I created with an Envelope Punch Board. I adhered this down and used craft magnets to keep it closed. I love using envelopes in mini albums lately; I think they make the perfect tuck spot for extras! When it came to embellishing this mini, I used a majority of the bits and pieces from Bungalow Lane.
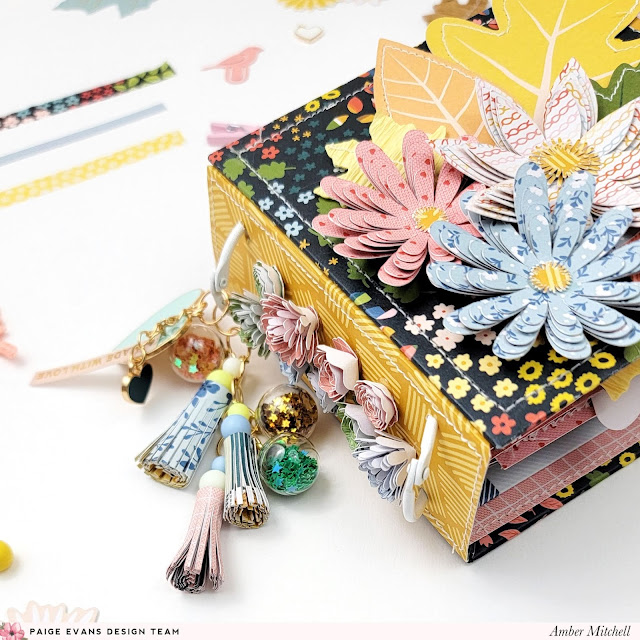
On the cover, I layered up some leaves from the Floral Die Cuts with paper flowers I made using Paige's Layered Flower and Leaves cut files. As a title, I used the “Happiness” sentiment from the Layered Stickers and as a finishing touch I added Stitched Leaves. Along the spine I added more flowers I made with Paige's Rolled Flowers cut files and, of course, a dangle of tassels and charms, including one of the Heart Charms.
To create tabs for the pages, I used the semi-circles from the Chipboard Stickers. To embellish the transition page, I used more of the Stitched Leaves. To decorate the pages in the pocket, I used the previously mentioned embellishments along with the Thickers, Foam Phrase Stickers, and 8-Page Sticker Book to add sentiments throughout.
Thanks so much for stopping by my post today! I’ll see you next time with another fun project!
SUPPLIES: Patterned papers, stickers, die cuts, paper clips, charm, washi tape, embellishments: BUNGALOW LANE; Cut files: Layered Flower and Leaves and Rolled Flowers by Paige Evans

Location: California, USA / Blog: Happy Crafty Studio / Instagram: @bambidearr / YouTube: bambidearr / Pinterest: bambidearr


Another beautiful project Amber! All the many gorgeous details and ideas are super fun. I'm sorry, I got a bit mixed up on the cover part. So, you wrapped the covers and spines separately and then taped them together? Is that right? Is there also Chipboard in the spine? Can I ask too hon, what is the final measure of the spine on your finished mini? Aren't I nosey? LOL 🧡🌸xK
ReplyDeleteHi Kelly! Thank you so much! ❤ So, the covers are wrapped chipboard and the spine is made from just a sheet of patterned paper. It measures about 1.5 inches in width once assembled and attached to the covers. Hope that helps! 😊
ReplyDelete