
Hello crafty friends! Amber Mitchell here on Paige's blog today to share with you a super colorful 4x4 Mini Album I created using the new Blooming Wild collection!

Last year I created my first 4x4 mini album using Paige's Splendid collection and her Virtual 4x4 Mini Album Class. I had so much fun putting that album together so I decided to create another one! I used another 4x4 Mini Album designed by Paige as the base, this one featuring colorful stripes. I thought the colors on this album matched the Blooming Wild collection perfectly.
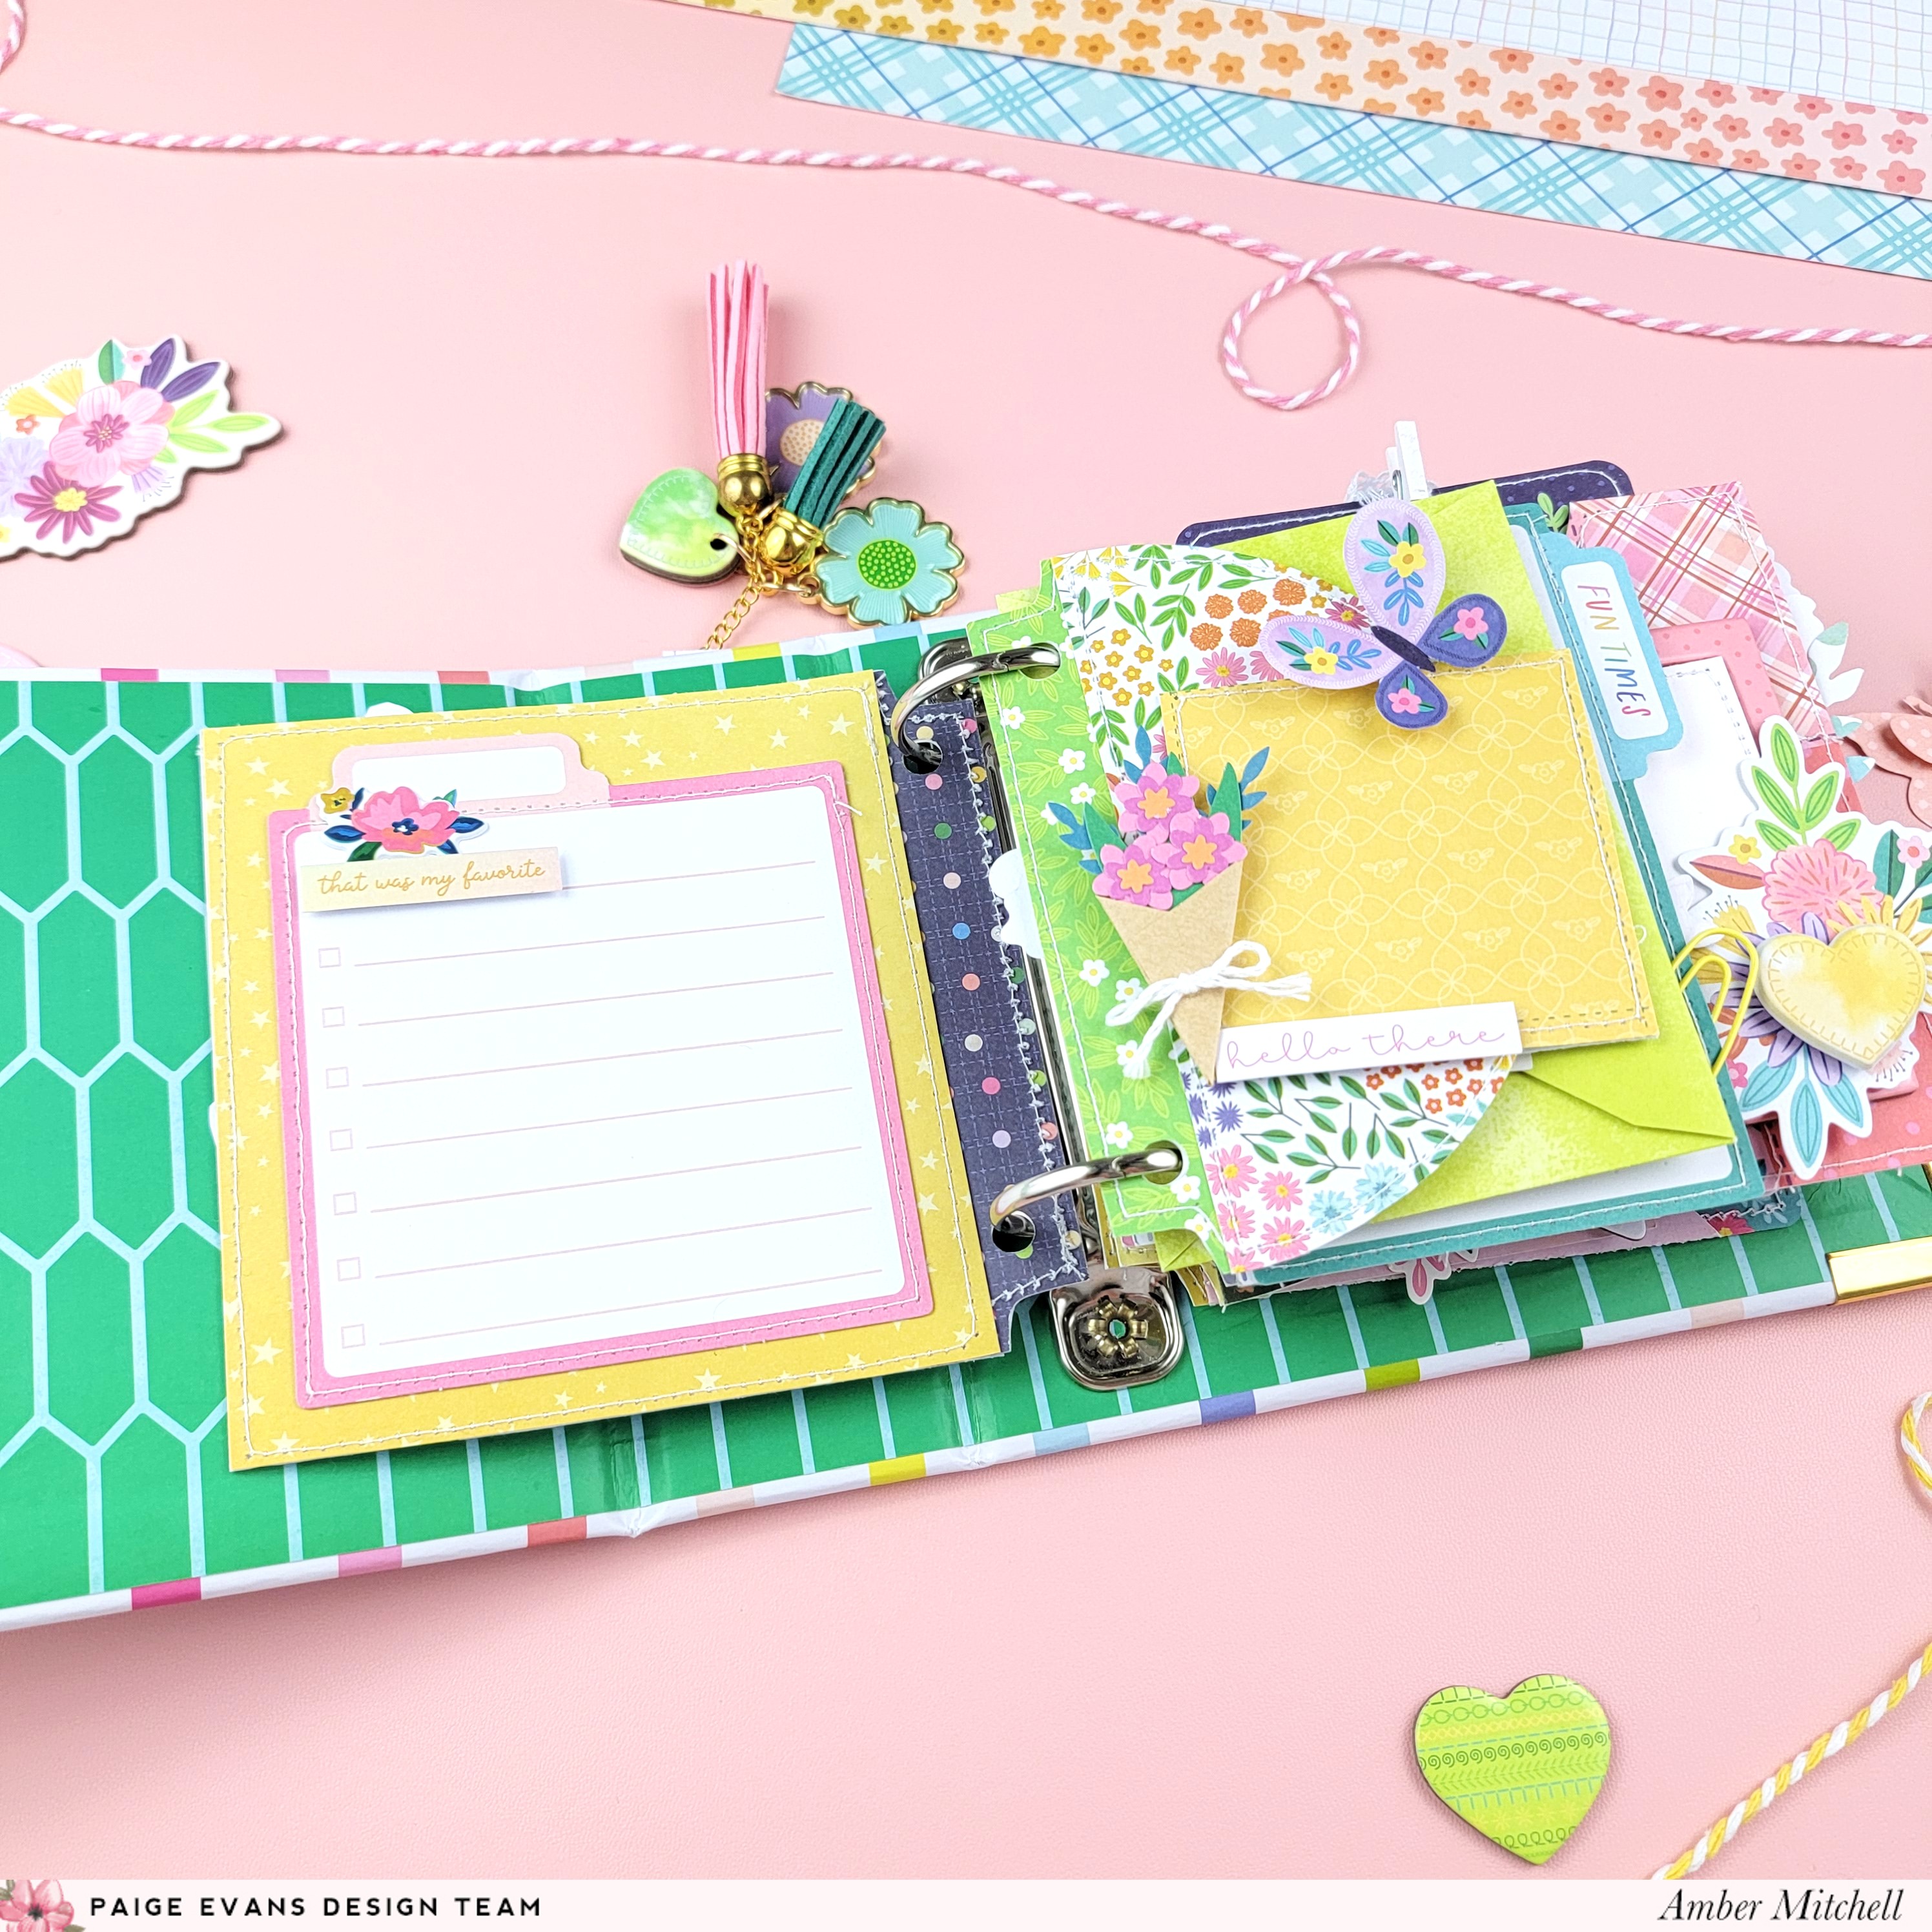
To make the pages of this album, I first cut several tabs using the cut file that is included in the class. I love how much simpler this makes the process of creating pages of all sorts. The pages I created vary in size and shape. I created two of them using envelopes (one store bought and one handmade using the Envelope Cut File from Paige). This was a fun way to add more space for photos, memories, and tuck-ins. To embellish one of these envelopes, I used the Chipboard Alphabet Outlines with Patterned Paper Backing Pieces to spell out ILY (I Love You).
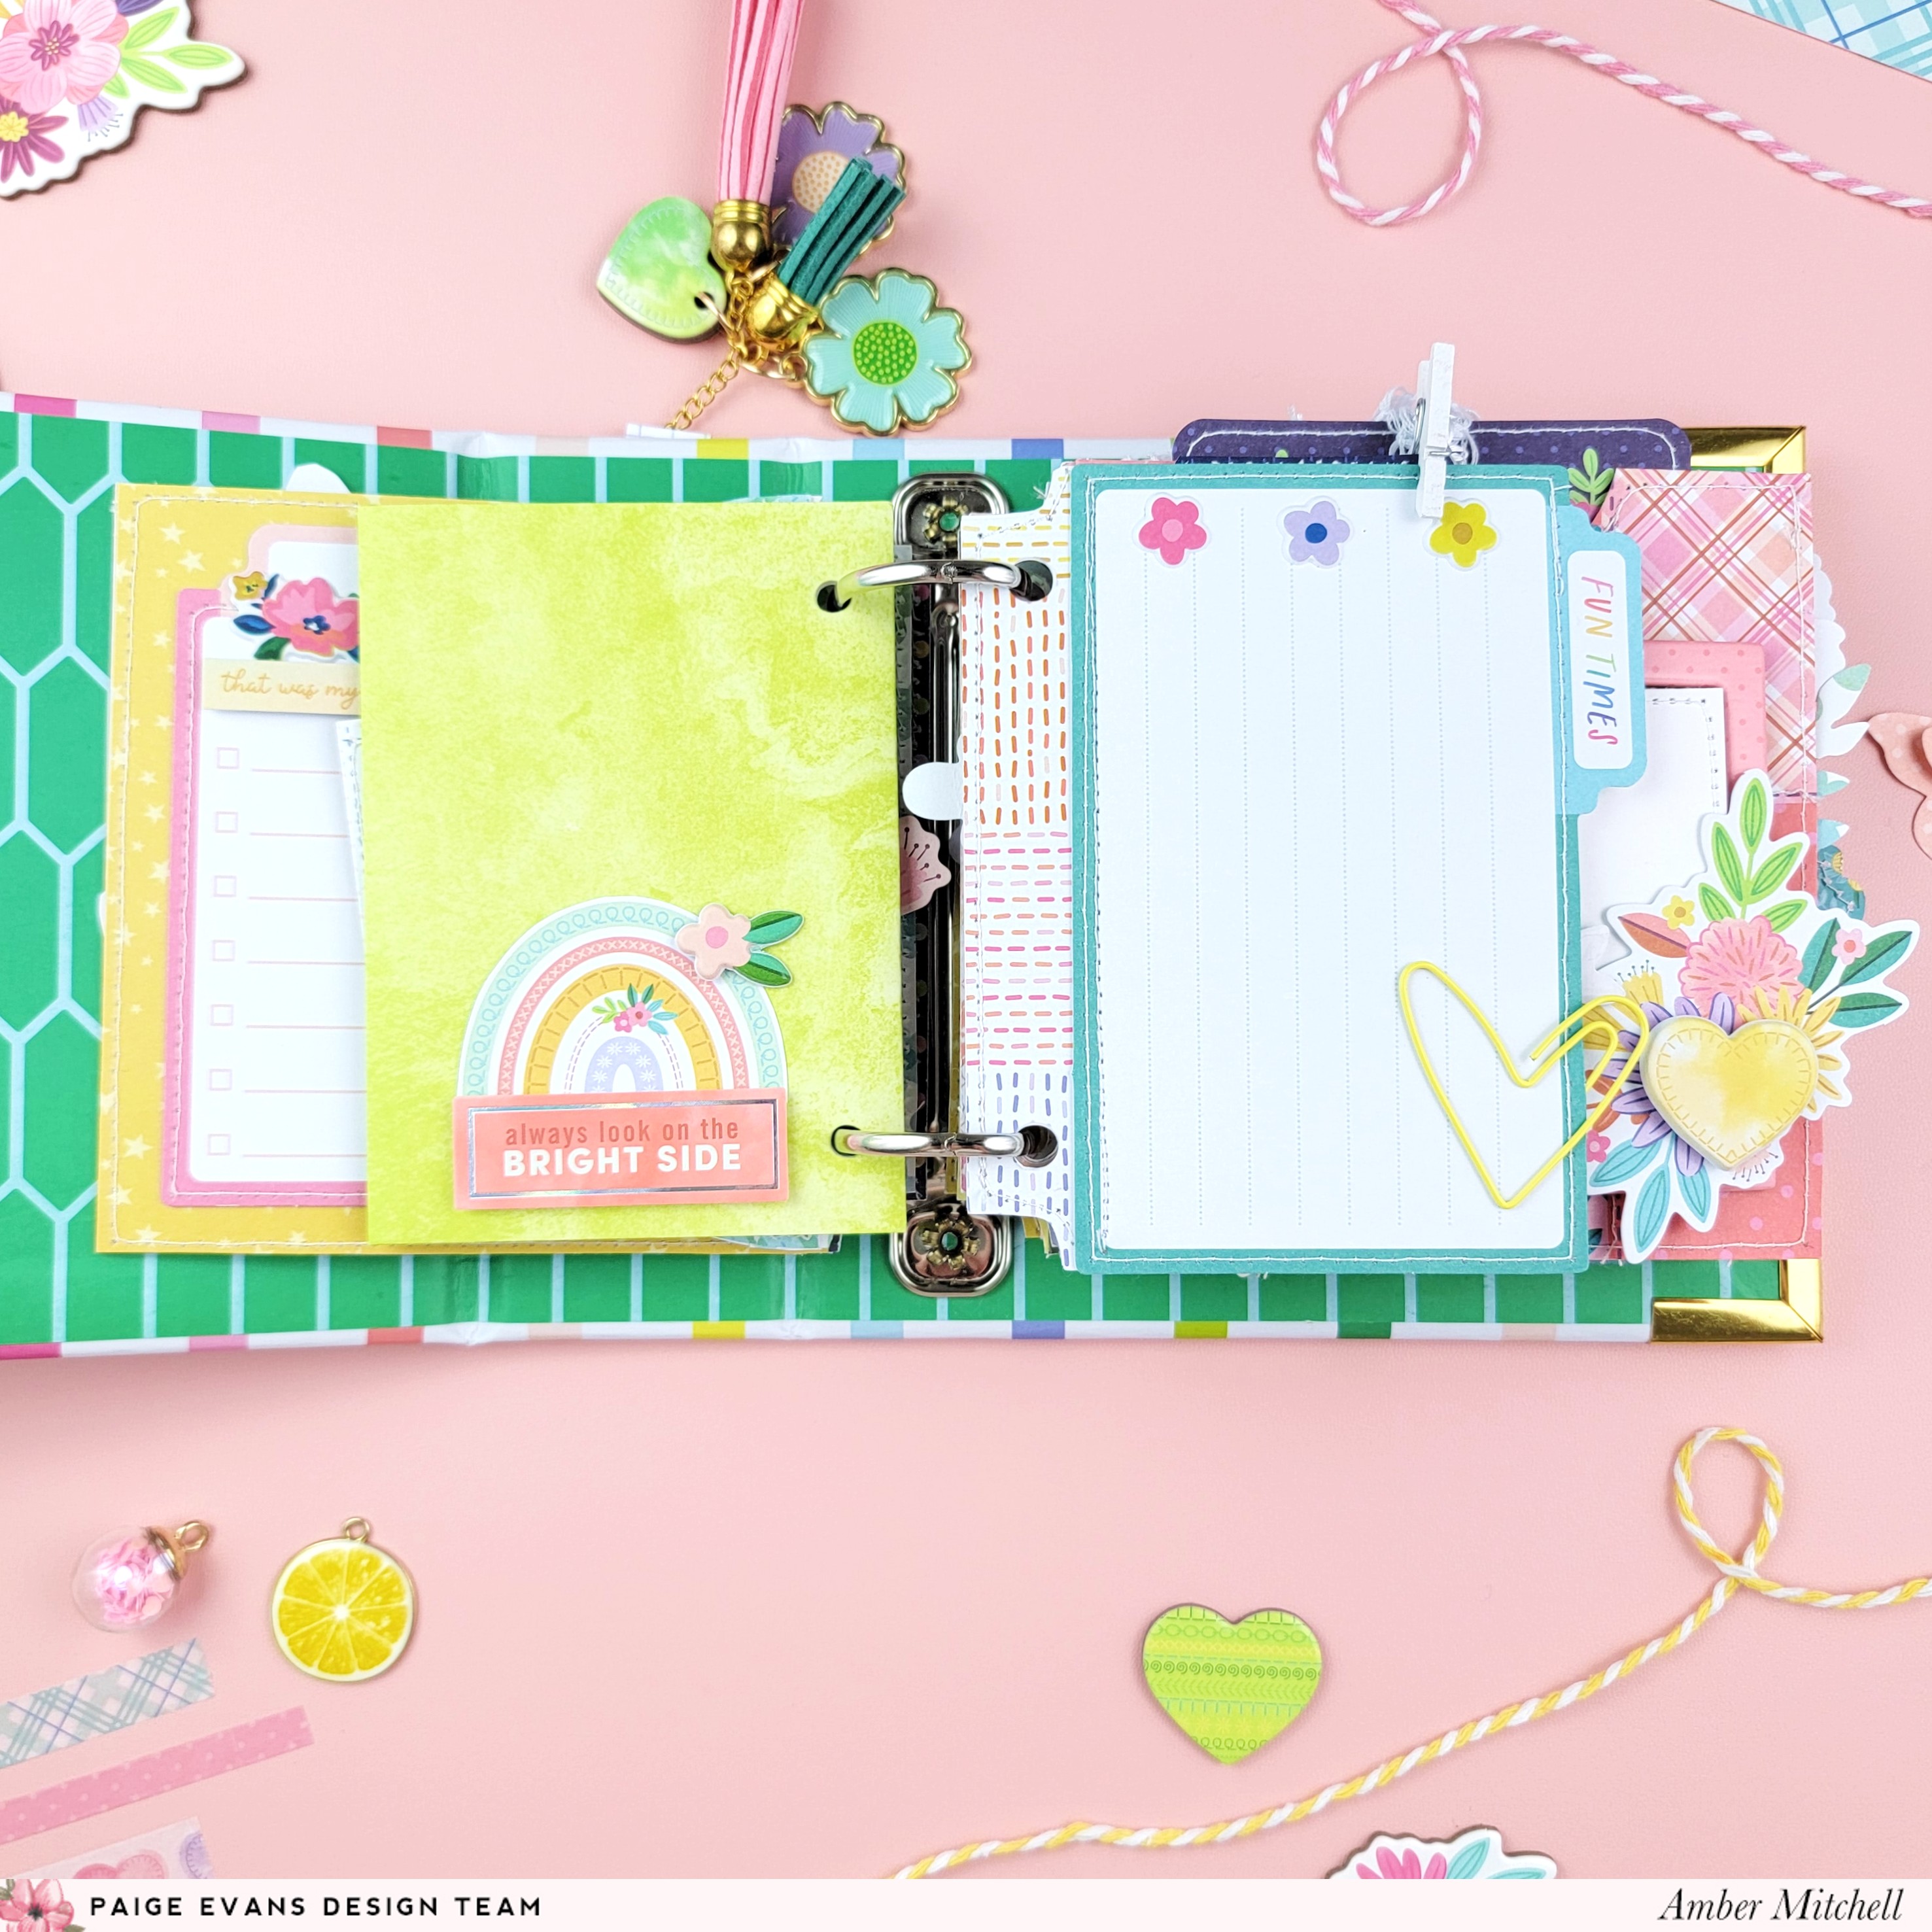
I also created half-circle pages. I did this by cutting two 4.5-inch circles using my Cricut. I then cut those circles in half and attached both halves together using my sewing machine. These might just be my favorite type of page to include in any project since they add a lot of uniqueness and character! I added photo mats to these pages (as well as throughout the album) using cut-aparts from Paper 15.
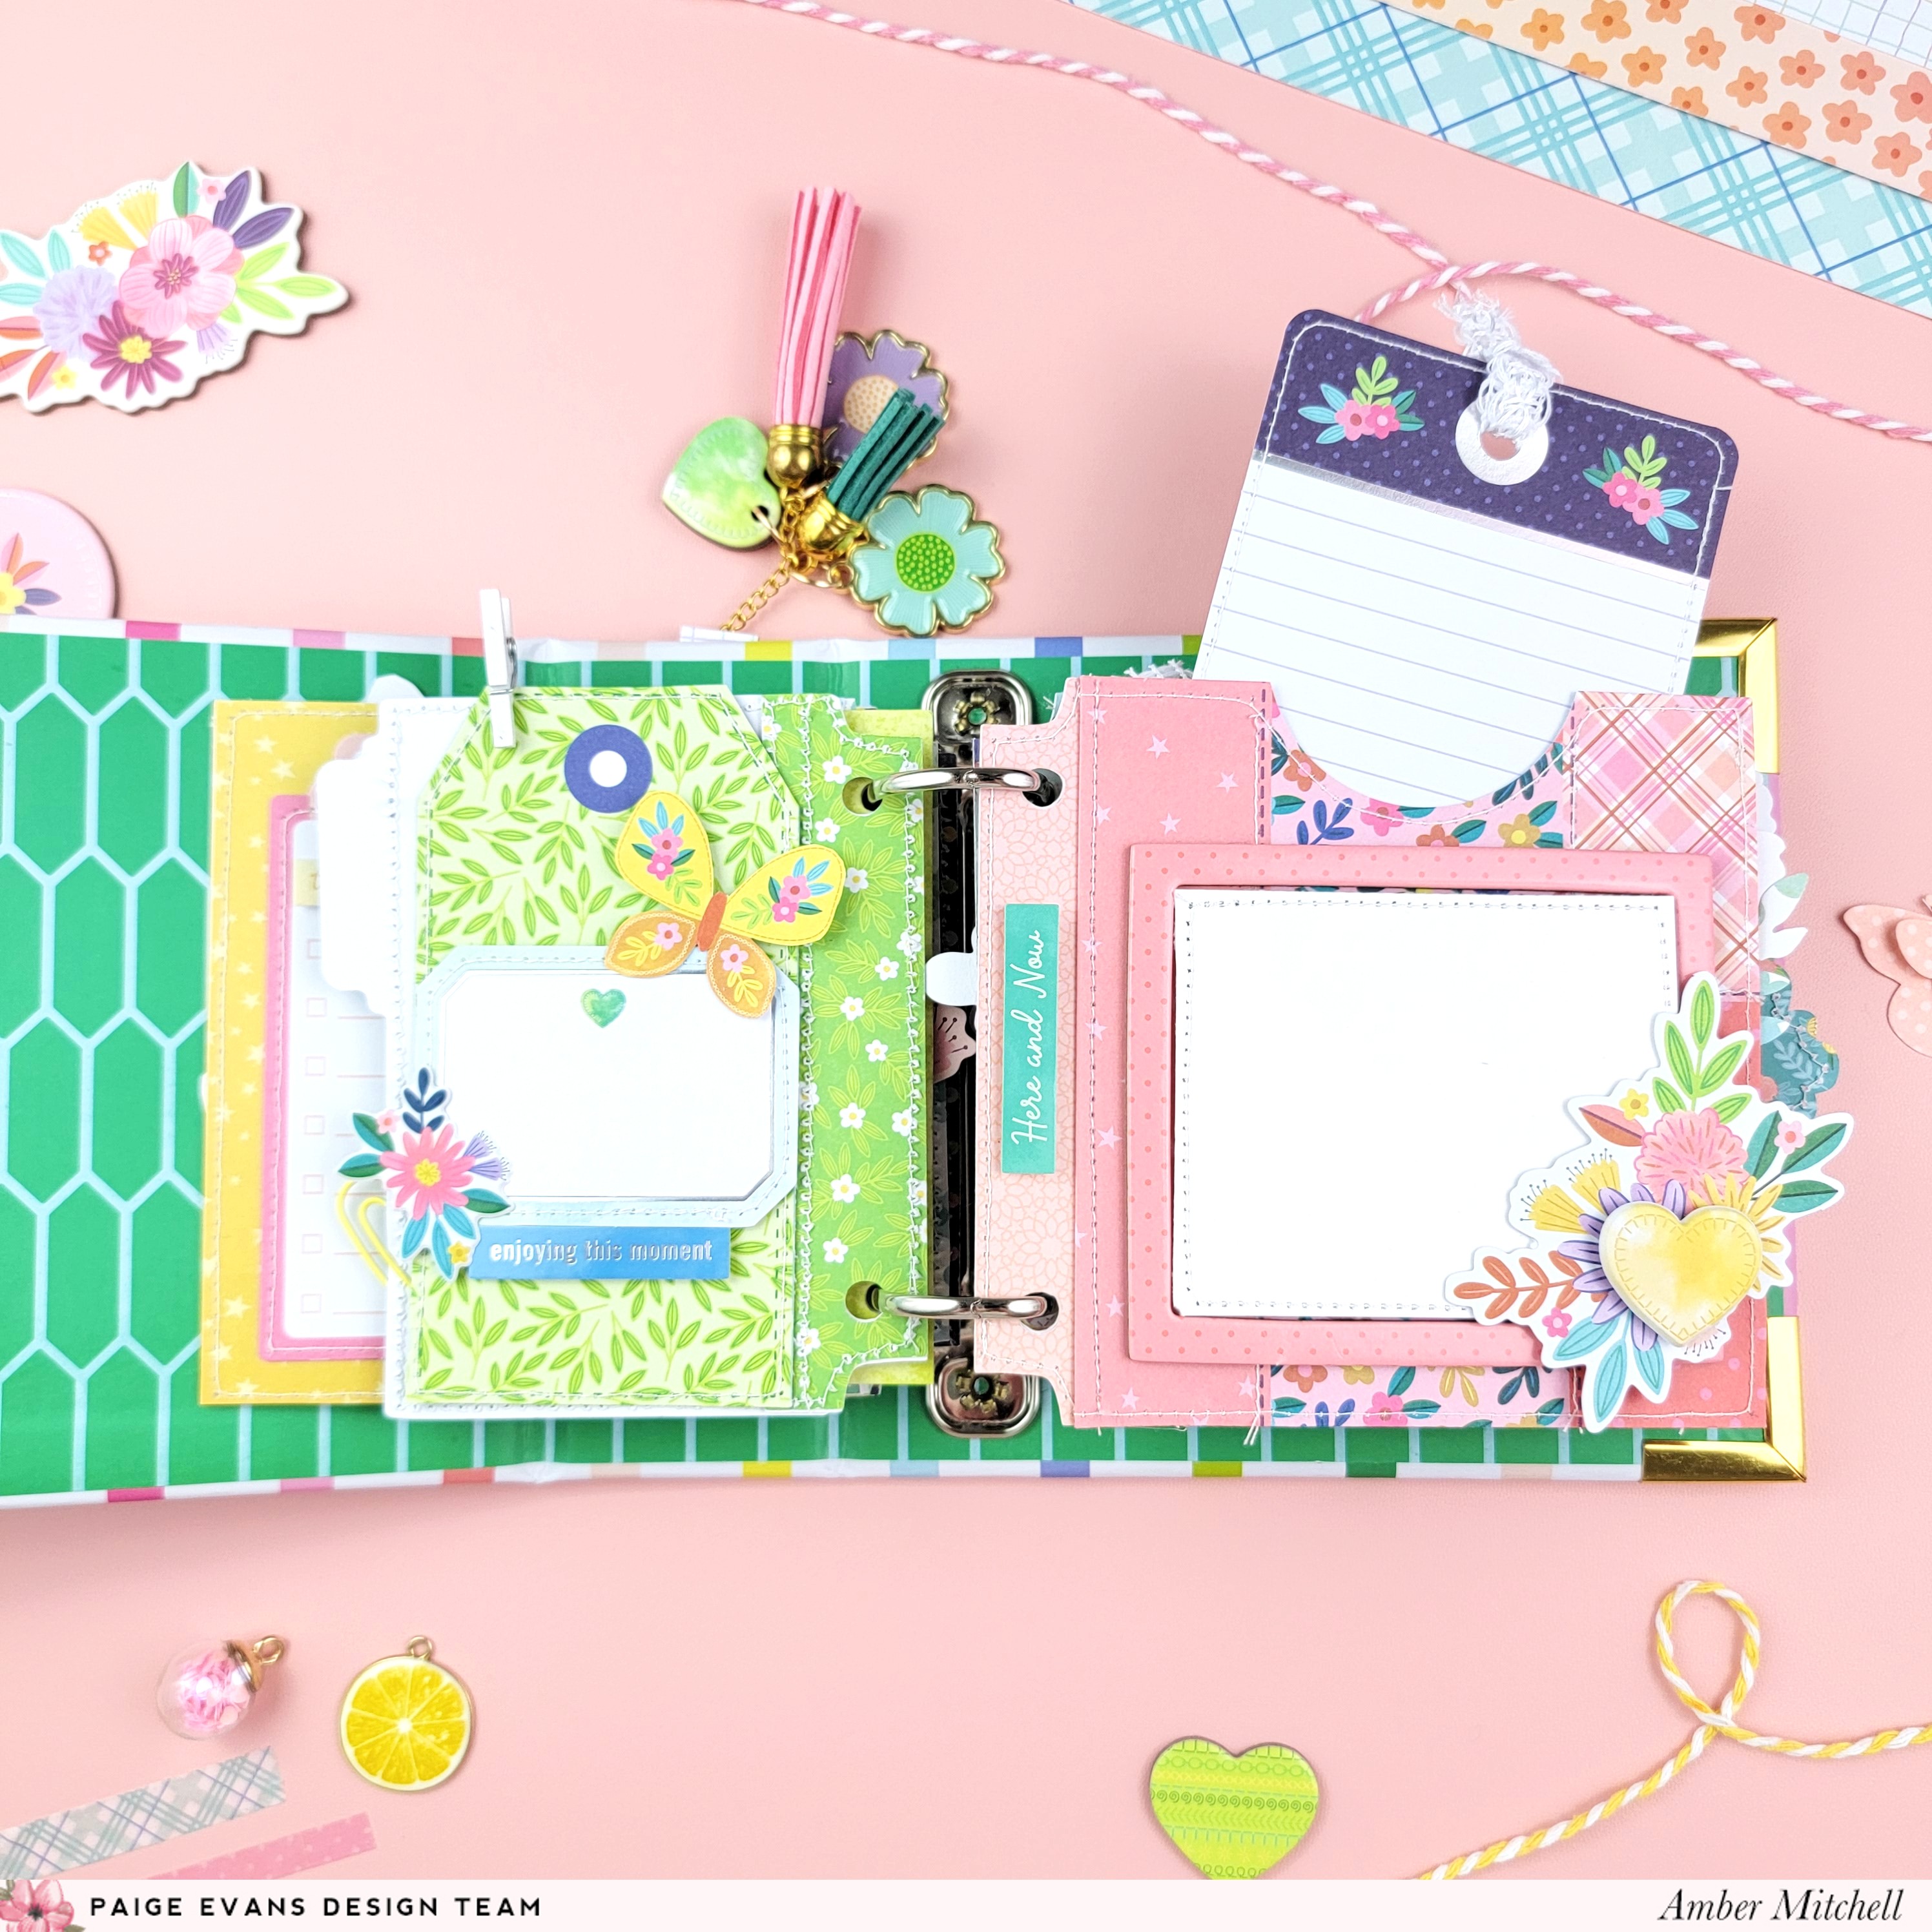
Another fun way to add pages is by using journaling cards! I used a few from the Journaling Spots throughout this album. To the back of one of these pages I added a tag that I created using Paper 9.

Following Paige's class instructions, I also created pages that measured 4.25x4.5 inches. I used this format to create my title page. To make another page, I trimmed down a card from the Boxed Cards. I then layered embellishments around it, including butterflies that I fussy cut from Paper 22.

I turned my other 4.25x4.5 inch page into a pocket so that I could slide another journaling card inside. On the front of this pocket page, I added a photo mat that I outlined using a frame from the Chipboard Frame Stickers. On the back of this pocket page, I added layered flowers that I created using a flower punch. I then added "stems" to these flowers by adding thin strips of green patterned paper underneath them. I added enamel dots to the center of each flower and some leaves that I created using another punch to finish off this page.

To embellish the cover of this album, I used a few flowers I created using Paige's Layered Flowers and Leaves cut file bundle. I created one large one and two smaller ones to use as accent embellishments. I used a sentiment from the Chipboard Stickers to create a title phrase and then finished the cover with pieces I created using various punches (like the monochromatic butterflies and leaves).

To complete this album, I added a mix of various embellishments from the Ephemera Die Cuts, Floral Die Cuts, Puffy Phrase Stickers, Sticker Book, and the Cardstock Stickers to fill in any empty spaces. I also added a fun mix of charms and tassels to the spine. I used a few of the Flower Charms from the Splendid collection here.

Thanks so much for stopping by my post today! I'd definitely recommend creating a 4x4 Mini Album, they're so easy and so much fun to put together. The possibilities are endless and really allow for creativity! I'll see you next time with another fun project!

SUPPLIES: Patterned papers, die cuts, stickers, embellishments: BLOOMING WILD; 4x4 Mini Album; Cut files: Layered Flowers and Leaves and Envelope by Paige Evans

Location: California, USA / Blog: Happy Crafty Studio / Instagram: @bambidearr / YouTube: bambidearr / Pinterest: bambidearr


Post a Comment